background image

Installation and operation  


700221   


15 / 22 

EN 


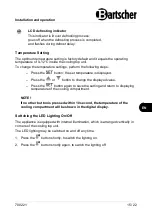
LCD defrosting indicator 

This indicator is lit over defrosting process;  
goes off when the defrosting process is completed,  
and flashes during defrost delay. 


Temperature Setting 

The optimum temperature setting is factory default and it equals the operating 
temperature of 0

–12°C inside the cooling top unit. 

To change the temperature settings, perform the following steps: 

–  Press the 

 button; the set temperature is displayed. 

–  Press the 


or 

 button to change the displayed value. 

–  Press the 

 button again to save the setting and return to displaying 

temperature of the cooling compartment. 


NOTE! 

If no other button is pressed within 10 second, the temperature of the 
cooling compartment will be shown in the digital display. 


Switching the LED Lighting On/Off 

The appliance is equipped with internal illumination, which is arranged vertically in 
corners of the cooling top unit. 

The LED lighting may be switched on and off any time. 

1.  Press the 

 button shortly, to switch the lighting on. 

2.  Press the 

 button shortly again, to switch the lighting off. 


Summary of Contents for 7450 2E

Page 1: ...7450 2E 700221...

Page 2: ...scher GmbH Franz Kleine Str 28 D 33154 Salzkotten Germany Phone 49 5258 971 0 Fax 49 5258 971 120 Technical Support Hotline 49 5258 971 197 www bartscher com Version 1 0 Date of preparation 2022 02 24...

Page 3: ...7 2 3 Declaration of Conformity 7 3 Transport Packaging and Storage 8 3 1 Delivery Check 8 3 2 Packaging 8 3 3 Storage 8 4 Technical Data 9 4 1 Technical Specifications 9 4 2 Functions of the Applian...

Page 4: ...s included in this manual is a prerequisite for safe and proper handling of the appliance Additionally accident prevention occupational health and safety and legal regulations in force in the area the...

Page 5: ...nt Too high a mains voltage or incorrect installation may cause electric shock The appliance may be connected only if data on the rating plate correspond with the mains voltage To avoid short circuit...

Page 6: ...m the socket Remove all sources of ignition in the vicinity ventilate room and contact technical service Avoid coolant getting in contact with eyes as it may cause serious eye damage Never use any fla...

Page 7: ...nd allows for safe operation The appliance may only be used when all connections are executed according to rules of law in force The appliance may only be used when it is clean Use only original spare...

Page 8: ...eration in maximum ambient temperature of 32 C and relative humidity of 65 1 4 Unintended Use An unintended use may lead to personal injuries or property damages caused by hazardous voltage fire or hi...

Page 9: ...spare parts We reserve the right to introduce technical modifications to the product intended for improvement of the appliance and its performance The warranty period for this appliance is 24 months c...

Page 10: ...used to store the appliance when relocating or when shipping the appliance to our service point in the case of any damages The packaging and its elements are made of recyclable materials Particularly...

Page 11: ...t amount in kg R290 0 056 kg Climate class 4 Energy efficiency class C Energy consumption in kWh year 2174 31 Number of sliding doors 2 Number of shelves 2 Shelves dimensions W x D in mm 745 x 335 Dis...

Page 12: ...ing double glazing Safety glass Type of shelves grille Height adjustable shelves Indicator light ON OFF Insulation cyclopentane C5H10 More information on the appliance is available in our website www...

Page 13: ...egulator 3 Control elements cover 4 ON OFF switch with integrated power indicator light green 5 Ventilation openings 6 Ventilation openings 7 Fan 8 Side glass pane 2 pcs 9 Front glass pane 10 Feet 4 p...

Page 14: ...th sufficient bearing capacity resistant to water dry and resistant to high temperatures sufficiently large and thus enabling usage of the appliance with no problems easily accessible well ventilated...

Page 15: ...er cord should be laid in a way preventing anyone from threading on it or tripping against it Prior to first use the appliance should be installed and left standing upright for at least 2 hours before...

Page 16: ...M ake sure no water enters electric install ati on and connection box N ast pni e dok adni e osuszy urz dzenie i elementy wyposa enia Setzen Sie di e Boden Abdeckung in das Becken ei n The cover acts...

Page 17: ...t temperature is displayed Press the or button to change the displayed value Press the button again to save the setting and return to displaying temperature of the cooling compartment NOTE If no other...

Page 18: ...he display shows a fault message 1 Press the button and hold it pressed for 2 seconds until the buzzer sounds 2 Press the button and hold it pressed for 6 seconds until the buzzer sounds again The dig...

Page 19: ...an water and dry thoroughly with soft cloth 6 Wash the bottom baseplate area thoroughly using warm water and a soft cloth Use mild cleaning agent if required Wipe the cleaned surfaces with a cloth moi...

Page 20: ...rces in immediate vicinity Move the Cooling top unit from the heat source Poor air circulation around the Cooling top unit Keep sufficient clearance from walls or other objects The sliding doors are n...

Page 21: ...unit and other objects is sufficient The compressor does not switch off automatically The Cooling top unit is overfilled Remove the excess of food products from the Cooling top unit Sliding doors hav...

Page 22: ...2019 2024 are available for at least eight years counted from the date of introduction of the last appliance of this model to market 8 Disposal Electrical Appliance Electric appliances are marked wit...

Reviews: