background image


- 34 - 

6. Cleaning and maintenance 

6.1 Safety advice 


o

  Before beginning with repair or cleaning works make sure the device has been 

disconnected from power supply and has cooled down. 

o

  Do not use any acid agents and make sure no water ingresses the device. 

o

  To protect yourself from electric shock, never immerse the device, its cables and 

the plug in water or other liquids.  

 CAUTION! 

The device is not suited for direct washing via water jets. 
Therefore, you must not use any kind of pressure water jet for cleaning the device!


6.2 Cleaning 


o

  Always clean the device after use. 

o

  Disassemble the accessories and other parts used. 

o

  Be very careful when disassembling and cleaning discs and knives as they are very 

sharp. Danger of injury! 

o

  For easier cleaning of the bowl with knife, remove it from the base by turning it 

counterclockwise.  

o

  Clean individual elements in warm water with a mild cleaning agent, using a soft 

cloth, sponge or brush for washing up. Next, rinse in clean water and leave to dry or 
dry thoroughly with a cloth. Later, reassemble any accessories as desired.  

o

  All of the device's removable parts are dishwasher-safe.  

 CAUTION! 

Never immerse the motor housing in water or other liquids, nor place under 
running water or in the dishwasher.  


o

  Wipe the motor housing and power cable with a soft, moist cloth. Ensure that water 

does not get inside the cable or motor housing. Dry the device thoroughly. 

o

  Use only soft cloths for cleaning, never use any aggressive cleaning substances 

that could damage the device and its accessories. 

o

  After cleaning, wipe and polish the surface with a dry cloth. 

Summary of Contents for FP 1000

Page 1: ...FP 1000 150148 V2 0714 ...

Page 2: ... use of the device 22 2 3 Intended use 23 3 Transport packaging and storage 24 3 1 Delivery check 24 3 2 Packaging 24 3 3 Storage 24 4 Technical data 25 4 1 Technical specification 25 4 2 Overview of parts 26 5 Installation and operation 27 5 1 Safety instructions 27 5 2 Installation and connection 28 5 3 Operation 29 6 Cleaning and maintenance 34 6 1 Safety advice 34 6 2 Cleaning 34 6 3 Safety in...

Page 3: ... servicing maintenance or cleaning 1 2 Key to symbols In this manual symbols are used to highlight important safety instructions and any advice relating to the device The instructions should be followed very carefully to avoid any risk of accident personal injury or material damage WARNING This symbol highlights hazards which could lead to injury Please follow the instructions very carefully and p...

Page 4: ...on of advice concerning operation and cleaning use other than designed alterations made by user use of inadequate spare parts We reserve the right to make technical changes for purposes of developing and improving the useful properties 1 4 Copyright protection The instruction manual including any texts drawings images or other illustrations is copyright No part of this publication may be reproduce...

Page 5: ...y approved by the manufacturer may be undertaken This device may only be operated in technically proper and safe condition 2 2 Safety instructions for use of the device The specifications regarding the industrial safety are based on the Regulations of the European Union applicable at the time of manufacturing the device The user is obliged to ensure that the said industrial safety measures concur ...

Page 6: ...ified customer service only The device is intended for home use or in similar places such as in kitchens for store or office employees or in other service locations in suburban properties by guests of hotels motels and other places of accommodation in Bed Breakfasts The device is not suitable for continuous commercial use The food processor is designed for mixing making milkshakes preparing purée ...

Page 7: ...r The outer and inner packing material should be removed completely from the device before installation NOTE If you liked to dispose the packing consider the regulations applicable in your country Supply re usable packing materials to the recycling Please inspect the device upon completeness In case any part is missing please contact our customer service center immediately 3 3 Storage Keep the pac...

Page 8: ...s W 230 x D 250 x H 435 mm Mixing cup capacity 1 6 liters Mixing bowl capacity 2 0 liters Weight 6 35 kg Accessories 1 stainless steel blade for pureeing and chopping 1 plastic blade for pureeing cooked food 1 cutting disc for slicing with 2 slicing thicknesses 2 mm and 3 mm 1 cutting disc for grating with grating thickness of 0 3 mm 1 cutting disc with two grating thicknesses of 1 mm and 3 5 mm W...

Page 9: ... 26 4 2 Overview of parts ...

Page 10: ... a properly installed single socket with protective contact Never remove the power cable by pulling the cable itself always grab the plug housing Never allow the power cable to come into contact with heat sources or sharp edges The power cable should not hang over the side of the working surface Ensure that no one can step on or trip over the cable The power cable must not be folded bent or tangle...

Page 11: ... motor turns off Overheating prevention This function is automatically activated when the device overheats from being used for too long or from being overloaded The device turns off automatically then comes back on after around 15 minutes 5 2 Installation and connection Unpack the device and remove all packing material Put the device in a safe place which can support its weight and maintain stabil...

Page 12: ...ed food the cutting discs for cutting grating and chopping fruit and vegetables Place the blade adapter upright inside the mixing bowl on the blade lock Install the appropriate blade for the type of foodstuff to be processed and manner of processing Install the desired blade on the adapter When a cutting disc is to be used first install the appropriate blade handle then place the cutting blade on ...

Page 13: ...se fingers or kitchen utensils to push fruits and vegetables into the processor Always use the pusher CAUTION Never leave the device to operate without food inside even if it is properly assembled Operating time ATTENTION The device can not be operated continuously for longer than 1 minute After this time the device should be given a 3 minute break A maximum of 5 cycles in a row can be performed a...

Page 14: ...then attach and lock the mixing cup lid to the blender mixing cup and begin processing the selected products Add products by placing them into the feed chute and pressing them with the pusher Avoid using excessive force For soft products select level 1 while for harder ones select level 2 Cutting disc for grating max 1 minute Place one of the included cutting discs for grating depending on the pro...

Page 15: ...ce the lid on the mixing cup and secure it by turning CAUTION Before using the device ensure the mixing cup is closed using the lid Connect the device to a single grounded outlet Use the speed dial to select the desired speed Level 1 for low speed Level 2 for high speed Pulse turn the speed dial left is used when food is to be processed for a short time only The position marked O is for disconnect...

Page 16: ...ns operating unevenly disconnect the device immediately by removing the plug from its socket and some of the food from the mixing cup Begin mixing again WARNING Danger of injury Never place hands or other objects inside the mixing cup when in operation Do not use any objects to help push food products into the device as they can get caught in the disc or knife and cause damage to the device and in...

Page 17: ...y are very sharp Danger of injury o For easier cleaning of the bowl with knife remove it from the base by turning it counterclockwise o Clean individual elements in warm water with a mild cleaning agent using a soft cloth sponge or brush for washing up Next rinse in clean water and leave to dry or dry thoroughly with a cloth Later reassemble any accessories as desired o All of the device s removab...

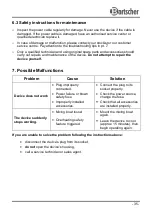
Page 18: ... Do not attempt to repair the device yourself 7 Possible Malfunctions Problem Cause Solution Device does not work Plug improperly connected Power failure or blown safety fuse Improperly installed accessories Connect the plug to its socket properly Check the power source change the fuse Check that all accessories are installed properly The device suddenly stops working Mixing bowl loose Overheating...

Page 19: ...sposal service in your community WARNING To exclude any abuse and the dangers involved make the waste device unfit for use before disposal For that purpose disconnect device from mains supply and remove mains connection cable from the device NOTE For the disposal of the device please consider and act according to the national and local rules and regulations Bartscher GmbH Franz Kleine Str 28 D 331...

Reviews: