background image

Pag. 

45

/

76 

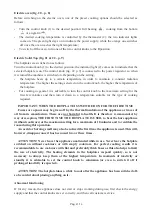
Electric oven (fig. 20 

 p. 8)


Before  switching  on  the  electric  oven,  one  of  the  preset  cooking  options  should  be  selected  as 
follows: 

-


Turn the control knob (1) to the desired position: full heating      ,  cooking from the bottom                 

        or au gratin       ; 

-


The  desired  cooking  temperature  is  controlled  by  the  thermostat  (2);  the  two  indicator  lights 

come on. The green light stays on to indicate the power supply, while the orange one switches 
off once the oven reaches the right temperature; 

-


To switch off the oven, turn one of the two control knobs to the 

position 

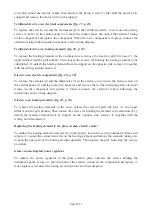
Electric Solid Top (fig. 21 & 22 

 p. 9) 

The hotplates are switched on as follows: 
Turn the control knob (1) to the desired position; the indicator light (2) comes on to indicate that the 
selected hotplate is on. The control knob (fig. 22 p. 9) is connected to the power regulator, so when 
it is turned the machine is switched on. Depending on the setting, 

-


 the  hotplate  heats  up  to  a  certain  temperature  in  order  to  maintain  a  constant  radiation 

temperature. The higher the setting selected on the control knob, the higher the temperature of 
the hotplate.  

-


For cooking in general it is advisable to turn the control knob to the maximum setting for the 

first  few  minutes  and  then  turn  it  down  to  a  temperature  suitable  for  the  type  of  cooking 
required. 


IMPORTANT: WHEN THE HOTPLATE IS SWITCHED ON FOR THE FIRST TIME 
Fumes or vapours may be given off by the thermal insulation of the appliance or traces of 

oil from its  manufacture. These are  not harmful to health. It is therefore recommended, by 
way of exception, THE FIRST TIME THE HOTPLATE IS USED, to heat the bare appliance 
(without cookware) at the maximum setting for a maximum of 10 minutes and to ventilate the 
room during this operation. 

An acrid or burning smell may also be noticed the first time the appliance is used. This will, 

however, disappear once it has been used two or three times. 
 

ATTENTION! Never leave the appliance unattended while in use. Never leave the hotplate 

switched  on  without  cookware  or  with  empty  cookware.  For  perfect  cooking  results  it  is 
recommendable to use cookware with flat and preferably thick bases as this also helps to limit 
the  use  of  electricity.  The  heating  elements  in  the  hotplates  respond  quickly,  so  is  not 
necessary  to  always  keep  them  at  the  highest  temperature.  In  moments  of  inactivity  or 
standby  it  is  advisable  to  set  the  control  knob  to  minimum  (or  even  to  switch  it  off  if 
prolonged inactivity is expected). 

 
ATTENTION! The hotplate takes a while to cool after the appliance has been switched off, 

so be careful about placing anything on it. 

Abnormal functioning 

If for any reason, the appliance does not start or stops working during use, first check the energy 
supply and that the control knobs are set correctly, and then call customer service. 

Summary of Contents for K7ECU05TT

Page 1: ...gerstrasse 60 CH 6403 K ssnacht am Rigi Tel 041 785 50 00 Fax 041 785 50 05 info bartscher ch www bartscher ch Bedienungsanleitung Mode d emploi 287 410 K7EVC05VV 287 420 K7EVC10VV 287 430 K7EVC10FV 2...

Page 2: ...Pag 1 76 CUCINE ELETTRICHE CUCINE ELETTRICHE IN VETROCERAMICA TUTTAPIASTRA ELETTRICO SERIE 70 INSTALLAZIONE USO E MANUTENZIONE...

Page 3: ...pace dimensions Raumbedarfsma e espacio m ximo necesario E elettrico lectrique electric elektrisch el ctrico Fig Abb 2 Dimensioni Dimensions Floor space dimensions Raumbedarfsma e espacio m ximo neces...

Page 4: ...Floor space dimensions Raumbedarfsma e espacio m ximo necesario E elettrico lectrique electric elektrisch el ctrico Fig Abb 4 Dimensioni Dimensions Floor space dimensions Raumbedarfsma e espacio m xi...

Page 5: ...sioni Dimensions Floor space dimensions Raumbedarfsma e espacio m ximo necesario 2 3 2 3 2 3 2 3 2 3 2 3 E elettrico lectrique electric elektrisch el ctrico Fig Abb 6 Dimensioni Dimensions Floor space...

Page 6: ...g Abb 7 Dimensioni Dimensions Floor space dimensions Raumbedarfsma e espacio m ximo necesario E elettrico lectrique electric elektrisch Fig Abb 8 Dimensioni Dimensions Floor space dimensions Raumbedar...

Page 7: ...mensioni Dimensions Floor space dimensions Raumbedarfsma e espacio m ximo necesario 2 25 2 25 2 25 2 25 E elettrico lectrique electric elektrisch el ctrico Fig Abb 10 Dimensioni Dimensions Floor space...

Page 8: ...o Fig Abb 12 targhetta caratteristiche macchine elettriche Plaque d identification des appareils lectriques data plate electric appliances Typenschild Elektro Ger te Tabla de caracter sticas cocinas e...

Page 9: ...tungen Elektroplatten Instrucciones de uso Placas el ctricas Fig Abb 19 Istruzioni uso Forno elettrico ventilato Instructions d utilisation Four lectrique ventil Instruction for use Electric ventilate...

Page 10: ...Elektrobackofen mit Umluft Conexi n el ctrica para horno ventilado Fig Abb 24 Allacciamento elettrico per forno elettrico Branchement lectrique pour four lectrique ventil Electric feeding for electri...

Page 11: ...Austausch der elektrischen Widerst nde des Elektrobackofens mit Umluft Sustituci n de las resistencias el ctricas del horno ventilado Fig Abb 29 Sostituzione componenti elettrici di comando del forno...

Page 12: ...x700x845 10 4 400 3N 50 60 5x4 4 K7ECU15VVQ Cucina elettrica 6 piastre quadre su Mobile 1200x700x845 15 6 400 3N 50 60 5x6 6 K7ECU05PPQ Cucina elettrica 2 piastre quadre su Mobile con portina 400x700x...

Page 13: ...i originali in caso contrario non viene assunta alcuna responsabilit L apparecchiatura non pu essere lavata con getti d acqua diretti ad alta pressione e non devono essere ostruite le aperture o ferit...

Page 14: ...azione in altezza nella versione su mobile Il rivestimento esterno di acciaio inossidabile al Cromo Nichel 18 10 Ogni piastra del piano dotata di un commutatore che permette di variare la potenza dal...

Page 15: ...su mobile Il rivestimento esterno di acciaio inossidabile al Cromo Nichel AISI 304 La piastra in vetroceramica di spessore adeguato a trasmettere il calore ed in essa sono evidenziate le zone dedicat...

Page 16: ...titi secondo le normative vigenti nel Paese di destinazione dell apparecchio in particolare per quel che riguarda il sacco nylon ed il polistirolo Dopo aver verificato l integrit si pu procedere a tog...

Page 17: ...mento Il problema si risolve con un breve riscaldamento a secco by passando l interruttore di sicurezza ATTENZIONE Tutte la parti protette e sigillate dal costruttore non possono essere regolate dall...

Page 18: ...scelta la zona accesa diventer rossa sul piano in vetroceramica Questa manopola fig 22 pag 8 associata al regolatore di energia ruotandola si accende la macchina In funzione della posizione la piastra...

Page 19: ...ig 20 pag 8 Prima di accendere il forno elettrico si deve selezionare il tipo di cottura prescelto procedendo nel modo seguente ruotare la manopola 1 nella posizione desiderata riscaldamento totale co...

Page 20: ...preferibilmente molto spesso in questo modo si riesce anche a contenere il consumo di energia elettrica Dal momento che le resistenze poste a riscaldamento del piano funzionano rapidamente non necessa...

Page 21: ...aceto condimenti mix di spezie condimenti sale da cucina concentrato dal momento che si potrebbero generare condizioni chimico fisiche che portano a distruggere la passivazione dell acciaio si consigl...

Page 22: ...girante del forno elettrico ventilato bisogna allentare le viti di fissaggio 1 della griglia di protezione 2 rimuoverla poi svitare il dado 3 di bloccaggio della ventola 4 ed estrarla Quindi sostitui...

Page 23: ...ella piastra vetrocetramica Per sostituire il regolatore di energia della resistenza vetroceramica necessario svitare le viti di fissaggio del cruscotto spostarlo quindi scollegare i cablaggi elettric...

Page 24: ...Pag 23 76 CUISINI RES LECTRIQUES FOURNEAUX LECTRIQUES VITROC RAMIQUE PLAQUE COUP DE FEU LECTRIQUE S RIE 70 INSTALLATION UTILISATION ET ENTRETIEN...

Page 25: ...4 K7ECU15VVQ Cuisini re 6 plaques carr es sur meuble 1200x700x845 15 6 400 3N 50 60 5x6 6 K7ECU05PPQ Cuisini re 2 plaques carr es sur meuble avec porte 400x700x845 5 2 400 3N 50 60 5x1 5 2 K7ECU10PPQ...

Page 26: ...nature que ce soit cesser toute utilisation et s adresser un centre d assistance technique agr Seules les pi ces d tach es d origine doivent tre utilis es La responsabilit du fabricant ne saurait tre...

Page 27: ...entionn es et demande que l installation soit effectu e dans le respect des normes en vigueur et notamment des normes relatives au syst me d vacuation des fum es et de renouvellement d air DESCRIPTION...

Page 28: ...ramique r sistant aux hautes temp ratures Le four est dot d un thermostat permettant le r glage de la temp rature de 90 C 300 C et d un s lecteur permettant de s lectionner le type de cuisson haut ba...

Page 29: ...et d eau chaude sanitaire Articles GC Installation d appareils de cuisson destin s la restauration Prescriptions particuli res chaque type d tablissement recevant du public h pitaux magasins etc Pour...

Page 30: ...ristiques techniques pag 24 L appareil doit en outre tre raccord au syst me QUIPOTENTIEL La borne de branchement se trouve proximit du point d entr e du c ble d alimentation Elle est reconnaissable l...

Page 31: ...tes quantit s 3 Cuisson de grandes quantit s 4 Cuisson temp rature moyenne 5 Cuisson haute temp rature 6 D but de cuisson ATTENTION Veiller contr ler constamment l appareil durant son fonctionnement N...

Page 32: ...oins doivent s allumer le t moin vert reste allum pour indiquer que le four est allum et le t moin orange s teint d s que la temp rature programm e est atteinte pour teindre le four ramener une des de...

Page 33: ...endant une dur e qui ne devra pas exc der 10 minutes la temp rature maximale et d a rer la pi ce pendant cette premi re utilisation Au cours de la premi re p riode de fonctionnement une odeur cre ou d...

Page 34: ...autre toile abrasive Pour liminer les incrustations il est possible d utiliser de la poudre de pierre ponce mais il est toutefois pr f rable d utiliser une ponge abrasive synth tique ou de la laine d...

Page 35: ...conseillons d utiliser des casseroles et ou des plats en terre cuite ayant un fond rugueux car cela risquerait d endommager le verre Pour le nettoyage veillez ne pas utiliser d objet pointu et effil...

Page 36: ...pag 10 Pour changer les r sistances du four ventil il est n cessaire d extraire la grille la sole 1 la plaque de diffusion sup rieure et les supports de grille Il faut ensuite d visser les vis de fixa...

Page 37: ...ur liminer votre ancien appareil utilisez les syst mes de collecte diff renci qui vous sont propos s dans chaque pays ou contactez votre d taillant quand vous achetez un quipement quivalent afin de re...

Page 38: ...Pag 37 76 ELECTRIC COOKERS GLASS CERAMIC ELECTRIC COOKERS ELECTRIC SOLID TOP SERIES 70 INSTALLATION USE AND MAINTENANCE...

Page 39: ...Top electric range 4 square plates on open cabinet 800x700x845 10 4 400 3N 50 60 5x2 5 4 K7ECU15VVQ Top electric range 6 square plates on open cabinet 1200x700x845 15 6 400 3N 50 60 5x4 6 K7ECU05PPQ T...

Page 40: ...appliance must not be washed with high pressure water sprays and the vents or inlets outlets for air fumes and heat must not be obstructed Before connecting the device make sure that the plate specifi...

Page 41: ...st iron with the heating element fixed beneath it embedded in a layer of insulating material 2 1 GN static electric oven The bottom is made of cast iron and reinforced by a series of ridges on both th...

Page 42: ...ith the cooking areas clearly indicated The heat intensity is controlled by a thermostat that varies the temperature of the special infrared heating elements under the hotplate Neutral cabinet For the...

Page 43: ...shown in the electrical diagram where voltage conversion is provided for Depending on the version the terminal boards are situated either behind the top control panel or behind the oven control panel...

Page 44: ...appliances fine adjustment of the joint can then be made with the grub screw 7 located on the joining strip This should be tightened well with an Allen key 8 as shown in fig 16 on page 8 Once the join...

Page 45: ...intervenes at a set temperature ATTENTION Never leave the appliance unattended while in use Never leave the glass ceramic cooker switched on without cookware or with empty cookware If the ceramic glas...

Page 46: ...ANT WHEN THE HOTPLATE IS SWITCHED ON FOR THE FIRST TIME Fumes or vapours may be given off by the thermal insulation of the appliance or traces of oil from its manufacture These are not harmful to heal...

Page 47: ...steel wool used in the direction of the glazed finish would be preferable After washing dry the appliance with a soft cloth When cleaning abrasive powders of any type chlorine based detergents and bl...

Page 48: ...with a cloth soaked in Vaseline oil to provide it with a protective film and ventilate the room from time to time Maintenance ATTENTION Before performing any kind of maintenance or repairs make sure...

Page 49: ...loosen the fixing screws on the control panel 1 and the protective hood 2 and remove them Then disconnect the electrical wiring on the component and replace it Then reconnect the electrical wiring fol...

Page 50: ...t product By actively using the provided collection systems you are contributing to the reuse recycling and enhancement of electrical or electronic devices and protecting the environment and health Ab...

Page 51: ...Pag 50 76 ELEKTROHERDE ELEKTROHERDE AUS GLASKERAMIK ELEKTRO GL HPLATTENHERD SERIE 70 INSTALLATION BEDIENUNG UND WARTUNG...

Page 52: ...3N 50 60 5x2 5 4 K7ECU15VVQ Elektroherd 6 quadratische Platten auf Unterschrank 1200x700x845 15 6 400 3N 50 60 5x4 6 K7ECU05PPQ Elektroherd 2 quadratische Platten auf Unterschrank mit T ren 400x700x84...

Page 53: ...tem Betrieb ist das Ger t auszuschalten und eine autorisierte Kundendienststelle zu Rate zu ziehen Es d rfen ausschlie lich Originalersatzteile verwendet werden andernfalls wird keinerlei Haftung bern...

Page 54: ...stallation insbesondere hinsichtlich der Rauchableitung und des Luftaustauschs nur unter Einhaltung der geltenden Vorschriften durchgef hrt werden darf BESCHREIBUNG DER GER TE Elektrisches Kochfeld Ro...

Page 55: ...erst nde die unter dem Boden und oberhalb des Verteilerblechs an der Oberseite angebracht sind Elektrisches Glaskeramik Kochfeld Robuste Edelstahlstruktur auf vier Stellf en die bei der Version als M...

Page 56: ...die Verpackung verwendeten Materiale entsprechen den g ltigen Umweltschutz Normen Sie k nnen gefahrlos aufbewahrt oder gem der g ltigen Richtlinien des Bestimmungslandes des Ger tes insbesondere sofe...

Page 57: ...hrend der Inbetriebnahme ausgel st werden Die Ursache ist auf die angesammelte Feuchtigkeit zur ckzuf hren Das Problem ist durch eine kurze Erhitzung ohne Sicherheitsschalter l sbar ACHTUNG S mtliche...

Page 58: ...Seite 9 Zum Einschalten der Platte wie folgt vorgehen Den Drehschalter 1 auf die gew nschte Position drehen die Kontrollampe 2 leuchtet auf um das Einschalten der gew hlten Platte anzuzeigen die eing...

Page 59: ...em Einschalten des Elektrobackofens ist die vorgew hlte Garart einzustellen dabei wie folgt vorgehen den Drehschalter 1 auf die gew nschte Position stellen Ober und Unterhitze nur Unterhitze nur Oberh...

Page 60: ...oder drei weiteren Benutzungen des Backofens nicht mehr zu vernehmen ist ACHTUNG Das Ger t nur unter Beaufsichtigung benutzen Die Platten niemals ohne Kochgeschirr in Betrieb nehmen Um ein optimales G...

Page 61: ...Roststellen entstehen k nnten Die Edelstahlteile nicht mit eisenhaltigen Elementen in Kontakt bringen Ebenso wird von der Verwendung von Glaspapier oder Schmirgelpapier abgeraten Nur bei starken Schm...

Page 62: ...bkratzen und mit cremigem Reinigungsmittel und einem feuchten Tuch reinigen Wenn die mit Verkrustungen beschmutzte Kochzone abk hlt k nnte die Glaskeramik besch digt werden Es wird davon abgeraten T p...

Page 63: ...Komponenten ausgetauscht Nach erfolgtem Austausch m ssen die Kabel gem dem Schaltplan wieder angeschlossen werden Widerst nde des Elektrobackofens mit Umluft Abb 28 S 10 Um die Widerst nde des Backofe...

Page 64: ...tplan anschlie en Informationen zu den in den EU L ndern benutzten elektrischen und elektronischen Altger ten Elektro nik Ger te die mit dem nachfolgenden Symbol gekennzeichnet sind d rfen gem EU Rich...

Page 65: ...Pag 64 76 COCINAS EL CTRICAS COCINAS EL CTRICAS DE VITROCER MICA COCINA DE PLACA RADIANTE EL CTRICA SERIE 70 INSTALACI N USO Y MANTENIMIENTO...

Page 66: ...Q Cocina el ctrica 6 placas cuadradas encima de mueble 1200x700x845 15 6 400 3N 50 60 5x6 6 K7ECU05PPQ Cocina el ctrica 2 placas cuadradas encima de mueble con puerta 400x700x845 5 2 400 3N 50 60 5x1...

Page 67: ...onamiento desactive la m quina y dir jase exclusivamente a un centro de asistencia t cnica autorizado Solicite solamente recambios originales en caso contrario no se asume ninguna responsabilidad El a...

Page 68: ...fabricados cumplen con las directivas CEE anteriormente citadas y solicita que se instalen respetando las normas vigentes especialmente en lo que se refiere al sistema de evacuaci n de humos y la cir...

Page 69: ...ie de nervios colocados tanto encima como debajo de la misma La rejilla extra ble est formada por redondo de acero revestido con una capa protectora El aislamiento de la c mara de cocci n y de la puer...

Page 70: ...cas Disposiciones de los cuerpos para la prevenci n de incendios INSTALACI N Operaciones preliminares Extraiga el aparato del embalaje aseg rese de que est ntegro y en caso de duda no lo utilice y p n...

Page 71: ...r una tolerancia de menos del 50 por lo que se deber elegir el adecuado Conecte un solo aparato por interruptor En algunos casos es posible que el aparato parado en el almac n pueda activar el interru...

Page 72: ...e se ha encendido la placa la zona en cuesti n se volver roja Dicho selector fig 22 p g 9 est conectado a un regulador de energ a por lo que al girarlo el aparato se enciende En funci n de la posici n...

Page 73: ...eada calentamiento total cocci n desde el fondo gratinado se regula la temperatura de cocci n deseada con el termostato 2 las dos luces indicadoras se encienden La luz indicadora verde permanece siemp...

Page 74: ...os de inactividad o de espera se recomienda colocar el selector al m nimo o bien apagarlo si se prev un periodo prolongado de inactividad ATENCI N Una vez apagado el aparato la placa sigue estando cal...

Page 75: ...ancias cidas concentradas durante periodos de tiempo prolongados vinagre ali os mezclas de especias sal de cocina concentrada ya que se podr an crear condiciones f sico qu micas susceptibles de destru...

Page 76: ...rodete del horno ventilado desapriete los tornillos de fijaci n 1 de la rejilla protectora 2 qu telo desenrosque la tuerca 3 de bloqueo del ventilador 4 y extr igala A continuaci n reempl celo Para e...

Page 77: ...se debe reemplazar Proceda de la manera inversa para volver a instalar el conjunto Regulador de energ a de la placa de vitrocer mica Quite el tablero desconecte los cables del componente a reemplazar...

Reviews: