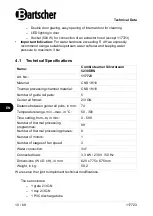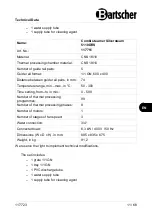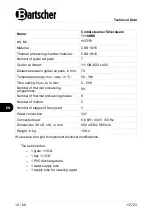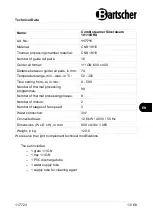
Installation Instructions
20 / 68
117723
EN
Drain Connection
To provide for liquid drainage from the
thermal processing chamber, the
appliance is equipped with water drain.
The connection (
A
, Fig. 5) is located at
the bottom right side of the back of the
appliance, and features 32 mm
diameter.
Connect the enclosed PVC discharge
tube to the
A
connection and connect it
with suitable hose, which must be
routed to a drainage system.
Fig. 5
Electrical Connection
• Before connecting the appliance to the power supply, make sure that voltage
and frequency values on the rating plate are conforming to the existing electric
installation. Connect the appliance only if the above mentioned parameters are
consistent with each other!
The allowable voltage deviation is ±10%.
• In order to directly connect the appliance to electrical supply, install an
automatic breaker between the appliance and the electrical installation, suitable
for the power value. Follow installation indications, so that contacts of such an
mechanism must feature suitable spacing, providing for full discharge with
respect to conditions for overvoltage category III. The disconnecting mechanism
should be installed so that it is available for the operating personnel all the time.
• The main switch, to which the plug of the mains power cord is connected,
should be set to '0' (zero) position. Have a qualified personnel check if the cord's
section is suitable for the power consumed by the appliance.
• The
117723
appliance is factory equipped with connection cord and mains plug
(single-phase, 230 V).
• To connect the appliance to electric supply, it is enough to insert the plug in a
single grounded socket.
• When placing the appliance, make sure the power plug is easily accessible to
immediately unplug the appliance if necessary.
• The electric power circuit must be protected by at least 16 A fuse. Connect the
appliance only directly to a wall grounded socket and do not use any power
boards or multisockets.
WARNING!

