• (Rechargeable) batteries must be kept out of reach of children. Do not leave
(rechargeable) batteries lying around, as there is risk, that children or pets
swallow them.
• (Rechargeable) batteries must not be dismantled, short-circuited or thrown into
fire. Never recharge non-rechargeable batteries. There is a risk of explosion!
• Consult an expert when in doubt about operation, safety or connection of the
device.
• Maintenance, modifications and repairs are to be performed exclusively by an
expert or at a qualified shop.
• If you have questions which remain unanswered by these operating instructions,
contact our technical support service or other technical personnel.
Operation
Only item no. 1170435: Pull the battery safety strip from the back of the product
before first time use.
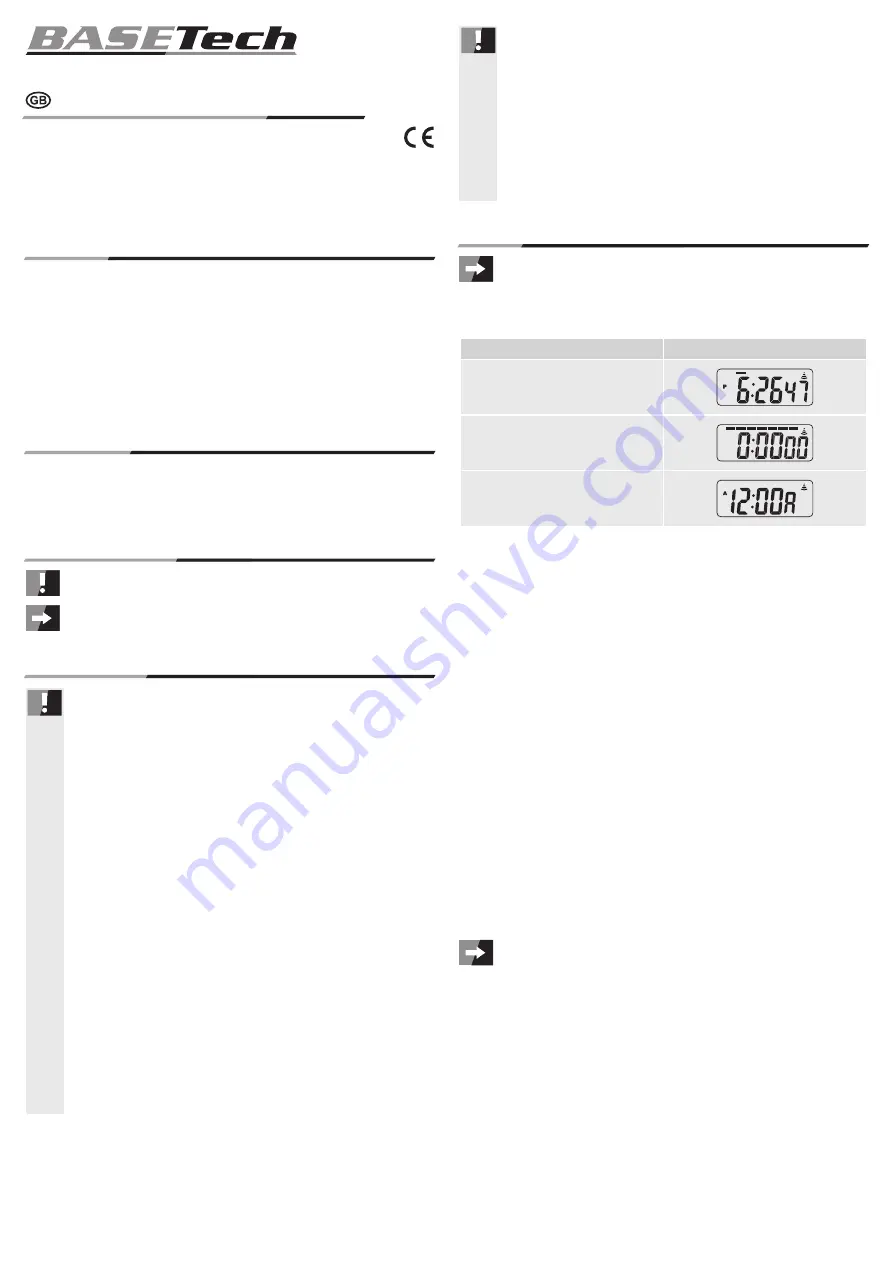
a) Mode overview
Press the MODE button to toggle between the different modes.
Mode
Display
Clock time, date, weekday
Stopwatch
Daily alarm
b) Setting clock time and calendar
• When in normal clock time display mode, press the MODE button three times. The second
indicator and the weekday display bar start flashing.
• At that time, press the START/STOP button, if necessary, to reset the seconds to zero.
• Press SPLIT/RESET. The minute indicator starts flashing.
• Press the START/STOP button to set the minutes. Press and hold the START/STOP button
for fast setting mode.
• Press SPLIT/RESET. The hour indicator starts flashing.
• Press the START/STOP button to set the hours. Press and hold the START/STOP button
for fast setting mode.
One of the A, P or H indicators appears behind the clock time.
A = 12-hour display, midnight till 11:59 noon
P = 12-hour display, 12:00 noon till 23:59
H = 24-hour display
• Press SPLIT/RESET. The day indicator starts flashing.
• Press the START/STOP button to set the day. Press and hold the START/STOP button for
fast setting mode.
• Press SPLIT/RESET. The month indicator starts flashing.
• Press the START/STOP button to set the month. Press and hold the START/STOP button
for fast setting mode.
• Press SPLIT/RESET. The weekday display bar starts flashing.
• Press the START/STOP button to set the weekday. Press and hold the START/STOP button
for fast setting mode.
SU = Sunday / MO = Monday / TU = Tuesday / WE = Wednesday / TH = Thursday /
FR = Friday / SA = Saturday
• Press MODE to confirm. All settings have been applied successfully.
Operating instructions
Version 04/14
Stopwatch
Item no. 1170434 (WT-034)
Item no. 1170435 (WT-035)
Intended use
The product is intended for measuring time and displaying the interim period. It also displays
the clock time, date and weekday. The product features an alarm function. Power supply is
facilitated via button cell type battery. The product is suitable for use in dry areas only.
For safety and approval purposes (CE), you must not rebuild and/or modify this product. Using
the product other than for its intended purpose as described above can damage the product or
pose a risk of injury. Read the instructions carefully and keep them. Make this product available
to third parties only together with its operating instructions.
This product complies with the statutory national and European requirements. All company
names and product names are trademarks of their respective owners. All rights reserved.
Delivery content
• Stopwatch
• Necklace
• Operating instruction
Explanation of symbols
The exclamation mark indicates specific risks associated with handling, function and
use.
The “arrow” symbol indicates special tips and operating information.
Safety instructions
Read the operating instructions carefully and especially observe the safety
information. If you do not follow the safety instructions and information
on proper handling in this manual, we assume no liability for any resulting
personal injury or damage to property. Such cases will invalidate the warranty/
guarantee.
• The device is not a toy. Keep it out of the reach of children and pets.
• Do not leave packaging material lying around carelessly. These may become
dangerous playing material for children.
• Protect the product from extreme temperatures, direct sunlight, strong jolts, high
humidity, moisture, flammable gases, vapours and solvents.
• Do not place the product under any mechanical stress.
• If it is no longer possible to operate the product safely, take it out of operation and
protect it from any accidental use. Safe operation can no longer be guaranteed
if the product:
- is visibly damaged,
- is no longer working properly,
- has been stored for extended periods in poor ambient conditions or
- has been subjected to any serious transport-related stresses.
• Please handle the product carefully. Jolts, impacts or a fall even from a low height
can damage the product.
• Correct polarity must be observed while inserting the (rechargeable) battery.
• The (rechargeable) battery should be removed from the device if it is not used
for a long period of time to avoid damage through leaking. Leaking or damaged
(rechargeable) batteries might cause acid burns when in contact with skin,
Therefore use suitable protective gloves to handle corrupted (rechargeable)
batteries.


