16
normal operation and have an alarm condition open the relay, so if the Mux alarm is
activated the alarm output is active.
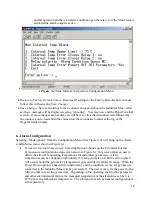
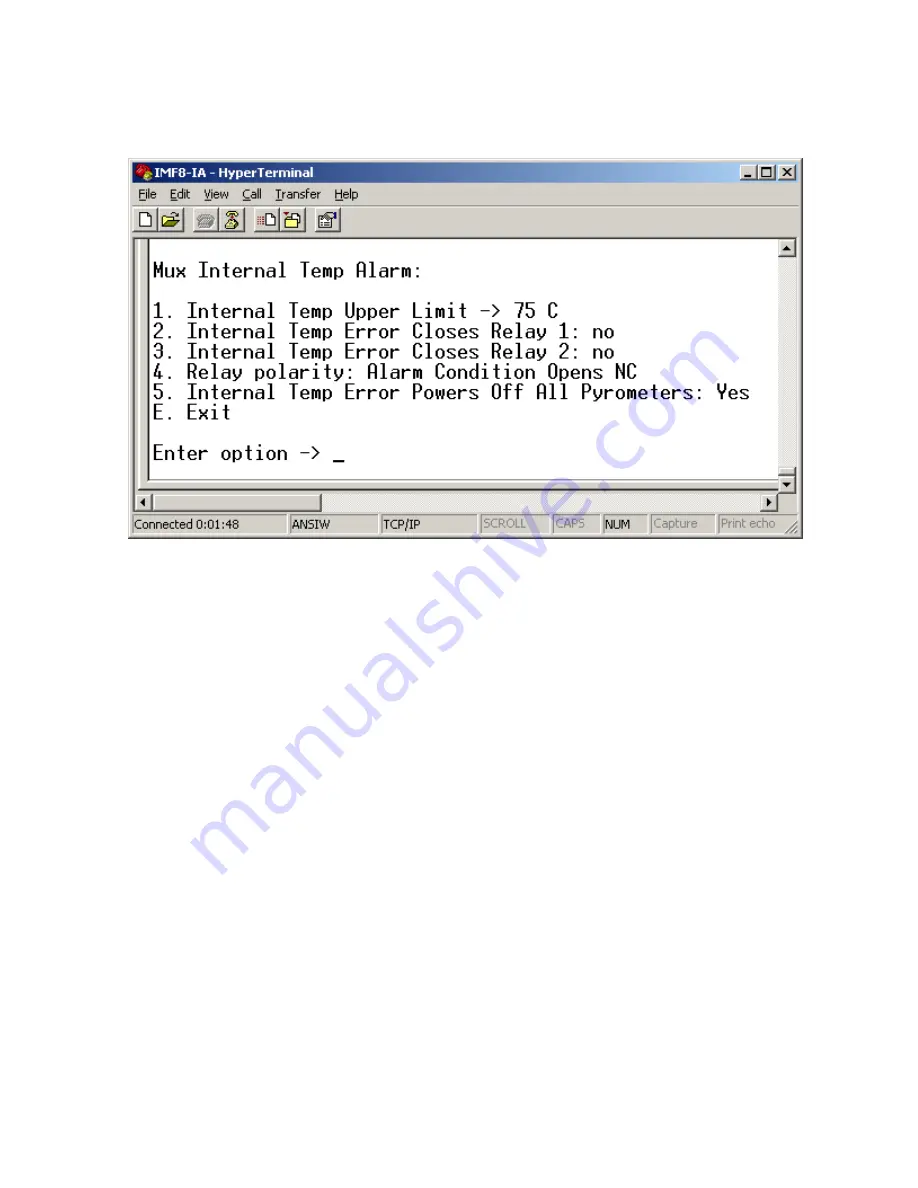
Figure 5-2:
Mux Internal Temperature Configuration Menu
Restore to Factory Default Values:
Restores all settings to the Factory Defaults but you must
follow this with selecting
Save Changes
.
Save Changes:
Saves all settings to their current values and reboots the Industrial Mux. After
saving, a message will be displayed saying ‘rebooting’. You may now end the HyperTerminal
session. If more changes are needed, you will have to click the disconnect icon followed by
the connect icon to reestablish the connection; these icons are located at the top of the
HyperTerminal display.
6. Alarm Configuration
Selecting ’Mode options’ from the Configuration Menu (See Figure 4-9) will bring up the Alarm
configuration menu, shown in Figure 6-1.
Pyrometer Internal Temperature:
Selecting Option 3 brings up the Pyrometer Internal
Temperature configuration setup screen shown in Figure 6-2; this screen allows a user to
define the allowable operating temperatures for individual pyrometers. Alarm
temperatures can be configured individually for each pyrometer, as can the action which
will occur should the pyrometer’s temperature goes outside the allowable range. When the
Power Down option is chosen for an instrument, and the condition occurs, all pyrometers
connected to the Industrial Mux will be powered off. The user must cycle the power to the
Mux in order to reset the pyrometers. Depending on the operating speed of the pyrometer,
and other environmental factors, the measured temperature of the electronics can be 5 to
12ºC above the ambient air temperature. The submenu for each pyrometer configuration is
self-explanatory.


