6-1
CAUTION
Substitution of printed circuit boards or individual components does not necessarily mean
the relay will operate properly. Always test the relay before placing it in operation.
SECTION 6
MAINTENANCE
GENERAL
BE1-81 Digital Underfrequency Relays require no preventive maintenance other than a periodic
operational test (refer to Section 5 for operational test procedure). If the relay fails to function properly,
and in-house repair is contemplated, consult the Service Manual (publication number 9 1064 00 620). If
factory repair is desired, contact the Customer Service Department of the Power Systems Group, Basler
Electric, for a return authorization number prior to shipping.
IN-HOUSE REPAIR
In-house replacement of individual components may be difficult and should not be attempted unless
appropriate equipment and qualified personnel are available.
If in-house repair is to be attempted, component values may be obtained from the schematics or the
parts list of the Service Manual. Replacement parts may be purchased locally. The quality of
replacement parts must be at least equal to that of the original components.
Where special components are involved, Basler Electric part numbers may be obtained from the number
stamped on the component or assembly, the schematic, or parts list. These parts may be ordered
directly from Basler Electric. When complete boards or assemblies are needed, the following
information is required.
1.
Relay model and style number
2.
Relay serial number or date code
3.
Board or assembly
a) Part number
b) Serial number
c)
Revision letter
4.
The name of the board or assembly
STORAGE
This protective relay contains aluminum electrolytic capacitors which generally have a life expectancy in
excess of 10 years at storage temperatures less than 40
C. Typically, the life expectancy of the
capacitor is cut in half for every 10
C rise in temperature. Storage life can be extended if, at one-year
intervals, power is applied to the relay for a period of thirty minutes.
Summary of Contents for BE1-81
Page 1: ... 05647 6 10 07 14 6 70 4 4 37 0 4 1 2WDNKECVKQP 4GXKUKQP ...
Page 7: ...BE1 81 General Information 1 2 Figure 1 1 Inverse Time Curves 50 Hertz Option ...
Page 8: ...BE1 81 General Information 1 3 Figure 1 2 Inverse Time Curves 60 Hertz Option ...
Page 13: ...BE1 81 Controls And Indicators 2 2 Figure 2 1 Location Of Controls And Indicators Option E1 ...
Page 14: ...BE1 81 Controls And Indicators 2 3 Figure 2 2 Location Of Controls And Indicators Option D1 ...
Page 15: ...BE1 81 Controls And Indicators 2 4 Figure 2 3 Location Of Assemblies ...
Page 22: ...BE1 81 Installation 4 3 Figure 4 3 S1 Case Single Ended Semi Flush Mounting Side View ...
Page 25: ...BE1 81 Installation 4 6 Figure 4 6 S1 Case Single Ended Projection Mounting Rear View ...
Page 26: ...BE1 81 Installation 4 7 Figure 4 7 S1 Case Single Ended Projection Mounting Side View ...
Page 27: ...BE1 81 Installation 4 8 Figure 4 8 S1 Case Double Ended Semi Flush Mounting Side View ...
Page 30: ...BE1 81 Installation 4 11 Figure 4 11 S1 Case Double Ended Projection Mounting Rear View ...
Page 31: ...BE1 81 Installation 4 12 Figure 4 12 S1 Case Double Ended Projection Mounting Side View ...
Page 33: ...BE1 81 Installation 4 14 Figure 4 14 DC Control Connections ...
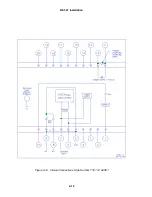
Page 34: ...BE1 81 Installation 4 15 Figure 4 15 Internal Connections Style Number T E 1 A0S5 ...
Page 35: ...BE1 81 Installation 4 16 Figure 4 16 Internal Connections Style Number T E 1C A2S5 ...


