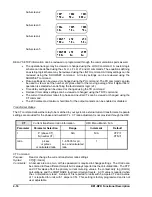
4-4
BE1-BPR Functional Description
ALARM Relay
Either normally open or normally closed contacts are available for the ALARM relay. Normally closed is the
usual configuration for fail safe operation. However, you may configure the ALARM output to fit your system
requirements by placing a jumper in the appropriate position. The output is normally energized and if the
power supply output falls below a predetermined voltage or the microprocessor watchdog timer times out,
the alarm output is de-energized. The software ALARM output (OA) is logically ORed with the hardware
logic power sensor and watchdog timer. Either input may trigger the ALARM output independently from the
software logic. The microprocessor based relay logic CANNOT disable this hardware protection.
Output Relays
Output relays, O1 through O5, are operated by the programmable logic section when the associated logic
equation(s) (LO1 through LO5) are TRUE. Output relay O1 is a high speed output with a maximum operate
time of 4.2 milliseconds.
Targets
Detailed target information about the inputs and outputs is displayed by the TARGETS menu screen.
Whenever any of the target output relays are energized, the front panel TARGET LED turns on. The
TARGET information is latched in non-volatile memory by software if the output is programmed as latching.
To reset the TARGET LED, operate the manual RESET key on the front panel keyboard or enter the RESET
command through the serial communication port. The PTARGET command programs output relays as
target relays.
LCD Display
A 2 line by 16 character, LCD display shows targets, setup, status, and diagnostic information and allows
local programming capability. LED backlighting is used to provide illumination for the LCD display.
Serial Ports RS-232/RS-485
Serial communication ports at the front and rear of the BPR relay provide total programming capability and
remote access for diagnostic, relay setup, and control.
SOFTWARE FUNCTIONAL DESCRIPTION
A majority of the relay settings may be made using the front panel keyboard and display. However, to
program the relay logic, change breaker configuration data, change time and date format, change CT data,
and request reports, the operator must use the front or rear communications port. In general, tasks that are
not easily done at the front panel should be done through the communication ports.
Introduction
Relay diagnostic and setup information is organized in a menu format when viewed using the front panel
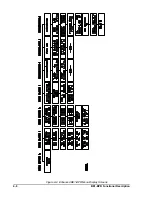
display. Figure 4-2 shows the menu progression from start-up to maintenance for an enhanced BE1-BPR.
Figure 4-3 shows the menu progression for a standard BE1-BPR. The operator uses the right arrow key to
scroll through the available menu screens and the down arrow key to access menu sub-screens. When
using a communication port, the relay is programmed using ASCII software commands. Helpful information
about software commands is available by using the HELP command. The HELP command provides a list
of available commands or information and syntax regarding a specific command along with an example of
its use.
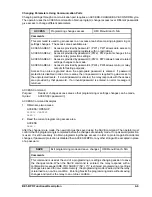
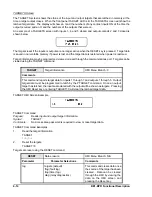
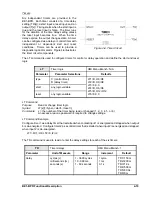
HELP
Commands information
HMI Menu Branch: N/A
Parameter
Comments
cmd
HELP or H returns information about using the HELP command. HELP1
or H1 provides a list of relay commands. HELP<cmd> or H<cmd>, where
<cmd> is a specific command, returns information on the usage and
format of the command and an example of its use.
Summary of Contents for BE1-BPR
Page 31: ...BE1 BPR Application 2 17...
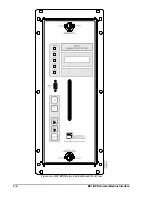
Page 42: ...3 4 BE1 BPR Human Machine Interface Figure 3 4 BE1 BPR Relay Vertical Mount Front View...
Page 43: ...BE1 BPR Human Machine Interface 3 5 Figure 3 5 BE1 BPR Relay Vertical Mount Rear View...
Page 49: ...4 6 BE1 BPR Functional Description Figure 4 2 Enhanced BE1 BPR Menu Display Screens...
Page 50: ...BE1 BPR Functional Description 4 7 Figure 4 3 Standard BE1 BPR Menu Display Screens...
Page 94: ...5 4 BE1 BPR BESTlogic Figure 5 1 BESTlogic Function Blocks...
Page 121: ...BE1 BPR Installation 7 3 Figure 7 3 Overall Dimensions Vertical Mount...
Page 122: ...7 4 BE1 BPR Installation Figure 7 4 Overall Dimensions Side View Vertical Mount...
Page 123: ...BE1 BPR Installation 7 5 Figure 7 5 Panel Drilling Diagram Vertical Mount...

