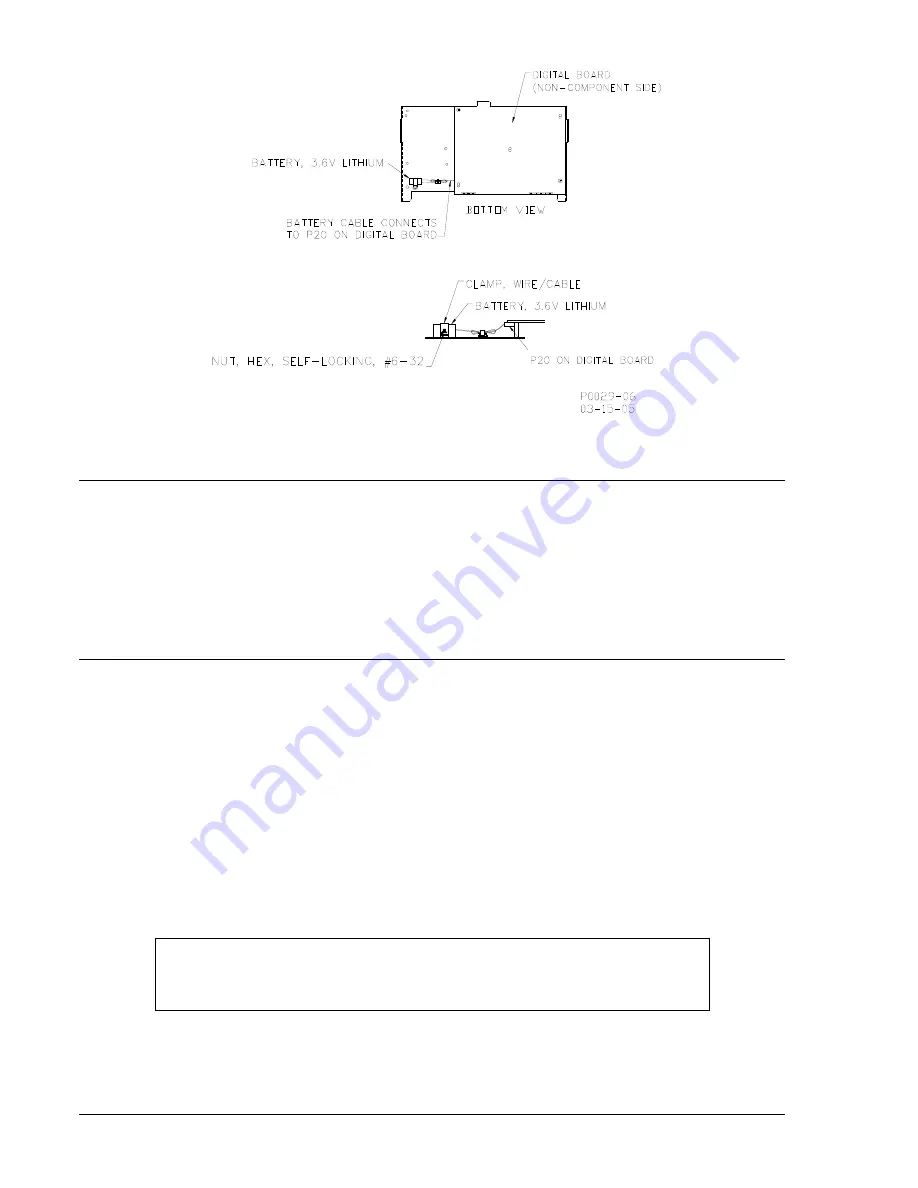
Figure 13-13. Location of Battery, Bottom View
CARE AND HANDLING
The BE1-CDS240 Current Differential System requires no preventive maintenance. The fully numeric
design of the relays requires no circuit-board level calibration.
There is no need to disturb the circuit interconnections within the assembly. Repair of the assembly by
replacement of individual circuit boards is not recommended. The printed circuit boards are constructed
using surface-mount technology and are not intended to be field serviceable.
Before returning the assembly for repair, contact the Basler Electric Technical Services Department at
618 654-2341 for a return authorization number.
UPDATING FIRMWARE AND SOFTWARE
Future enhancements to relay functionality may make a firmware update desirable. Enhancements to
relay firmware typically coincide with enhancements to BESTCOMS software for that relay. When a relay
is updated with the latest version of firmware, the latest version of BESTCOMS software should also be
obtained.
Updating Relay Firmware
If a firmware upgrade is desired, you may request a CD-ROM containing the latest firmware or download
the firmware from the Basler Electric website. Direct your web browser to
http://www.basler.com/BE1_Firm and complete the on line form to request a CD-ROM containing the
latest firmware or a password for downloading firmware from the Basler Electric web site.
Once the appropriate firmware is obtained, it can be uploaded to a relay using the
BESTload
software
utility provided on the CD-ROM originally supplied with the relay.
NOTE
Firmware consists of an
Application
program and a
DSP
program. Both programs
must be uploaded to the relay to maintain proper operation.
Updating BESTCOMS Software
13-32
BE1-CDS240 Testing and Maintenance
9365200990 Rev F
Firmware enhancements often include the addition of relay settings or the modification of existing
settings. BESTCOMS software is revised to accommodate the new or changed settings. When firmware
is updated, the latest version of BESTCOMS should also be obtained. If a CD-ROM was obtained from
Summary of Contents for BE1-CDS240
Page 2: ......
Page 8: ...vi BE1 CDS240 Introduction 9365200990 Rev F This page intentionally left blank ...
Page 38: ...1 28 BE1 CDS240 General Information 9365200990 Rev F This page intentionally left blank ...
Page 40: ...ii BE1 CDS240 Quick Start 9365200990 Rev F This page intentionally left blank ...
Page 152: ...ii BE1 CDS240 Metering 9365200990 Rev F This page intentionally left blank ...
Page 226: ...iv BE1 CDS240 Application 9365200990 Rev F This page intentionally left blank ...
Page 286: ...ii BE1 CDS240 Security 9365200990 Rev F This page intentionally left blank ...
Page 290: ...9 4 BE1 CDS240 Security 9365200990 Rev F This page intentionally left blank ...
Page 292: ...ii BE1 CDS240 Human Machine Interface 9365200990 Rev F This page intentionally left blank ...
Page 306: ...10 14 BE1 CDS240 Human Machine Interface 9365200990 Rev F This page intentionally left blank ...
Page 308: ...ii BE1 CDS240 ASCII Command Interface 9365200990 Rev F This page intentionally left blank ...
Page 342: ...11 34 BE1 CDS240 ASCII Command Interface 9365200990 Rev F This page intentionally left blank ...
Page 349: ...Figure 12 5 Horizontal Rack Mount Front View 9365200990 Rev F BE1 CDS240 Installation 12 5 ...
Page 361: ...Figure 12 17 Typical DC Connection Diagrams 9365200990 Rev F BE1 CDS240 Installation 12 17 ...
Page 372: ...12 28 BE1 CDS240 Installation 9365200990 Rev F This page intentionally left blank ...
Page 468: ...13 92 BE1 CDS240 Testing and Maintenance 9365200990 Rev F This page intentionally left blank ...
Page 512: ...14 42 BE1 CDS240 BESTCOMS Software 9365200990 Rev F This page intentionally left blank ...
Page 544: ...ii BE1 CDS240 Terminal Communication 9365200990 Rev F This page intentionally left blank ...
Page 550: ...ii BE1 CDS240 Settings Calculations 9365200990 Rev F This page intentionally left blank ...
Page 578: ...D 28 BE1 CDS240 Settings Calculations 9365200990 Rev F This page intentionally left blank ...
Page 579: ......


