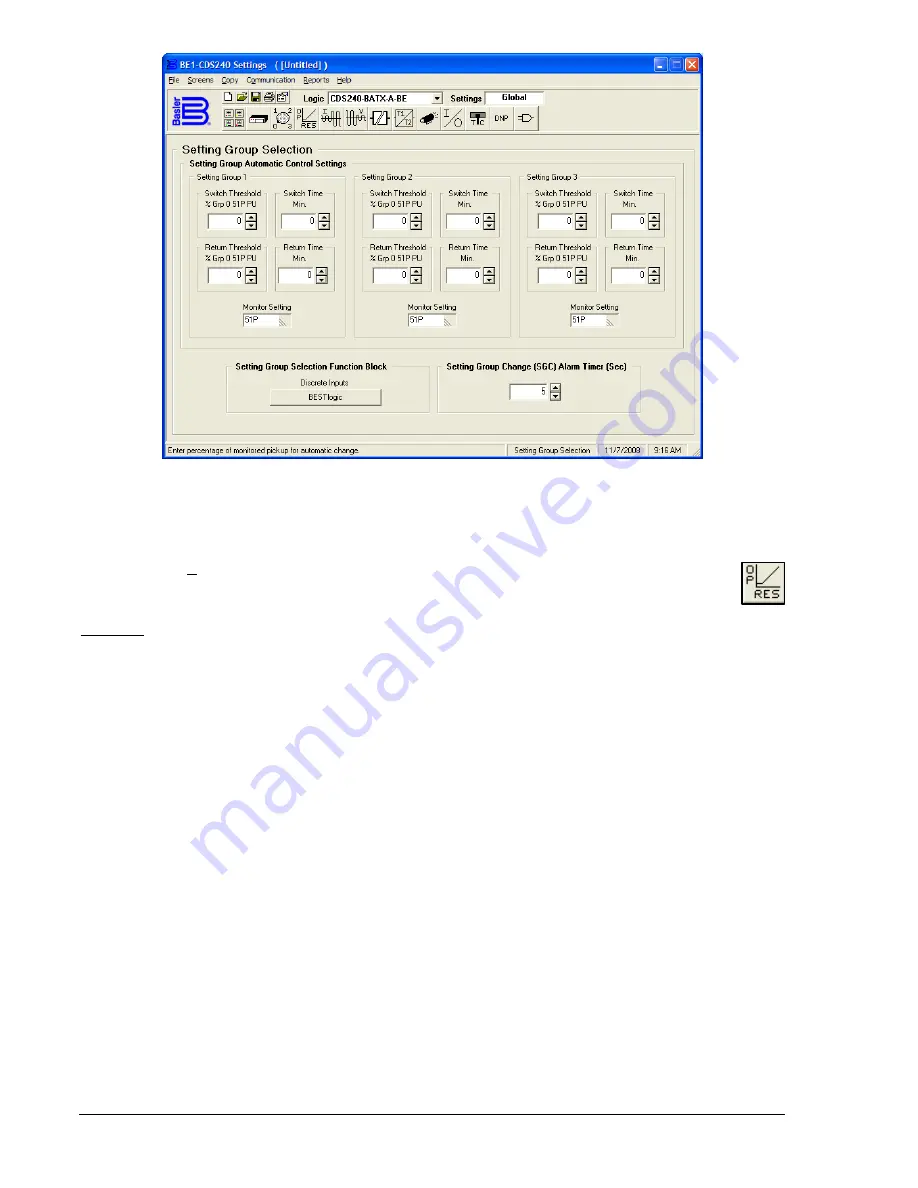
Figure 14-14. Setting Group Selection Screen
Percentage Differential
Pull down the
Screens
menu and select
Percentage Differential
or click on the Percentage
Differential icon that is shown at the right margin of this paragraph. This screen has three folder
tabs and the first tab is
87 Phase
.
87 Phase
The 87 Phase tab (Figure 14-15) brings up the screen that allows setting the 87 Tap. In the
MANUAL
mode, Tap, CT amps can be set for Circuit 1 and Circuit 2, only, through a range of 2 to 20. By selecting
the box, "
Select to Enter Data for Auto Tap Calculation
," the
MANUAL
display changes to
AUTO
. In this
mode, the transformer MVA can be set in the range of .5 to 9,999 and kv, CT can be set in the range of
.01 to 1,000.
The
Restrained Pickup
can be set using the drop down menu. The 87 Phase can be adjusted from 0.10
times tap to 1.00 times tap using the
Up/Down
arrows. Restraint Slope % is, likewise, adjustable from 15
to 60% with 45% being the default. The
2
nd
Harmonic Restraint % lop
can be set from 5 to 75 with 18.0
being the default. The
5
th
Harmonic Restraint % lop
has the same range with 35.0 being the default.
Unrestrained Pickup
is set using the drop down menu arrow next to the selection box. To the right,
Up/Down
arrows are used to select any value between 1 times tap to 21 times tap with zero as the
default.
14-12
BE1-CDS240 BESTCOMS Software
9365200990 Rev F
Summary of Contents for BE1-CDS240
Page 2: ......
Page 8: ...vi BE1 CDS240 Introduction 9365200990 Rev F This page intentionally left blank ...
Page 38: ...1 28 BE1 CDS240 General Information 9365200990 Rev F This page intentionally left blank ...
Page 40: ...ii BE1 CDS240 Quick Start 9365200990 Rev F This page intentionally left blank ...
Page 152: ...ii BE1 CDS240 Metering 9365200990 Rev F This page intentionally left blank ...
Page 226: ...iv BE1 CDS240 Application 9365200990 Rev F This page intentionally left blank ...
Page 286: ...ii BE1 CDS240 Security 9365200990 Rev F This page intentionally left blank ...
Page 290: ...9 4 BE1 CDS240 Security 9365200990 Rev F This page intentionally left blank ...
Page 292: ...ii BE1 CDS240 Human Machine Interface 9365200990 Rev F This page intentionally left blank ...
Page 306: ...10 14 BE1 CDS240 Human Machine Interface 9365200990 Rev F This page intentionally left blank ...
Page 308: ...ii BE1 CDS240 ASCII Command Interface 9365200990 Rev F This page intentionally left blank ...
Page 342: ...11 34 BE1 CDS240 ASCII Command Interface 9365200990 Rev F This page intentionally left blank ...
Page 349: ...Figure 12 5 Horizontal Rack Mount Front View 9365200990 Rev F BE1 CDS240 Installation 12 5 ...
Page 361: ...Figure 12 17 Typical DC Connection Diagrams 9365200990 Rev F BE1 CDS240 Installation 12 17 ...
Page 372: ...12 28 BE1 CDS240 Installation 9365200990 Rev F This page intentionally left blank ...
Page 468: ...13 92 BE1 CDS240 Testing and Maintenance 9365200990 Rev F This page intentionally left blank ...
Page 512: ...14 42 BE1 CDS240 BESTCOMS Software 9365200990 Rev F This page intentionally left blank ...
Page 544: ...ii BE1 CDS240 Terminal Communication 9365200990 Rev F This page intentionally left blank ...
Page 550: ...ii BE1 CDS240 Settings Calculations 9365200990 Rev F This page intentionally left blank ...
Page 578: ...D 28 BE1 CDS240 Settings Calculations 9365200990 Rev F This page intentionally left blank ...
Page 579: ......


