MAINTENANCE OF BACKUP BATTERY FOR REAL-TIME CLOCK
The backup battery for the real-time clock is an optional feature available in BE1 numeric products. A
3.6V, 0.95 Ah lithium battery is used to maintain clock function during extended loss of power supply
voltage (over eight hours). In mobile substation and generator applications, the primary battery system
that supplies the relay power supply may be disconnected for weeks or even months between uses.
Without battery backup for the real time clock, clock functions would cease after eight hours (capacitor
backup).
The backup battery should be replaced after five years of operation. The recommended battery is a
lithium 3.6V, 0.95 Ah battery (Basler p/n: 9318700012 or Applied Power p/n: BM551902). Use the
following instructions to replace the battery:
Step 1:
Remove the unit from the case.
Step 2: Disconnect the battery cable.
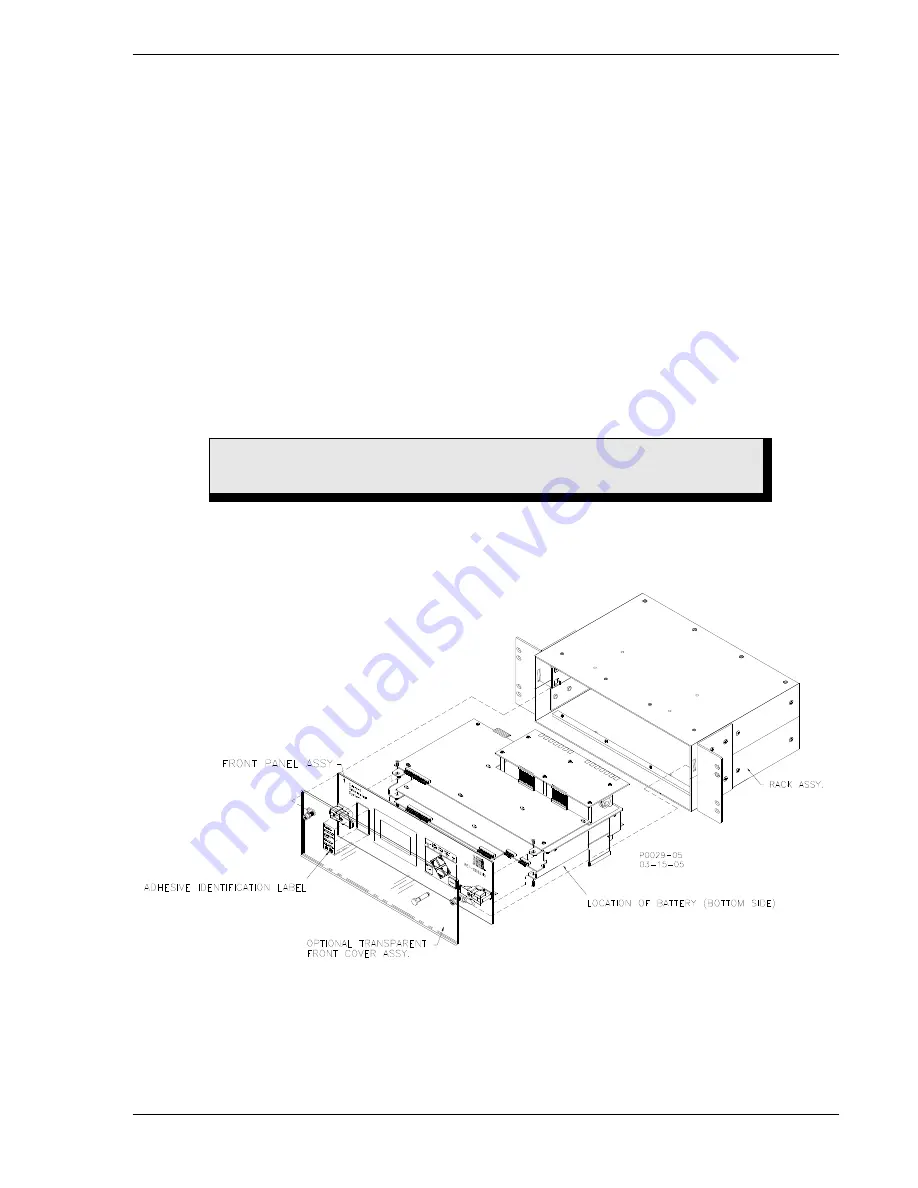
Step 3: Locate the battery. The battery is located on the bottom side of a horizontal unit or the left side
of a vertical unit. See Figures 13-12 and 13-13 for battery location.
Step 4: Using a 5/16” nut driver, remove the nut holding the battery strap in place. Then remove the
old battery, being careful not to hang the leads on the printed circuit board components.
Consult local ordinances for proper battery disposal.
Step 5: Install the new battery by following Steps 1 through 4 in reverse order.
WARNING!
Do not short-circuit, reverse battery polarity, or attempt to recharge the battery.
Figure 13-12. Location of Battery, Top View
9365200990 Rev F
BE1-CDS240 Testing and Maintenance
13-31
Summary of Contents for BE1-CDS240
Page 2: ......
Page 8: ...vi BE1 CDS240 Introduction 9365200990 Rev F This page intentionally left blank ...
Page 38: ...1 28 BE1 CDS240 General Information 9365200990 Rev F This page intentionally left blank ...
Page 40: ...ii BE1 CDS240 Quick Start 9365200990 Rev F This page intentionally left blank ...
Page 152: ...ii BE1 CDS240 Metering 9365200990 Rev F This page intentionally left blank ...
Page 226: ...iv BE1 CDS240 Application 9365200990 Rev F This page intentionally left blank ...
Page 286: ...ii BE1 CDS240 Security 9365200990 Rev F This page intentionally left blank ...
Page 290: ...9 4 BE1 CDS240 Security 9365200990 Rev F This page intentionally left blank ...
Page 292: ...ii BE1 CDS240 Human Machine Interface 9365200990 Rev F This page intentionally left blank ...
Page 306: ...10 14 BE1 CDS240 Human Machine Interface 9365200990 Rev F This page intentionally left blank ...
Page 308: ...ii BE1 CDS240 ASCII Command Interface 9365200990 Rev F This page intentionally left blank ...
Page 342: ...11 34 BE1 CDS240 ASCII Command Interface 9365200990 Rev F This page intentionally left blank ...
Page 349: ...Figure 12 5 Horizontal Rack Mount Front View 9365200990 Rev F BE1 CDS240 Installation 12 5 ...
Page 361: ...Figure 12 17 Typical DC Connection Diagrams 9365200990 Rev F BE1 CDS240 Installation 12 17 ...
Page 372: ...12 28 BE1 CDS240 Installation 9365200990 Rev F This page intentionally left blank ...
Page 468: ...13 92 BE1 CDS240 Testing and Maintenance 9365200990 Rev F This page intentionally left blank ...
Page 512: ...14 42 BE1 CDS240 BESTCOMS Software 9365200990 Rev F This page intentionally left blank ...
Page 544: ...ii BE1 CDS240 Terminal Communication 9365200990 Rev F This page intentionally left blank ...
Page 550: ...ii BE1 CDS240 Settings Calculations 9365200990 Rev F This page intentionally left blank ...
Page 578: ...D 28 BE1 CDS240 Settings Calculations 9365200990 Rev F This page intentionally left blank ...
Page 579: ......


