background image

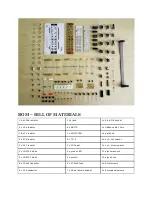
4 x 10uF capacitor


1 x 26pin male header


2 x PCB


2 x 1uF capacitor


1 x 2x5pin male header


1 x Front panel


2 x 2N3904 transistor


2 x 14 pin DIL socket


2 x 2N3906 transistor


1 x 16 pin DIL socket


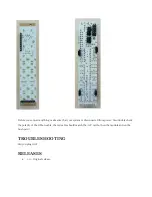
The SKIS module consists of two boards, the top board is used for all of the UI components and the 

bottom board is the heart of the sound processing circuit. 

We even included some of the best quality solder we found to help you solder everything faster. 

BOTTOM BOARD 

Lets start with the bottom board, with the shortest and smallest parts. 

Take a strip of resistors and look up the values printed on the circuit boards. Start with the 100K, since 

there are 14 of them it will be easier to locate the rest on the board. Place them through the board, solder 

them and clip off the excess leads. Do the same for the rest of 10k, 1k, 47k and 4.7k resistors. ( The color of 

the resistor body may defer from the pictures, but its the color code of the values that matters). 

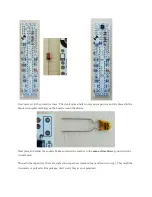
Your board should look like this (click on the images to enlarge): 


Next populate the board with the diodes and solder them in. Be careful though, diodes are 

polarized!


Make sure that the marking ring on the diode body matches the marking on the circuit board. 


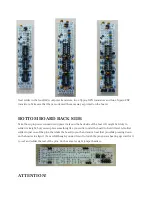
By now your board should look like this: 

Summary of Contents for SKIS V1.0

Page 1: ...e that you understand all the steps if you are having any troubles don t hesitate to seek help at the forum We suggest that you work in a clean and a well lit environment to avoid accidents or losing...

Page 2: ...istor 1 x LM13700N 2 x pot knob 2 x 47k resistor 2 x TL74 1 x nut nut spacer 2 x 4k7 resistor 2 x 500k pot 1 x nut screw spacer 2 x 1N4148 diode 2 x green LED 10 x jack washers 2 x 1N4007 diode 2 x sw...

Page 3: ...lest parts Take a strip of resistors and look up the values printed on the circuit boards Start with the 100K since there are 14 of them it will be easier to locate the rest on the board Place them th...

Page 4: ...rkings on the board around the diodes Next place and solder the sockets Make sure that the notch is in the same direction as printed on the circuit board Then add the capacitors there are eight 100n c...

Page 5: ...the back side of the board It might be tricky to solder it straight but you can place something like your cutter under the board to hold it level Also first solder in just one of the pins then take th...

Page 6: ...uld match the long lead of the capacitor the side is also marked on the body of the capacitor with a white strip You might have to clip a little the jumper header if they are in the way of the capacit...

Page 7: ...ds Just like in the image below Unscrew the top spacer again and disconnect the two boards Place the three potentiometers to their respected places on the board Push them well until they sit absolutel...

Page 8: ...nel so take the standoff and place it in the opening Check that all the components came through and then screw the wooden front panel with the second hex screw Also secure the jacks to the panel with...

Page 9: ...like in the image below Solder the LEDs the switches and the rest of the components Congratulations You have made it through now just connect the bottom board add the knobs the jumpers to your prefer...

Page 10: ...hat your system is disconnected from power Also double check the polarity of the ribbon cable the red cable should match the 12V rail both on the module and on the bus board TROUBLESHOOTING did you pl...

Reviews: