background image

39

38

KR

KR


Summary of Contents for glo

Page 1: ...1 ...

Page 2: ...3 2 EN EN EN ...

Page 3: ...adaptor and USB cable that are provided Do not use any other USB cables or AC adaptor to recharge the glo tobacco heater 9 In the event that you lose or misplace the provided glo USB AC adaptor you should purchase a new glo USB AC adaptor accessory pack 10 Adhere to all safety information as detailed in the User Guide of the AC DC adaptor that you are using 11 Do not leave the glo tobacco heater u...

Page 4: ...ur old product helps prevent potential negative consequences for the environment and human health To clean the glo USB AC adaptor wipe the adaptor with a dry cloth when it gets dirty and do not use a thinner benzene or alcohol based cleaner as it may cause damage to this product The glo USB AC adaptor will only charge the device at the correct rate between the temperatures of 10 C to 45 C At tempe...

Page 5: ...9 8 EN EN 01 Heater entrance 02 Slider door 03 Control button 04 USB charging port 05 Cleaning door PRODUCT DIAGRAM 01 02 03 04 05 ...

Page 6: ...heater can be used whilst plugged in as long as it has enough charge However charging will be paused until the session is complete 02 Insert a neo stick Slide open the shutter on top of the glo tobacco heater and gently insert a neo stick until you feel the stick touching the bottom of the glo tobacco heater At this point you should still see the top of the coloured collar on the tipping of the ne...

Page 7: ...ted as the device heats up After 20 seconds all four lights on the glo tobacco heater will be solidly illuminated and the glo tobacco heater will vibrate gently to indicate that it s ready to use To start a Boost Mode session Hold down the control button on the glo tobacco heater for 5 seconds to start the heating process The glo tobacco heater will vibrate gently after 3 seconds and then again at...

Page 8: ...ck must be removed and replaced before the next session can begin 05 Remove a neo stick Simply remove a neo stick by the filter Take care when removing stick from the glo tobacco heater as the tobacco portion could be hot 06 Dispose a neo stick Discard a neo stick responsibly in a waste bin or ashtray Always ensure the shutter is closed after every session BATTERY STATUS 100 power more than 20 ses...

Page 9: ...m of the glo tobacco heater Clean the inside of the heating chamber using the brush provided For best results clean from both ends as required For best performance the glo tobacco heater needs to be cleaned after 20 sessions 09 How to clean the cleaning brush Simply rinse brush under running water Please make sure that the cleaning brush is dried before using again with glo tobacco heater ...

Page 10: ...e glo tobacco heater may have ran out of battery Check the battery status by pressing the control button on the glo tobacco heater Recharge if necessary Refer to the recharging instructions in the Instructions for Use section The glo tobacco heater may be above the battery s maximum temperature Move to a cooler area and or wait for the glo tobacco heater to cool down The glo tobacco heater may be ...

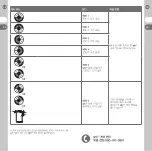
Page 11: ...temperature is too high Error 5 The glo tobacco heater is not heating Error 6 The glo tobacco heater is not charging Remove the USB cable from the device make a note of the error code and contact the glo Care Center for support If you have read the troubleshooting information and are still having problems with your glo tobacco heater please contact the glo Care Center for additional help and advic...

Page 12: ...23 22 KR KR 1 2 3 4 5 6 7 8 9 10 11 12 13 ...

Page 13: ...25 24 KR KR 14 15 16 17 18 ...

Page 14: ...27 26 KR KR 05 01 02 03 04 ...

Page 15: ...29 28 KR KR ...

Page 16: ...31 30 KR KR ...

Page 17: ...33 32 KR KR ...

Page 18: ...35 34 KR KR 1 2 ...

Page 19: ...37 36 KR KR ...

Page 20: ...39 38 KR KR ...

Reviews: