background image

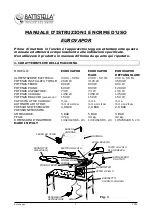
Eurovapor 

10 

2016 

2.


IMPORTANT 


Before  installing  EUROVAPOR,  it  is  necessary  to  set  up  a  protected  electrical  socket  
suitable to its power. 
 

This ironing board is not suitable for children, people with physical or mental handicaps or 
inexperienced persons, unless they are instructed by a person who takes the responsibility 
for their safety. Children must not play with the ironing board. 


3.


OPENING OF PACKAGE 

 
1.


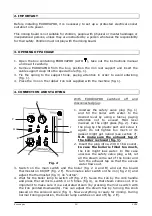
Open the box containing EUROVAPOR (ALTO  ), take out the instructions manual 
and read it carefully.


2.


Remove  EUROVAPOR  from  the  box,  position  the  iron  rest  support  and  insert  the 
cable support deep into the special hole (fig. 1).


3.


Fix  the  spring  to  the  support  hook,  paying  attention  in  order  to  avoid  entwining 
(fig. 1). 

4.


Place the iron on the rubber iron rest supplied with the machine (fig. 1). 


4.


CONNECTION AND STARTING 


With 

EUROVAPOR 

switched 

off 

and 

disconnected plug: 


1.


Unscrew  the  safety  valve  plug  (fig.  1) 

and  fill  the  boiler  with  water  to  the  

desired  level  by  using  a  funnel,  paying 
attention  not  to  exceed  MAX  level 
marked  on  the  sight  glass  (fig.  2).  Take 
the  plug  by  the  plastic part  and  screw  it 

again:  do  not  tighten  too  much  or  its 
gasket  might  get  ruined  (see  section  7). 

N.B.  make  sure  the  exhaust  tap  of 

the boiler is closed (fig. 1).


2.


Insert the plug into a 230 V 16 A socket. 

In case the boiler is  filled too much, 

the  iron  might  leak  water.  In  this  case 
unscrew  the  safety  valve  plug  a  bit,  let 
all the steam come out of the boiler and 

turn  the  exhaust  tap  so  that  the  excess 

water flows out.  

3.


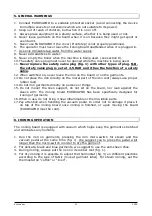
Switch  on  the  main  switch  and  the  boiler  (fig.  2  A  and  B)  and  set  the  board 

thermostat on 80/90° (fig. 2 F). Five minutes later switch on the iron (fig. 2 C) and 

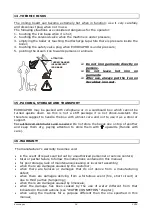
adjust the thermostat (fig. 3) on “cotton”.


4.


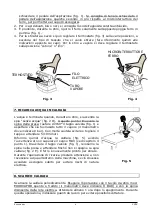
Wait for the boiler lamp to switch off (fig. 2 E). Seize the iron by the cork handle 

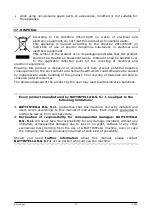
and press the red micro-switch 4 or 5 times (fig. 4), so that steam comes out. It is 
important to make sure it is a saturated steam (by pressing the micro switch with 

the  iron  pointed  downwards).  You  can  adjust  the  steam  flux  by  turning  the  knob 
placed on the solenoid valve (fig. 1). Now everything is ready for ironing.  During 
normal ironing operation, the boiler lamp switches on and off (fig. 2 E). 

Fig. 2 

A

B

C

D

E

F

G

H

I

Summary of Contents for EUROVAPOR

Page 1: ...ALY 39 0424 549027 39 0424 549007 www battistellag it info battistellag it Questo manuale di propriet della BATTISTELLA B G S r l Qualsiasi riproduzione vietata La Ditta si riserva il diritto di appor...

Page 2: ...NZA PIANO 600 W 800 W 1200 W POTENZA ASPIRATORE 73 W 73 W 130 W POTENZA CALDAIA 1450 W 1450 W 1450 W POTENZA BRACCIO accessorio 150 W 150 W 150 W CAPACIT UTILE CALDAIA 3 4 L 3 4 L 3 4 L AUTONOMIA DI S...

Page 3: ...ione fig 1 4 ALLACCIAMENTO E ACCENSIONE Con il tavolo stiro mod EUROVAPOR spento e spina disinserita 1 Svitare il tappo valvola dall EUROVAPOR fig 1 e riempire con la quantit desiderata d acqua la cal...

Page 4: ...dalla rete idrica per uso domestico 8 Non aggiungere additivi di alcun genere nell acqua 9 Non scaricare l acqua dalla caldaia durante il funzionamento dell apparecchio vedi capitolo 8 10 Il tappo val...

Page 5: ...il tappo valvola fig 1 e aspettare che sia fuoriuscito tutto il vapore il manometro deve indicare 0 bar Con molta cautela svitare e togliere il tappo e attendere 5 10 minuti Rifornire quindi d acqua l...

Page 6: ...zza 3 consigliato sostituire la guarnizione di tenuta del tappo valvola ogni 1200 ore di accensione o al massimo ogni 2 anni utilizzando solo guarnizioni originali L operazione va eseguita con l appar...

Page 7: ...stiro mod EUROVAPOR al di fuori della stiratura normale 2 quando si sostituisce la guarnizione del tappo valvola con guarnizioni non originali 14 RISCHI DI NATURA TERMICA L apparecchio pu diventare e...

Page 8: ...nelle istruzioni vedi capitolo QUALE ACQUA UTILIZZARE quando si utilizza l apparecchio per un uso diverso da quello specificato nel presente manuale quando si utilizzano ricambi o accessori non origi...

Page 9: ...ni di legge dalla data di acquisto Esclusione di responsabilit per danni indiretti In nessun caso la Battistella B G S r l sar responsabile per i danni inclusi senza limitazioni il danno indiretto per...

Page 10: ...EUROVAPOR EUROVAPOR MAXI EUROVAPOR RECTANGULAR POWER SUPPLY 230 V 50 Hz 230 V 50 Hz 230 V 50 Hz TOTAL INSTALLED POWER 2923 W 3123 W 3580 W IRON POWER 800 W 800 W 800 W BOARD POWER 600 W 800 W 1200 W V...

Page 11: ...ion not to exceed MAX level marked on the sight glass fig 2 Take the plug by the plastic part and screw it again do not tighten too much or its gasket might get ruined see section 7 N B make sure the...

Page 12: ...ace the iron directly on the metal part of the iron rest always use proper rubber rest 14 Do not iron garments directly on persons or things 15 Do not mount the linen support do not sit on the board n...

Page 13: ...er onto the machine In the event his should happen dry immediately in order to avoid electrical risks 8 BOILER DISCHARGE Empty the boiler periodically Carry out this operation when the machine is unpl...

Page 14: ...o replace 1 the internal safety valve every 2100 hrs of ironing or maximum every 3 years 2 the internal thermostat every 2100 hrs of ironing or maximum every 3 years 3 steam hose and iron electric wir...

Page 15: ...ggest to handle the box with utmost care and not to use it as a stool or support For authorized distributors and resellers Do not store the boxes one on top of another and keep them dry paying attenti...

Page 16: ...ise be caused by inappropriate waste handling of this product The recycling of materials will help to conserve natural resources The abusive disposal of the product by the user may lead to administrat...

Reviews: