PNEUMATIC ZEUS mod. 2009
page 7
January 2009
11.
USE OF CLAMPS
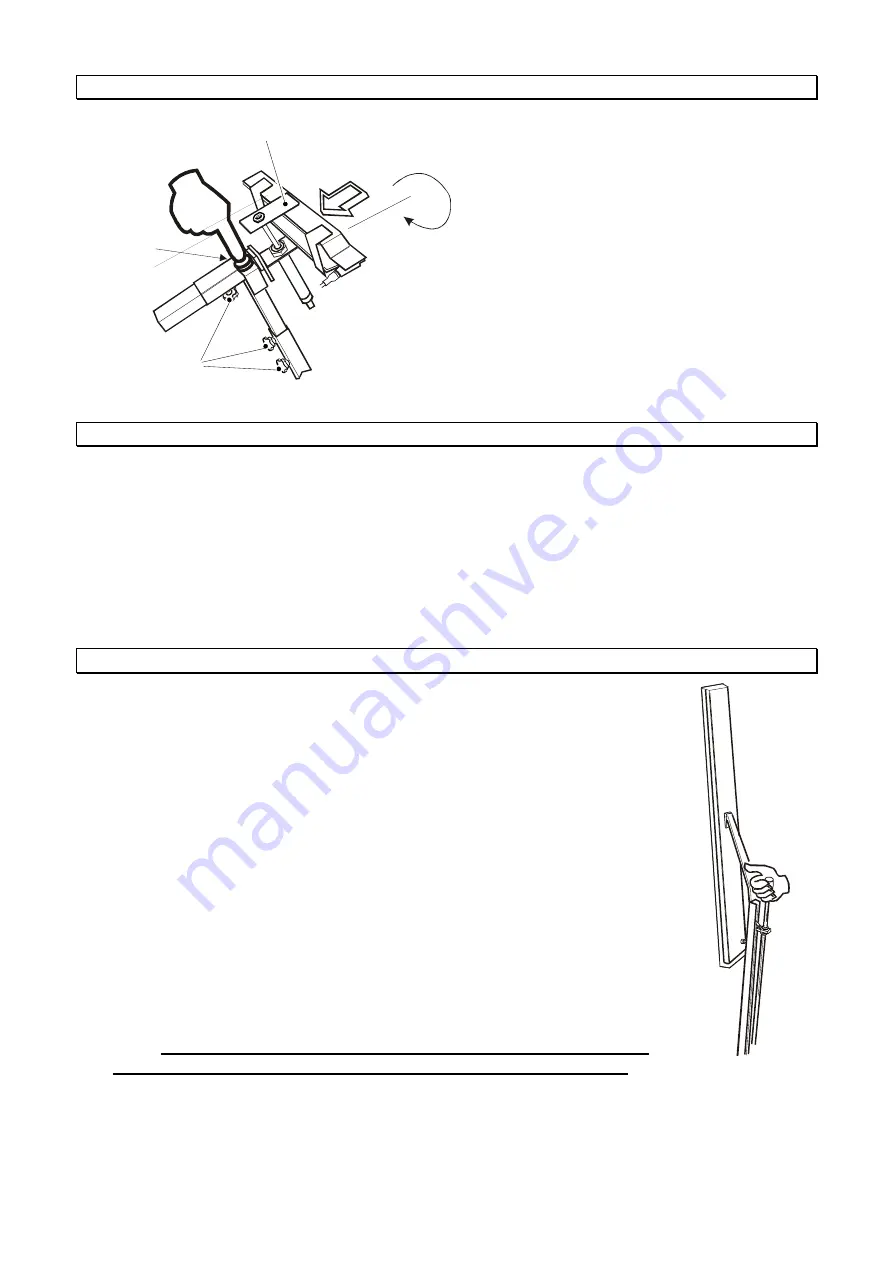
The functioning of clamps and arms is
automatic. You just need to insert the
garments sleeves into the special slit;
as soon as Zeus notices the presence of
the sleeves, it will tighten the clamps.
If the sleeves are inserted incorrectly,
by pushing for a couple of seconds the
clamps opening button, the sleeves will
be freed. It is possible to adjust height
and distance of the clamps by using the
special knobs
(fig. 2).
You can also
turn the clamps on vertical position.
12.
USE OF PADDLE
The dummy is fitted with two paddles
(fig. 1)
: the front paddle is used for closing the
opening of the garment without having to button it, whereas the back one is used for
fastening of the slits or the central pleat of the garment. The operator can release the
paddle by grasping the handle and pulling the racket with one’s thumb
(fig. 3)
. In
addition, by turning the handle clockwise or anticlockwise, you can adjust the
pressure exerted by the paddle on the garment, preventing it from slipping away or
being marked.
13.
SHOULDERS AND BLOWING MOTOR ADJUSTMENT
Upon the first working cycle and each time the fabric to iron is
changed, it is necessary to set up the following adjustments:
1.
Place the garment on the body former and adjust the shoulders
width by means of the proper knob
(fig. 1)
. The body former
shoulders must coincide with the garment shoulders.
2.
Regulate the paddle (see point
12
).
3.
Adjust the air register according to the program which has been
chosen or according to your requirements. Example: when
program 1 is selected
, “
CHILDRENS SWEATSHIRT ADJ. AIR 1
”
will
be displayed.
N.B.
The blowing motor is three-phase. Should it work,
but not blow, invert two phases on the electric feeding.
SLIT FOR SLEEVE
INTRODUCTION
CLAMPS
CLAMPS OPENING
BUTTON
ADJUSTMENT
KNOBS
Fig. 2
Fig. 3


