background image


DIP No. 

Description 

1-4 channel 

impedance setting 

E1 reference CLK  Reserved 

75

Ω


Setting 75Ω:E1 impedance 75Ω 

Setting 120Ω:E1 impedance 120Ω 

DIP No.6/7/8 

default:120Ω position 

120Ω 

Reset 

Restore to factory default setting by pressing 5 second 

Power 

The device supports two voltage, AC220V or DC-48V input. Allows 
power fluctuations in the range of 10%. Please note that there are 
positive and negative polarity DC input. DC-48V: POWER connect to 
the cathode, RETURN then negative. 

2.4 Turning Off the Unit   


To turn off the unit:   
•      Remove the power cord from the power source.   

Summary of Contents for BD-2FE1-IP-G

Page 1: ...Ethernet Multiplexer MODEL BD FE1 IP G BD 2FE1 IP G BD 4FE1 IP G User Manual SHANGHAI BAUDCOM COMMUNICATION DEVICE CO LTD Website http www baudcom com cn Email info baudcom com cn Tel 86 21 37709251 F...

Page 2: ...iguration 13 3 1 User Login 13 3 2 System Settings 13 3 3 Service Configuration 15 Chapter 4 Technical Specifications 21 4 1 Operating Environment 21 4 2 Power Supply Section 21 4 4 E1 Interface 21 4...

Page 3: ...be held liable for any harm or damage resulting from any omissions inaccuracies or errors contained in the manual Brief Introduction This User Manual describes the installation and operation of E1 com...

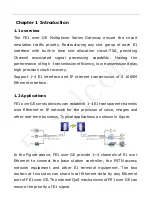
Page 4: ...nternet transmission of 4 1000M Ethernet interface 1 2 Applications FE1 over GE series devices can establish 1 4 E1 transparent channels over Ethernet or IP network for the provision of voice images a...

Page 5: ...N 802 1q Support software and firmware upgrade Support Ring Protection recovery time 20ms and 1 1 Protection Support NTP SNMP RSTP protocol Support TACACS Support Qos setting Support for log managemen...

Page 6: ...ability adaptive timing Stable 50ppb Output Jitter adaptive timing 0 03UI Ethernet Interface Number of Ports 2 port UTP and 2 port SFP Interface Type 10 100 1000M GE RJ45 ports and 1000M SFP optical p...

Page 7: ...ernal from internal oscillator optional External E1 via dedicated port optional Loopback derived from the E1 T1 receive line Adaptive regenerated from Ethernet link Adaptive Clock accuracy 10 ppb Jitt...

Page 8: ...port telnet web SYSLOG Activity logging user activities TACACS SNTP Out of Band Ethernet Management Any one of the User Ethernet port should be configured as an out of band management port Power Requi...

Page 9: ...ver GE requires no operator attention except for occasionally monitoring the front panel indicators Intervention is only required when the unit must be configured to its operational requirements or wh...

Page 10: ...atus Description SYS YELLOW System Operating Indication Blinking System is Working Off System is Abnormal PWR GREEN Power Indication On Unit is Powered Off Unit is Off E1 Indicator RED E1 LOS Indicati...

Page 11: ...Differential Clock Input Pinouts Pin 1 2 3 4 5 6 7 8 Func tion NC NC NC CLK IN CLK IN NC NC NC Ethernet Interface Supports 2 port UTP 2 port SFP Data rate 1000Mbps Console Interface The Console inter...

Page 12: ...20 Reset Restore to factory default setting by pressing 5 second Power The device supports two voltage AC220V or DC 48V input Allows power fluctuations in the range of 10 Please note that there are po...

Page 13: ...sed configuration interface this configuration program is suitable for any MS Windows or UNIX platforms browser for example Enter 192 168 0 168 in the address bar press Enter you will see the login sc...

Page 14: ...IP address subnet mask and default gateway display network MAC 3 2 3 System Reboot This page can restart the device or restore the factory default configuration 3 2 4 System Upgrade Software or firmw...

Page 15: ...n Equipment web pages default English version of this page can be switched in the Chinese and English version 3 3 Service Configuration 3 3 1 Simulation Gateway Configuration Support four network prot...

Page 16: ...hould set to the remote device s source IP MAC 3 3 2 E1 Branch Configuration Set E1 frame mode E1 timeslot frame size RTP timestamp mode the clock recovery mode E1 line loopback function enabled and d...

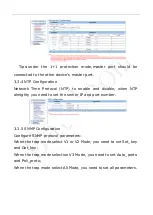
Page 17: ...e and disable when NTP almighty you need to set the server IP and port number 3 3 5 SNMP Configuration Configure SNMP protocol parameters When the trap mode select V1 or V2 Mode you need to set Set_ke...

Page 18: ...eed to set the authentication IP audit IP the session IP and other related parameters 3 3 7 Syslog Configuration Logging turned on and off open the Local Logging click View The Current Log in system l...

Page 19: ...Configuration 3 4 1 Port s QoS Configuration Select the port Qos debug mode Qos mode the default priority setting the system default port priority 3 4 2 Tos Map Set Tos value and the priority mapping...

Page 20: ...riority mapping table 3 5 Statistical Information 3 5 1 Ethernet Statistics Display Ethernet port statistics information 3 5 2 E1 Statistics E1 port statistics information display 3 5 3 E1 Alarm Displ...

Page 21: ...gnetic interference 4 2 Power Supply Section Input Voltage AC 220V or DC 48V 4 4 E1 Interface Number of E1 Ports 4 Data Rate 2 048 Mb s 50ppm Line Code HDB3 Interface Impedance RJ45 75 unbalanced 120...

Page 22: ...face Standard IEEE 802 3 802 1P 802 1Q Connector Type RJ45 with LEDs 4 6 Ethernet Optical Interface Type 1000Base FX Compliance IEEE 802 3 802 1P 802 1Q Connector Type LC SFP Wavelength 1310 1550nm Tr...

Page 23: ...n a properly When device is powered up do not connect or disconnect data cable without due cause 4 Grounding The product should be linked to the ground through earthed conductor To avoid electric shoc...

Page 24: ...ording to the list of contents specified in this manual Contact the Company or its distributors and agencies immediately should abnormal circumstances arise 5 3 Power Supply Check the power supply of...

Page 25: ...nt requires the connection turn on the power the device enters the normal working condition If the device is not working properly see Troubleshooting such as the problem still persists please follow t...

Page 26: ...ted Troubleshooting is through the following steps First check the E1 terminal equipment such as the PCM device whether it is shutdown Second check if the E1 connection is reliable whether the E1 cabl...

Page 27: ...ponding L2TPv3 IPv4 MEF corresponding MEF MPLS corresponding MPLS 7 Whether both sides select the RTP header both sides choose the RTP header or both sides do not choose the RTP Header 8 UDP mode whet...

Page 28: ...her the end of E1 cable is dropped or poor contact or line broken 13 Both ends of the gateway are set to the differential clock mode but common clock source does not exist A 1 Downstream reporting sli...

Page 29: ...ut both ends of the device work in loopback clock recovery mode 7 Different sources clock of both ends of the device but both ends of the device set to be at system clock operating mode 8 One end of t...

Page 30: ...es free 2 The Warranty does not cover the follows and the maintenance ices will be charged 3 Over 36 months from the date of purchase 4 User fails to provide certificate of purchase date and the produ...

Page 31: ...the Company throughout the country 5 For any damage caused due to improper operations the company does not assume any responsibility If indeed the product itself causes damages the company only assume...

Page 32: ......

Page 33: ......

Reviews: