Page 7
For technical questions, please call 1-888-866-5797.
Item 63445
S
AFET
y
Op
ERA
TION
M
AINTENAN
c
E
S
ETU
p
Assembly/Mounting
cAUTION!
Transport planer using carrying Handles only, do not lift with Rollers.
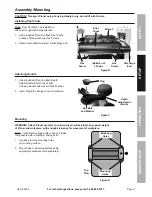
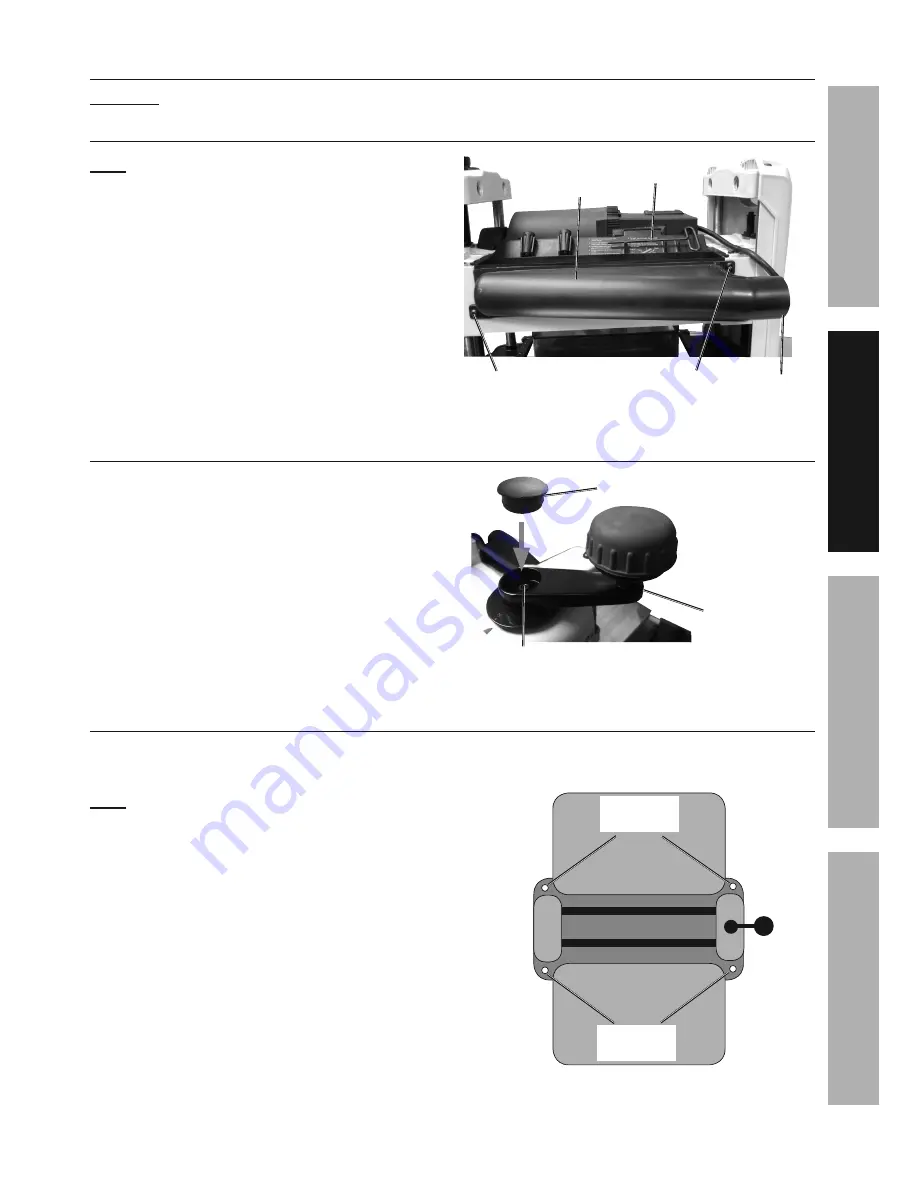
Installing Dust chute
Note:
Dust Chute may be installed in
either left or right discharge direction.
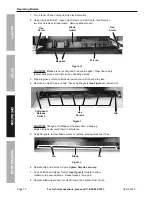
1. Using included Wrench, attach Dust Chute
to back of Planer with two Hex Screws.
2. Attach dust collection system to discharge end.
Discharge
End
Hex
Screw
Hex
Screw
Wrench
Dust
chute
(Rollers not
shown)
Figure B
Attaching Handle
1. Using included Wrench, attach Depth
Adjustment Handle to top of right
Carrying Handle with Hex Bolt and Washer.
2. Insert Plug into opening to cover hardware.
Hex Bolt
and Washer
Depth
Adjustment
Handle
plug
Figure c
Mounting
WARNING! Attach planer securely to solid and level surface that can support weight
of planer and workpiece, with enough clearance for movement of workpiece.
Note:
Verify that mounting surface has no hidden
components before drilling or driving bolts.
1. Use base to mark mounting holes
on mounting surface.
2. Mount base to mounting surface using
appropriate hardware (sold separately).
Top
View
Mounting
Holes
Mounting
Holes
Figure D


