Page 10
For technical questions, please call 1-888-866-5797.
Item 64121
S
AFET
y
Op
ERA
TION
M
AINTENAN
c
E
S
ETU
p
Operating Instructions
Read the ENTIRE IMpORTANT SAFETy INFORMATION section at the beginning of this
manual including all text under subheadings therein before set up or use of this product.
Tool Set Up
TO pREVENT SERIOUS INJURy FROM AccIDENTAL OpERATION:
Make sure that the Trigger is in the off-position and unplug the tool from its
electrical outlet before performing any procedure in this section.
Drill Bit Installation
cAUTION!
Wear heavy-duty work gloves
to provide protection when inserting and
removing drill bits. Drill bits become very hot during
use. Do not remove drill bit until the bit has cooled.
1. Insert Chuck Key into Chuck, then turn Key
counterclockwise until Chuck’s jaws are open
enough for the bit to fit between jaws.
2. Use a bit designed for the workpiece type. Place
bit into the drill inside the Chuck’s Jaws.
3. Turn the Key clockwise until the bit is held securely
in place, centered between the Chuck’s Jaws.
NOTIcE: Use sharp bits. Dull, bent, or
damaged bits may cause binding and
put stress on the drill and/or bit.
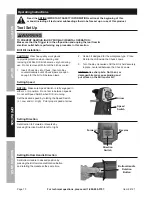
Setting Speed
NOTIcE:
Make sure Speed Switch is fully engaged in
either L or H position. Do not set in between speeds.
Do not set Speed Switch when Drill is running.
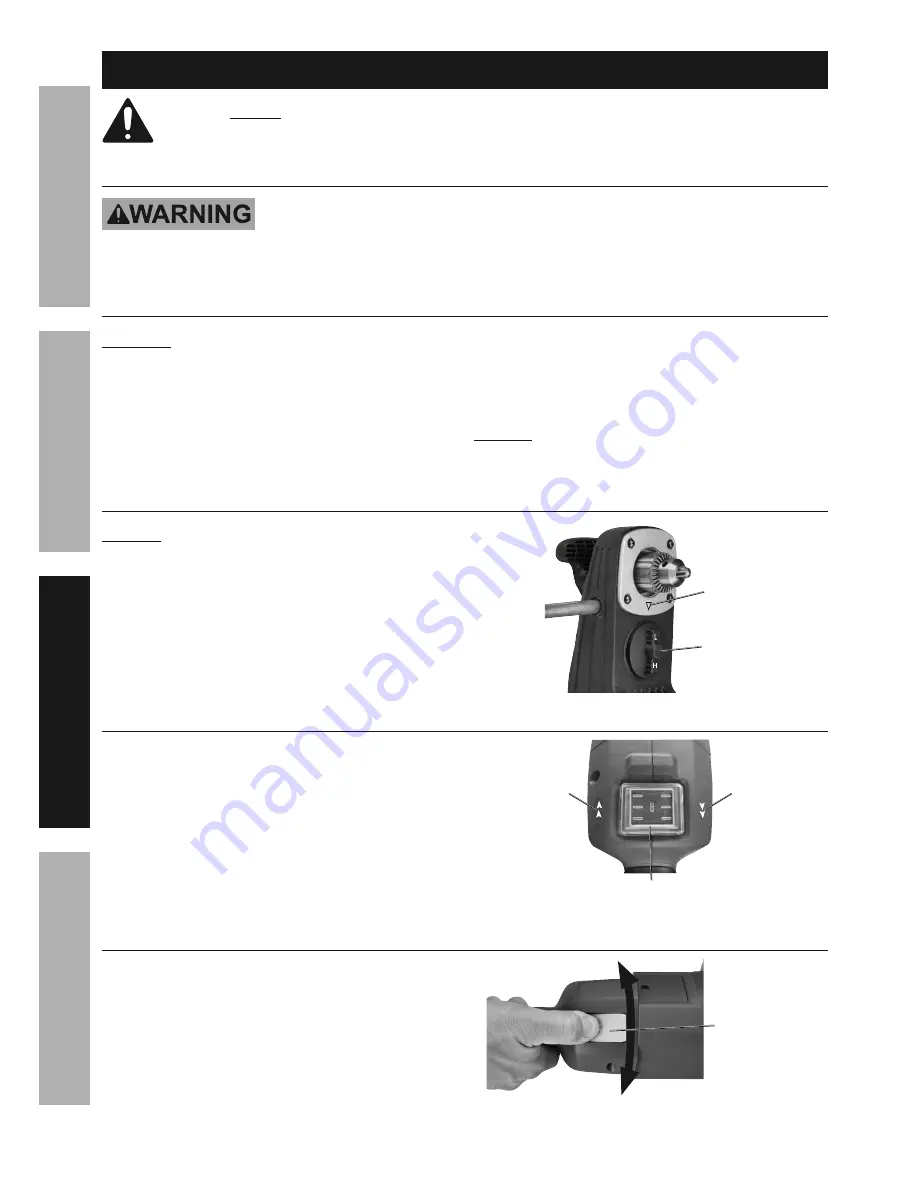
Set the desired speed by rotating the Speed Switch
(L = Low and H = High). Point proper speed at arrow.
Arrow
Speed
Switch
Setting Direction
Set direction to Forward or Reverse by
pressing Direction Switch to left or right.
Forward
Reverse
Direction
Switch
Setting Bottom Handle Direction
Set Bottom Handle to desired position by
pressing the Bottom Handle Rotation Button
and rotating the Handle at the same time.
Bottom Handle
Rotation
Button


