Page 9
For technical questions, please call 1-888-866-5797.
Item 58253
SA
FE
TY
OP
ERA
TI
O
N
MAINT
ENANC
E
SE
TUP
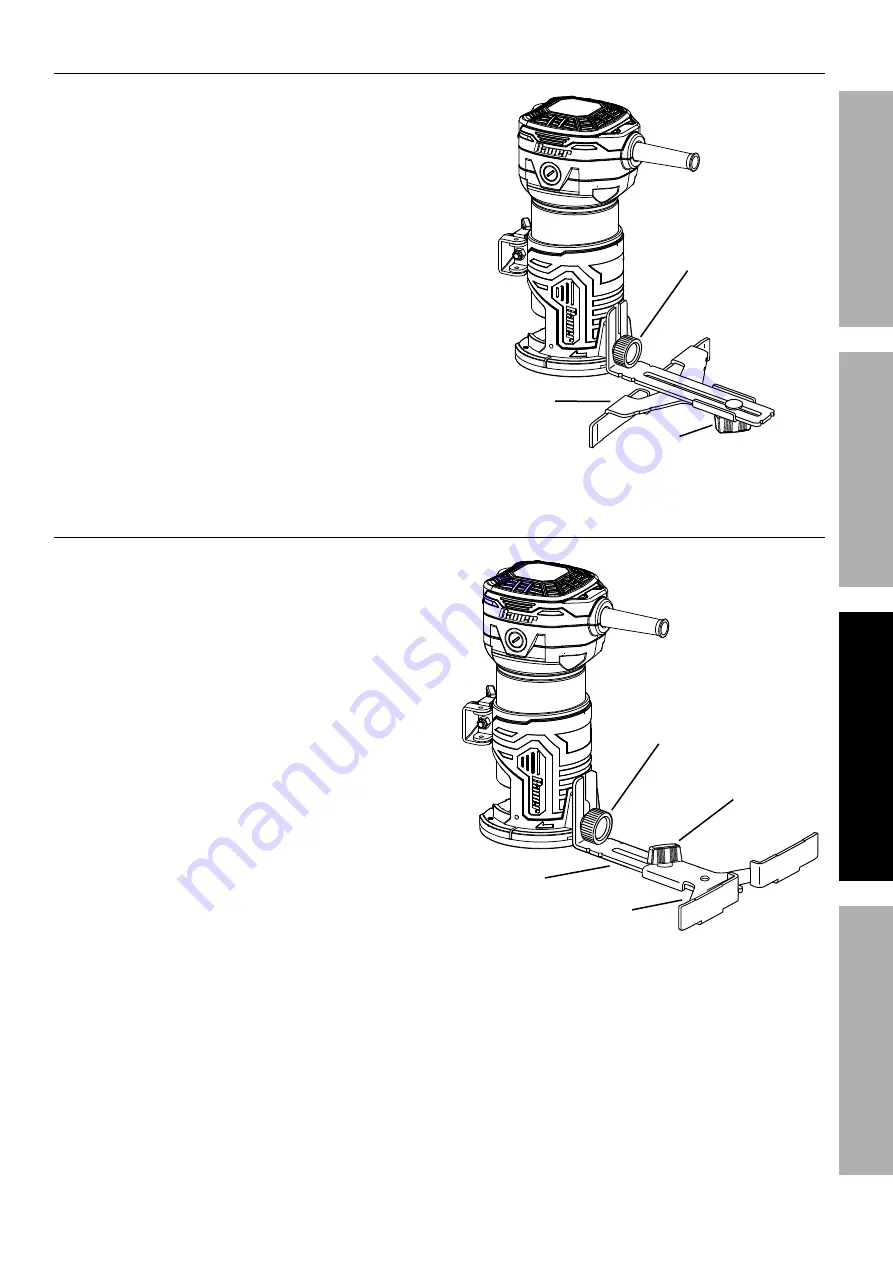
Installing the Fence
Use the Fence to make cuts parallel to
the edge of a workpiece, or following a
guide clamped onto the workpiece.
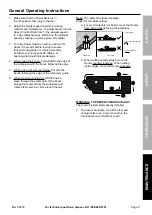
1. Install the Fence Bracket with the Fence
facing inward, and the flanges down.
2. Using the Attachment Knob, attach
the Fence Assembly to the Router,
as shown in
Figure A
.
3. After measuring the proper distance
from the router bit to the Fence, tighten
the Fence using the Wing Nut.
4. Adjust the cutting depth as described in
Adjusting Cutting Depth
on page 8.
5. Make a test cut on a piece of scrap material
to ensure that the adjustment is correct.
Fence
Attachment
Knob
Wing
Nut
Figure A: Installing the Fence
Setting up a Temporary Guide
Clamp a temporary guide to the workpiece
to make a straight cut which does not
parallel the edge of the workpiece.
1. Clamp a suitable straight board across the
workpiece parallel to the desired location of the cut.
2. Install the Fence Assembly with the Fence
facing outward and up, as shown in
Figure B
.
3. After measuring the proper distance from the
router bit to the temporary guide, tighten the Fence
using the Attachment Knob and Wing Nut.
4. Make a test cut on a piece of scrap material
to ensure that the adjustment is correct.
Fence
Attachment
Knob
Fence
Bracket
Wing
Nut
Figure B: Fence Installation for
Use with a Temporary Guide


