Page 11
For technical questions, please call 1-888-866-5797.
Item 57946
Sa
FE
ty
Op
E
ra
ti
O
n
Maint
E
nanc
E
S
E
tup
General instructions for use
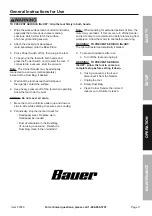
tO prEVEnt SEriOuS inJury: Grip the tool firmly in both hands.
1. Wipe the work surface clean of all dirt and debris,
especially that of previous coarser sanding
sessions, which will scratch the surface
of a finer grit sanding session.
2. Attach the desired grit Sandpaper
(sold separately) onto the Base Plate.
3. Press Power Switch off (0), then plug in the tool.
4. To begin, grip the tool with both hands and
press the Power Switch on (
i
) to start the tool. If
connected to a vacuum, start the vacuum.
note:
The Corner Sander may be alternately
connected to a vacuum (sold separately),
instead of the Dust Bag, if desired.
5. Wait until the tool has reached full speed,
then gently contact the surface.
6. Keep heavy pressure off of the tool when operating.
Allow the tool to do the work.
nOticE:
Do not cover air vents.
7. Move the tool in a uniform pattern up and down or
side to side while sanding to ensure even sanding.
8. Periodically, stop the tool and check for:
• Sandpaper wear. Replace worn
Sandpaper as needed.
• Dust accumulation in the Dust Bag
(if not using a vacuum). Detach the
Dust Bag, clean it, then reinstall it.
note:
When sanding for extended periods of time, the
motor may overheat. If this occurs, turn off the Sander
and let it come to a complete stop before removing from
workpiece. Allow the motor to cool before resuming.
WarninG! tO prEVEnt SEriOuS inJury:
The tool will restart automatically if stalled.
9. To prevent accidents, after use:
a. Turn off the tool and unplug it.
WarninG! tO prEVEnt SEriOuS
inJury: allow the tool to come to a
complete stop before setting it down.
b. If using a vacuum, stop it and
disconnect it from the Sander.
c. Unplug the tool.
d. Empty Dust Bag.
e. Clean Corner Sander, then store it
indoors out of children’s reach.


