- 2 mm
ELITE 50_III
ELITE 50_III
3
a:
b:
c:
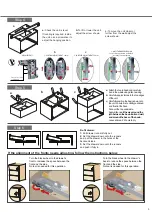
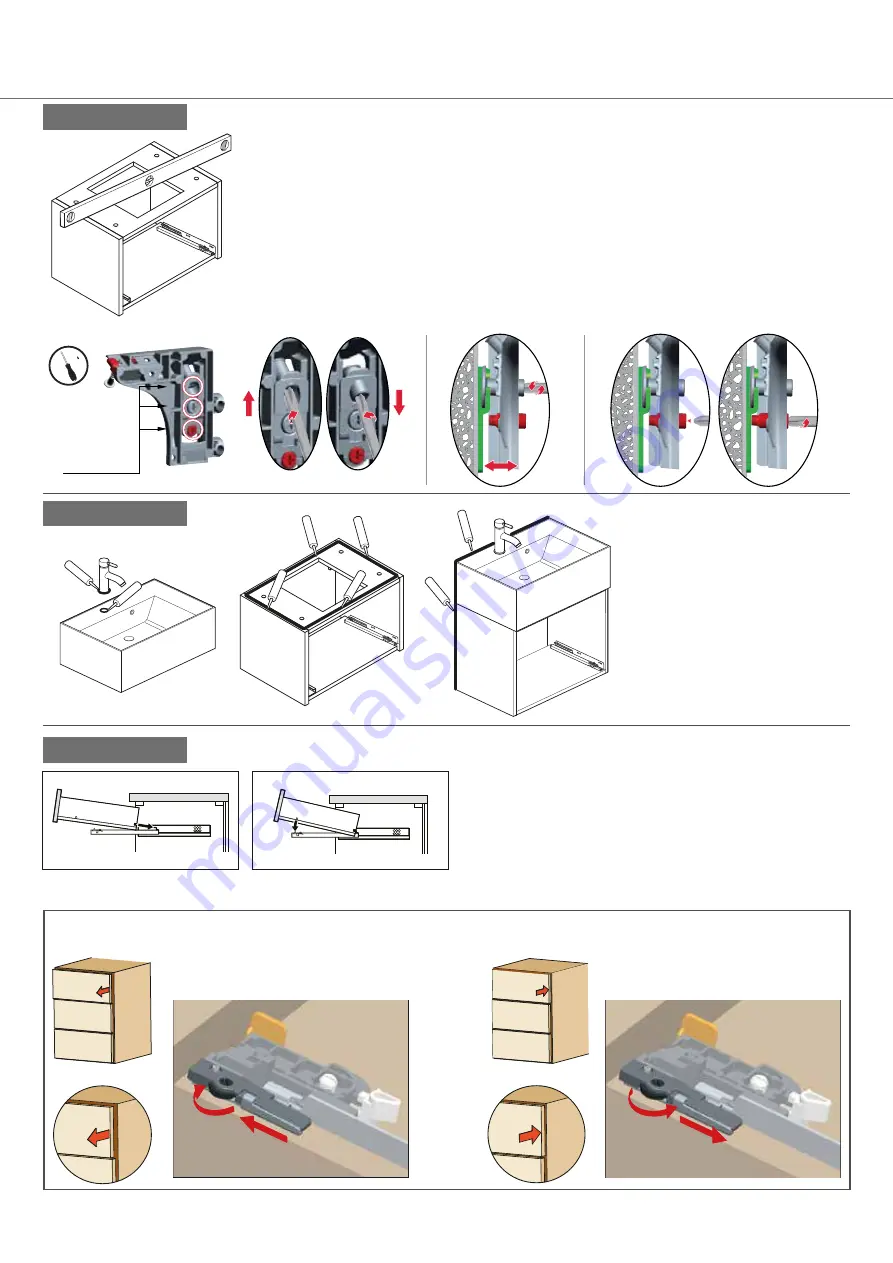
Attach the tap to basin and carefully
bed in the waste using silicone
only.
Carefully apply silicone to the top edges
of the unit.
Carefully position the basin down onto
the unit, ensure it is centrally positioned
and flush at the back.
Connect the tap and waste.
Apply silicone
all the way around the
join between the basin/unit and wall,
and around the base of the basin.
Leave silicone, 24 hours to dry.
Turn the black wheel to the drawer's
front to increase the space between the
front and the side.
No tool is needed for this operation.
Turn the black wheel to the drawer's
back to reduce the space between the
front and the side.
No tool is needed for this operation.
Step 4
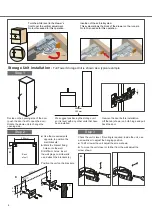
a:
Check the unit is level.
If leveling is required: inside
the unit, use a screwdriver to
adjust the hanging position.
b:
To lift or lower the unit
adjust the screw shown.
c:
To move the unit closer or
further from the wall adjust the
screw shown.
b
a
c
Step 5
Step 6
a
c
b
1
2
3
1: VERTICAL ADJUSTMENT 13mm
2: IN-DEPTH ADJUSTMENT 12mm
3: ANTI-TURNOVER LOCKING
Stop screwing the red bolt when
it touches the wall plate
ADJUSTMENTS
Slot for cross PZ2
screwdriver
If the alignment of the fronts needs adjusting, follow the instructions below.
+ 2 mm
Re-fit drawer:
1:
Pull drawer runners fully out.
2:
Set the drawer down onto the runners
and put the drawer in the holes at the
backand sides.
3:
Set the drawer down onto the runners
and push it fully in.

