Avoid heavy impact to or falling down of the measuring tool. Damage to
the measuring tool can impair its accuracy.After heavy impact or falling
down, check the angle accuracy
between the 0° and 90° laser line with the angle of a precision square.
Switching On and Off
To switch on the measuring tool, briefly press the On/Off switch 1.Im-
mediately after switching on, the measuring tool sends out the two
laser lines at 0 ° and 90°.
Do not point the laser beam at persons or animals and do not look into
the laser beam yourself, not even from a large distance.
To switch off the measuring tool, push the On/Off switch 1 again.
Do not leave the switched on measuring tool unattendedand switch the
measuring tool off after use. Other persons could be blinded by the
laser beam.
Working Advice
Always place the measuring tool level on the floor or fasten it plane
against the wall. When placing down or fastening unevenly,the angle
will not be precisely 90 °.
Always use the centre of the laser line for marking. The width of the
laser line changes with the distance.
Never use the laser lines that the measuring tool standing on the floor
projects on the wall for alignment. The measuring tool is not self-level-
ling. Therefore, the line on the wall is distorted.
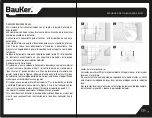
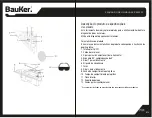
The reference point for alignment of tiles is the intersecting point P of
the laser lines, directly in front of the measuring tool. To project an
angle, the measuring tool must be rotated at this intersecting point, see
figured.
Position the measuring tool only on a clean wall holder 12.The measur-
ing tool cannot stand level on an uneven, soiled wall holder surface,
which could lead to faulty measuring results.
Positioning the Measuring Tool
When working on the floor, place down the measuring tool with the
bottom plate 11 facing the floor. Place the T-edge 5 of the tool against
a wall so that the 0° laser line runs parallel to the reference line (e.g. a
wall), see figure A. Measure the clearance between laser line and refer-
ence line directly at the measuring tool and as far away as possible
from the measuring tool. Align the measuring tool in such a manner that
both clearances are equal.
29

