37
WATER SUPPLY
•
Water supply: cold water only
•
Tap:
3/4” threaded hose connection
•
Pressure:
100-1000 kPa (1-10 bar).
WATER INLET HOSE
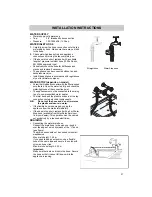
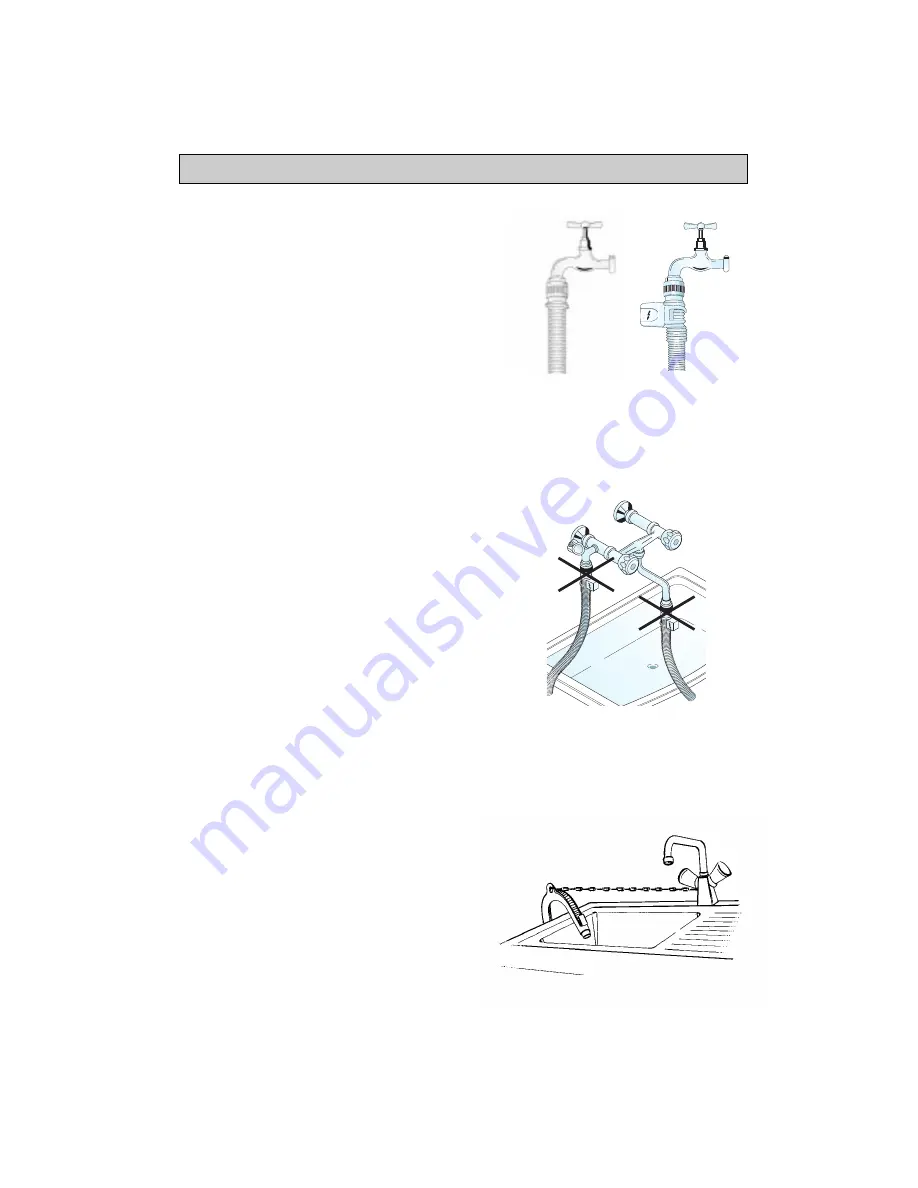
1. Carefully screw the hose connection onto the tap
preferably by hand. Make sure there are no kinks
in the hose.
2. Check water-tightness of tap and appliance
connections by turning the tap completely on.
•
If the hose is too short, replace it with a suitable
length of pressure resistant hose (1000 kPa min,
EN 50084 approved type).
•
Periodically check the hose for brittleness and
cracks and replace if necessary.
•
The appliance can be connected without an anti-
backpressure valve.
•
Install the appliance in accordance with regulations
of your local water company.
WATER STOP (depends on model)
•
Screw the threaded connector with the filter inserted
onto the tap. Open the water tap fully and check the
water-tightness of the connection point.
•
The appliance must not be connected to the mixing
tap of a non-pressurized water heater.
•
The inlet hose and the plastic enclosure at the tap
connection contain electrical components.
N.B.
Do not cut the hose and do not immerse
the plastic enclosure in water.
•
If the flexible hose is damaged, unplug the
appliance from the mains immediately.
•
If the hose is too short, replace it with a 3 m Water
Stop hose (available from After-Sales Service or
from your dealer). This operation must be carried
out exclusively by a licensed electrician.
DRAINING
•
Connecting the water drain hose.
Connect the drain hose to the siphon or hook it
over the edge of a sink by means of the “U” bend
(see figure).
The drain hose should not be hooked onto small
washbasins.
Max. drain height: 1.25 m
If you need to add an extension, use a flexible
hose of the same type and secure the union with
screw-on hose clips.
Max. drain hose length: 2.50 m
Important:
Make sure there are no kinks in the hose. Secure
the hose so that it cannot fall down while the
appliance is running.
INSTALLATION INSTRUCTIONS
Straight hose
Water Stop hose

