background image

4.3 Driveshaft Dimension

To accompany the variety of 3 point hitch geometry 

available today, the driveshaft can be too long for 

some machines or too short for others. It is very 

important that the driveshaft be free to telescope 

but not to bottom out when going through its 

working range. If the driveshaft bottoms out, the 

bearings on both the machine and tractor PTO 

shaft will be overloaded and fail in a short time.

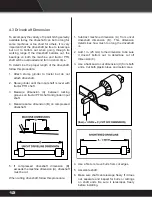
To determine the proper length of the driveshaft, 

follow this procedure:

1.  Attach stump grinder to tractor but do not 

attach driveshaft.

2.  Raise grinder until the input shaft is level with 

tractor PTO shaft.

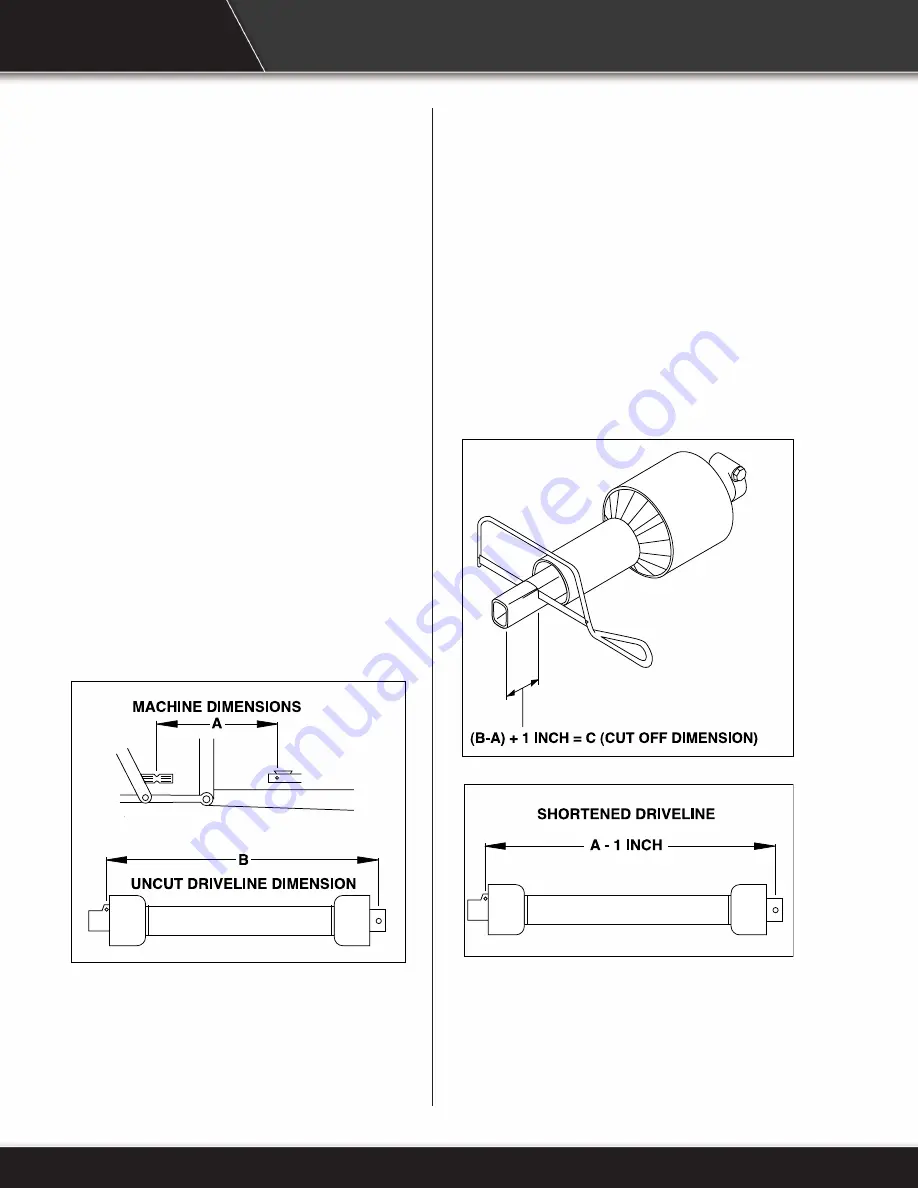
3.  Measure dimension (A) between locking 

grooves on tractor PTO shaft and grinder input 

shaft.

4.  Measure same dimension (B) on compressed 

driveshaft.

5.  If compressed driveshaft dimension (B) 

exceeds the machine dimension (A), driveshaft 

must be cut.

When cutting driveshaft, follow this procedure:

1.  Subtract machine dimension (A) from uncut 

driveshaft dimension (B). This dimension 

determines how much too long the driveshaft 

is.

2.  Add 1 in. (25 mm) to the dimension to be sure 

it doesn’t bottom out, to determine cut off 

dimension (C).

3.  Use a hacksaw to cut dimension (C) from both 

ends. Cut both plastic tubes and metal cores.

4. 

Use a file to remove burrs from cut edges.

5.  Assemble shaft.

6.  Make sure shaft can telescope freely. If it does 

not, separate and inspect for burrs or cuttings 

on shaft ends. Be sure it telescopes freely 

before installing.

12

Summary of Contents for STUMP BLASTER 3P34

Page 1: ...3P24 3P34 and 3P40 STUMP GRINDER OPERATOR S MANUAL Issue Date July 2021 ...

Page 2: ...11 4 3 Driveshaft Dimension 12 5 OPERATION 13 5 1 Preparation For Use 13 5 2 Pre Operation Check List 14 5 3 Machine Components 15 5 4 Attach To Tractor 15 5 5 Detaching Stump Grinder From Tractor 18 5 6 Transporting 19 5 7 Adjusting Swing Speed 20 5 8 Carbide Teeth Break In 20 5 9 First Time User Tips 21 5 10 Field Operation 21 6 SERVICE AND MAINTENANCE 24 6 1 Service 24 6 1 1 Replace Cutting Tee...

Page 3: ... reference and to pass on to new operators or owners Call your Baumalight dealer distributor or the factory if you need assistance information or additional copies of the manuals 1 1 Overview When this machine is worn out and no longer in use it should be returned to the retailer or other party for recycling OPERATOR ORIENTATION The directions left right front and rear as mentioned throughout this...

Page 4: ...avoided could result in minor or moderate injury NOTICE NOTICE Indicates a situation that could result in damage to the equipment or other property 2 1 Safety Alert Symbol And Safety Words 2 2 Operational Hazards WARNING Prevent serious injury or death Read and understand this manual before operating stump grinder Always stop engine and remove key before leaving operators seat Never allow anyone n...

Page 5: ...ntact Baumalight at 866 820 7603 Prepare for Emergencies Be prepared in case of emergencies Keep a fire extinguisher and first aid kit close to the machine Keep emergency phone numbers close to your phone Know your address so emergency services can locate you if an emergency arises Replace Safety Signs Replace missing or damaged safety signs Safety signs are identified in Section 3 of this manual ...

Page 6: ...s are clear of machinery Relieve hydraulic pressure before disconnecting hydraulic hoses See your tractor Operator s Manual Raised Attachment WARNING Crushing hazard Raised unsupported stump grinder can fall resulting in death or serious injury Neverentertheareaunderaraisedstump grinder unless properly supported A raised stump grinder can lower unexpectedly resulting in death or serious injury NEV...

Page 7: ...ing serious injury Prevent the hazard by relieving pressure See tractor Operator s Manual before connecting or disconnecting hydraulic lines Verify all connections are tight before applying pressure Search for leaks with a piece of cardboard or wood Protect hands and body from high pressure fluids If an accident occurs see a doctor immediately Any fluid injected into the skin must be surgically re...

Page 8: ...866 820 7603 before you weld cut drill holes or make any other modifications Always use Baumalight replacement parts WARNING Moving parts can crush and cut Keep clear of moving components Follow lockout procedure before servicing WARNING Crushing hazard Before performing inspections service or maintenance Park machine on firm level surface Engage parking brake Turn engine off and remove key Place ...

Page 9: ...This page intentionally left blank 7 ...

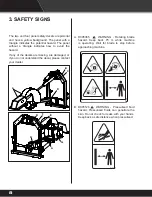
Page 10: ...ecals are missing are damaged or if you do not understand the decal please contact your dealer A B C D A G G F D E A D005365 WARNING Rotating blade hazard Keep back 75 m while machine is operating Wait for blade to stop before approaching machine D005365 B D005126 WARNING Pressurized fluid hazard Pressurized fluids can penetrate the skin Do not check for leaks with your hands Keep back a safe dist...

Page 11: ...n go to www P65Warnings ca gov D005262 D D005127 WARNING Pinch point crush hazard Do not reach into machine Keep away from machine D005127 E D005517 WARNING Remove key before servicing D005522 F D005125 WARNING Read and understand safety signs on the machine and operating instructions in this manual before operating machine D005125 G D005224 WARNING Rotating driveshaft Entanglement hazard Keep awa...

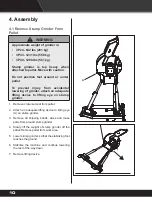
Page 12: ...fting eye on stump grinder 1 Remove crate material from pallet 2 Attach an adequate lifting device to lifting eye A on stump grinder 3 Remove all shipping bands wires and loose parts from around stump grinder 4 Slowly lift the weight of stump grinder off the pallet Remove pallet from work area 5 Lower stump grinder so that the stabilizing foot reaches the ground 6 Stabilize the machine and continu...

Page 13: ...screws A washers and cover B 2 Remove nut and bolt from drive line 3 Attach drive line C to gear box shaft D 4 Install nut and bolt in drive line 5 Install cover four washers and cap screws 6 Attach safety shield chain E as shown E A B C D 11 ...

Page 14: ...3 Measure dimension A between locking grooves on tractor PTO shaft and grinder input shaft 4 Measure same dimension B on compressed driveshaft 5 If compressed driveshaft dimension B exceeds the machine dimension A driveshaft must be cut When cutting driveshaft follow this procedure 1 Subtract machine dimension A from uncut driveshaft dimension B This dimension determines how much too long the driv...

Page 15: ...thout binding Remove any masking materials affixed during painting Inspect the tractor and any accessory equipment to verify that nameplates and all safety warning caution signs and decals provided with the equipment are in place and clearly visible Verify the three linch pins are securely fastened Visually inspect the unit before each start up Check for loose or missing parts and any damage that ...

Page 16: ...away and cannot bind or be pinched Each operation Check the cross bolts that secure the 9 pivot pins Each operation Verify the pins on each end of the drive shaft are secured Each operation Verify the safety chains on the drive shaft are securely attached to the cover Each operation Verify the cutting tips on the cutting wheel are tight Every 4 hours Grease 2 pins on the deflector shield Every 6 h...

Page 17: ...perate the tractor and stump grinder 1 Back up tractor to stump grinder with hitch points approximately in alignment 2 Engage tractor park brake and or place transmission in Park 3 Shut off engine and remove key 4 Attach lower links to grinder and retain using lynch pins A To avoid machine damage verify lynch pins are locked on lower links 5 Align top link with hole in top of frame and retain with...

Page 18: ...top link so that the stump grinderA frame is vertical to the ground WARNING Pressurized fluids can penetrate the skin Hydraulic hoses can fail due to physical damage age kinks and exposure Check hoses regularly Replace damaged hoses Use body and face protection while searching for leaks A tiny almost invisible leak can penetrate the skin thereby requiring immediate medical attention Use wood or ca...

Page 19: ...13 If equipped with S1050 Adapter Bracket Remove lock pins from positions G and pivot S1050 adapter brackets to a comfortable operating position Install lock pins at positions G G 17 ...

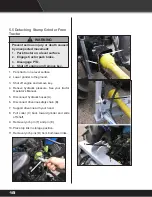
Page 20: ...nder to the ground 3 Shut off engine and remove key 4 Relieve hydraulic pressure See your tractor Operator s Manual 5 Disconnect hydraulic hoses A 6 Disconnect drive line safety chain B 7 Support drive line with your hand 8 Pull collar C back toward grinder and slide off shaft 9 Remove lynch pin F and pin E 10 Place top link in storage position 11 Remove lynch pins D from both lower links A 5 5 De...

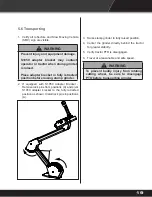
Page 21: ...porting grinder 1 Verify all reflectors and Slow Moving Vehicle SMV sign are visible WARNING Prevent injury and equipment damage S1050 adapter bracket may contact operator or tractor when stump grinder is raised Place adapter bracket in fully retracted position before raising stump grinder 2 If equipped with S1050 Adapter Bracket Remove lock pins from positions A and pivot S1050 adapter bracket to...

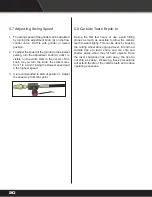
Page 22: ...est speed and 4 the highest speed 3 It is recommended to start at position 1 Adjust the speed up from that point A During the first few hours of use avoid hitting stones as much as possible to allow the carbide teeth to wear slightly This can be done by keeping the cutting wheel above ground level Brand new carbide tips are razor sharp and can chip and shatter easily when they hit hard objects Onc...

Page 23: ...h practice Do not expect to get the first stump done quickly WARNING Alwaysturnoffthetractoranddisengage the PTO drive before getting off the seat and approaching the cutting wheel WARNING Wear an approved respirator N95 Type as a minimum Follow local state and federal regulations The health effects from exposure to wood dust are due to chemicals in the wood or chemical substances in the wood crea...

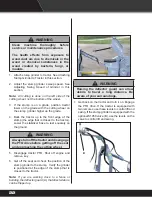
Page 24: ...o the tractor Lower the stabilizer base to rest squarely on the ground WARNING Alwaysturnoffthetractoranddisengage the PTO drive before getting off the seat and approaching the cutting wheel 5 Disengage tractor PTO Shut off engine and remove key 6 Get off the seat and check the position of the stump grinder to the stump Verify the grinder is positioned at the edge of the stump that is closest to t...

Page 25: ...here the roots branch out 11 Lift the stump grinder and swing it to the far right Back the tractor up slightly to position the stump grinder beside the new front edge of the stump 12 Make multiple passes over the front edge of the stump taking 3 6 in 76 152 mm on each pass 13 Reposition the tractor and stump grinder as needed until the entire stump has been removed to below ground level 14 Follow ...

Page 26: ...If an accident occurs see a doctor immediately Any fluid injected into the skin must be surgically removed within a few hours or serious infection may result WARNING Prevent serious injury or death caused by unexpected movement 1 Park tractor on a level surface 2 Engage tractor park brake 3 Disengage PTO 4 Shut off engine and remove key WARNING Drilling sawing sanding or machining wood products ca...

Page 27: ...ue Note Parts breakdown can be found on Baumalight s website www baumalight com B A 1 Park tractor and grinder on a level surface 2 Lower grinder to the ground 3 Place wood block under cutting wheel and lower cutting wheel to wood block 4 Shut off engine and remove key 5 Relieve hydraulic pressure See your tractor Operator s Manual 6 Remove hose B from cylinder 7 Remove quick coupler and or adapte...

Page 28: ...OEM Part Number 71R8121UCKR80V6 Dimension A 0 236 in 6 mm Dimension B 1 12 in 28 5 mm 4 Disk 165 Hp 1 000 rpm OEM Part Number CSHN086U2R100W8 Dimension A 0 275 in 7 mm Dimension B 1 14 in 29 mm Binacchi Drivehafts 2 Disk 68 Hp 540 rpm OEM Part Number B6140EA60255 B6N121USA60255 Dimension A 0 236 in 6 mm Dimension B 1 1 in 28 mm 4 Disk 80 Hp 540 rpm OEM Part Number B8N111USA60307 B8 140EA60307 Dime...

Page 29: ...r faster and are more prone to chipping With daily use expect to replace 5 to 10 teeth per week See Replace Cutting Teeth in this section Every 2 hours Deflector Shield Pins Lubricate pins so deflector can move freely Every 6 hours Pivot Pins Lubricate pivot pins Every 10 hours Gearbox Oil Change gear box oil Use synthetic 90W gear oil Capacity is 1 5 L 1 5 qts Every 200 hours Cutting Wheel Retain...

Page 30: ...Lubricate deflector shield pivot points every 6 hours of use 6 2 1 Every 6 Hours Lubricate pivot pins every 10 hours of use 6 2 2 Every 10 Hours 28 ...

Page 31: ...d block under cutting wheel and lower cutting wheel to wood block 4 Shut off engine and remove key 5 Remove drain plug A 6 Drain oil and install plug 7 Remove fill check plug B 8 Add synthetic 90W gear oil until oil comes out of hole 9 Replace fill check plug A B 6 2 3 Every 200 Hours 29 ...

Page 32: ...ss from each other Striking the rotor with a hammer may be necessary to unseat from shaft 6 Lower grinder so cutting wheel touches the ground 7 Loosen gearbox mounting bolts and move gearbox outward B 8 Safely secure cutting wheel C in a vertical position 9 Keep a safe distance from grinder and raise grinder up and away from cutting wheel C C 6 2 5 Install Cutting Wheel 1 Safely secure cutting whe...

Page 33: ...s idled down as this will decrease the output power of the engine Take smaller passes less cutting to decrease the strain on the clutch Turn the flow control knob to a lower number 1 to reduce the strain on the slip clutch Be careful when tightening the tension setting on the slip clutch as this could put excess strain on the gear box Tractor is not able to lift grinder Tractor is too small Move l...

Page 34: ...ockout power source before adjusting or servicing 1 Disengage tractor PTO Shut off engine and remove key 2 Using a marker scribe a line A across the exposed edges of the clutch plate and friction discs 3 Loosen each compression nut B exactly two revolutions to free clutch friction discs 8 1 Storing Grinder A B 4 Start tractor and run driveshaft at a low idle to slip the friction discs This will re...

Page 35: ...o make repairs to the product or affect the replacement of defective parts which will be done at no charge within a reasonable time after the receipt of the product Units or parts should be returned at the customer s expense to the nearest repair location or Authorized Service Centre Pack unit in a strong carton and pad tightly to avoid damage Damage in transit is not covered by warranty Include o...

Page 36: ...MTB MFG INC CORPORATE HEADQUARTERS 4575 Powell Rd Wallenstein Ontario Canada N0B 2S0 Phone 519 698 9864 Toll Free 866 820 7603 Fax 519 698 1087 www baumalight com 34 ...

Reviews: