background image

Installation 

IMPORTANT: Before installation and usage read 
all the instructions and make sure that the 
voltage (V) and the frequency (Hz) indicated on 
the rating plate are exactly the same as the 
voltage and frequency in your home. The rating 
plate can be found on the front left edge of the    


        inside of the refrigerator. 

 
The manufacturer declines all responsibility in the event of the installer 
failing to observe all the accident prevention regulations in force, 
which are necessary for normal use and the regular operation of the 
electric system. 
 

Electrical connection 
 

YOUR FRIDGE FREEZER IS INTENDED FOR FITTED 
AND PERMANENT INSTALLATION. 

We recommend that the appliance is connected by a 
qualified electrician, who is a member of the N.I.C.E.I.C. 
and who will comply with the I.E.E. and local regulations.


o


Your refrigerator comes supplied with a 13 amp plug fitted. If in 
future you need to change the fuse in this plug, then a 13 amp 
ASTA approved (BS 1362) fuse 

must

 be used. 


o


The wiring in the mains lead is coloured as follows: 

Brown 


Live 

Blue   


Neutral 

Green and yellow 


Earth 


o


As the colours of the wires in the appliance’s mains lead may not 
correspond with the coloured markings identifying the terminals 
in your spur box, please proceed as follows: 


The 

brown wire 

must be connected to the terminal marked “L” 

(live), or coloured 

red

 
The 

blue wire

 must be connected to the terminal marked “N” 

(neutral), or coloured 

black

 
The 

green and yellow wire

 must be connected to the terminal 

marked “E” (earth), or by the earth symbol, or coloured 

green 

and yellow


o


When the connection is completed, no stray strands or cut wire 
should be present. The cord clamp must be secured over the 
outer sheath. 


20

Summary of Contents for BF337SS

Page 1: ...s BF337SS Frost free fridge freezer...

Page 2: ...struction Manual contains important information including safety installation points which will enable you to get the most out of your appliance Please keep it in a safe place so that it is easily ava...

Page 3: ...Control panel 11 Turning on the appliance and setting the thermostat 12 Selecting superfreeze mode 13 Selecting holiday mode 13 Arranging and storing food in the fridge section 14 The freezer compart...

Page 4: ...off directly behind the appliance to prevent misuse This should be undertaken by a competent person Disable the door lock to make sure that children cannot get stuck inside the appliance o The packag...

Page 5: ...her purpose or it is not used correctly then Baumatic Ltd will accept no liability for any damage that is caused o Altering the specification of the appliance must not be attempted for reasons of safe...

Page 6: ...the back coils of the appliance to come into contact with the wall surface o Always ensure that the location where you are installing your appliance is free of stored items such as papers and other f...

Page 7: ...operation o Fast freeze switch o Mark resistant coating o 3 Safety glass shelves o 2 Salad crispers o Butter compartment o Bottle rack o 3 General racks o 3 Freezer drawers o Reversible doors IMPORTA...

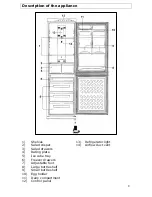
Page 8: ...13 Refrigerator light 2 Salad crisper 14 Airflow duct vent 3 Salad drawers 4 Rating plate 5 Ice cube tray 6 Freezer drawers 7 Adjustable foot 8 Large bottle shelf 9 Small bottle shelf 10 Egg holder 1...

Page 9: ...in the bottom of your refrigerator and there is a cover that goes over them o The cover helps to prevent fruit and vegetables from drying out prematurely 3 Upper door shelves o The door liner holds va...

Page 10: ...hould be cleaned with a solution of sodium bicarbonate dissolved in lukewarm water The interior and accessories should be thoroughly dried after the cleaning process has been completed o There can be...

Page 11: ...ature of 16 C Holiday mode 2 LOW This will keep the fridge at a temperature of 5 C and the freezer at a temperature of 18 C 3 MID This will keep the fridge at a temperature of 3 C and the freezer at a...

Page 12: ...want to alter the temperature setting press the TEMP CONTROL button until the required temperature neon LOW MID or HIGH is lit o You should not put food in either the fridge or freezer until the FREE...

Page 13: ...in superfreeze mode for prolonged periods After the food is frozen you should return the temperature setting to MID 3 Selecting holiday mode This setting can be used to save energy if you are going to...

Page 14: ...on shelves inside of the main section of the refrigerator o Some organic solutions such as the oils in lemon orange peel and acid in butter can cause damage to the plastic parts contained inside of th...

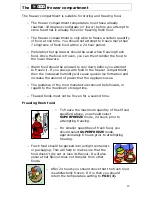
Page 15: ...nt then the increased humidity will cause quicker ice formation and increase the amount of power that the appliance uses o The guidance of the food manufacturer should be followed in regard to the max...

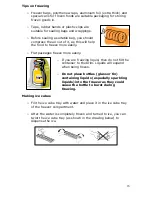
Page 16: ...o Flat packages freeze more easily o If you are freezing liquid then do not fill the container to the brim Liquids will expand when being frozen o Do not place bottles glass or tin containing liquids...

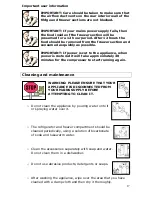
Page 17: ...ake approximately 30 minutes for the compressor to start running again Cleaning and maintenance 17 WARNING PLEASE ENSURE THAT YOUR APPLIANCE IS DISCONNECTED FROM YOUR MAINS SUPPLY BEFORE ATTEMPTING TO...

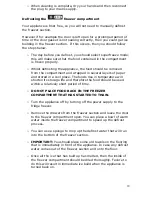
Page 18: ...ture will shorten its storage life and therefore the food should be used within a relatively short period of time o DO NOT PLACE FOOD BACK IN THE FREEZER COMPARTMENT THAT HAS STARTED TO THAW o Turn th...

Page 19: ...zer as this could cause damage to the refrigerant system Replacing the light bulb 19 WARNING PLEASE ENSURE THAT YOUR APPLIANCE IS DISCONNECTED FROM YOUR MAINS SUPPLY BEFORE ATTEMPTING TO REPLACE THE L...

Page 20: ...I C and who will comply with the I E E and local regulations o Your refrigerator comes supplied with a 13 amp plug fitted If in future you need to change the fuse in this plug then a 13 amp ASTA appr...

Page 21: ...e g next to a radiator or boiler If this is not feasible then you should install an insulation plate between the appliance and the adjacent heat source o You should check whether there is an electrica...

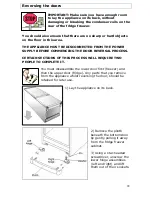
Page 22: ...THE DOOR REVERSAL PROCESS CERTAIN SECTIONS OF THIS PROCESS WILL REQUIRE TWO PEOPLE TO COMPLETE IT You must disassemble the lower door first freezer and then the upper door fridge Any parts that you r...

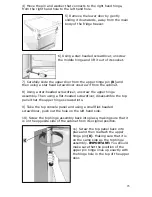
Page 23: ...unscrew the upper hinge assembly Then using a flat headed screwdriver disassemble the top panel that the upper hinge screwed into 9 Take the top console panel and using a small flat headed screwdrive...

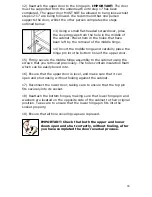
Page 24: ...or 15 Firmly secure the middle hinge assembly to the cabinet using the screws that you removed previously The holes contain insulation foam which can be easily bored into 16 Ensure that the upper door...

Page 25: ...too tightly into it o The thermostat setting is too low you should turn the thermostat up higher o Ensure that the door is closing properly and that the door has not been left open for a prolonged pe...

Page 26: ...ssued at the time of purchase This guarantee is transferable only with the written consent of Baumatic Ltd If the appliance fails and is considered either not repairable or uneconomical to repair betw...

Page 27: ...Kingdom Sales Telephone 44 118 933 6900 Sales Fax 44 118 931 0035 Service Telephone 44 118 933 6911 Service Fax 44 118 986 9124 Spares Telephone 44 118 933 6922 Technical Advice Telephone 44 118 933...

Page 28: ...28 28...

Reviews: