background image

Contents 
 

Environmental note   


Important 

safety 

information 

     5 – 6 

 
Specifications 

of 

your 

fridge 

freezer 

    7 - 9 

Description of the appliance   


Description 

of 

the 

product 

features 

     9 

 
Using your Baumatic fridge freezer   


10-12 

Before switching on 


10 

During first use   


10 

Switching on the appliance and setting the thermostat 


11-12 

 
Arranging and storing food in the fridge section  


12-13 

 
The 

 freezer 

compartment 

     13 

Freezing 

fresh 

food 

       14 

Tips 

on 

freezing 

        14-15 

Making ice cubes  


15 

Normal 

operating 

noises       15-16 

 
Cleaning 

and 

maintenance 

      16-20 

The defrost drain hole   


17 

The evaporating tray   


18 

Defrosting the 


freezer 

compartment    19-20 

Replacing 

the 

light 

bulb 

       20 

 
Installation 


21-27 

Electrical connection 


21 

Positioning   


22 

Reversing 

the 

doors 

       23-27 

 
Troubleshooting 


28-29 

 
Contact details   


30


3


Summary of Contents for BFB230SL

Page 1: ...BFB230SL BFB230W 230 Litre frost free fridge freezer...

Page 2: ...ion Manual contains important information including safety installation points which will enable you to get the most out of your appliance Please keep it in a safe place so that it is easily available...

Page 3: ...d setting the thermostat 11 12 Arranging and storing food in the fridge section 12 13 The freezer compartment 13 Freezing fresh food 14 Tips on freezing 14 15 Making ice cubes 15 Normal operating nois...

Page 4: ...off directly behind the appliance to prevent misuse This should be undertaken by a competent person Disable the door lock to make sure that children cannot get stuck inside the appliance o The packag...

Page 5: ...used o Altering the specification of the appliance must not be attempted for reasons of safety Before using your appliance o Check the appliance for any signs of transport damage If you notice any dam...

Page 6: ...the back coils of the appliance to come into contact with the wall surface o Always ensure that the location where you are installing your appliance is free of stored items such as papers and other f...

Page 7: ...oors Dimensions of appliance Height 1660 mm Width 540 mm Depth 600 mm Please refer to the installation instructions for more specific information on the size of aperture that you will require IMPORTAN...

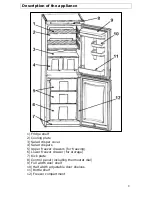
Page 8: ...lad crisper cover 4 Salad crispers 5 Upper freezer drawers for freezing 6 Lower freezer drawer for storage 7 Kick plate 8 Control panel including thermostat dial 9 Full width door shelf 10 Half width...

Page 9: ...es clogged see The defrost drain hole section for a detailed explanation of how to keep the channel clear 3 Crisper drawer and cover o The crisper drawer is in the bottom of your refrigerator and ther...

Page 10: ...ccessories should be thoroughly dried after the cleaning process has been completed o There can be an odour when you first switch on the appliance It will lessen as the appliance starts to cool During...

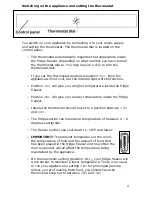
Page 11: ...zer o Position 6 will give you a lower temperature inside the fridge freezer o Ideally the thermostat should be set to a position between 3 and 4 o The fridge section can maintain a temperature of bet...

Page 12: ...ood items should be allowed to come into contact with the back wall of the refrigerator o Make sure that you arrange food in such a way that the door can close completely Particular attention should b...

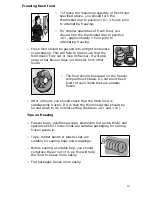
Page 13: ...more than 3 5 kilograms of fresh food within a 24 hour period o Preferably the upper freezer drawers 5 should be used when freezing fresh food Once the food is frozen you can then transfer the food t...

Page 14: ...m other foods o The food should be placed on the freezer compartment s base Do not allow fresh food to touch items that are already frozen o After 24 hours you should check that the fresh food is sati...

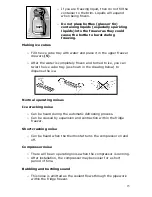
Page 15: ...you can twist the ice cube tray as shown in the drawing below to dispense the ice Normal operating noises Ice cracking noise o Can be heard during the automatic defrosting process o Can be caused by e...

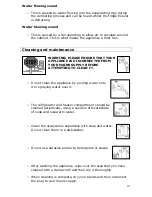
Page 16: ...MAINS SUPPLY BEFORE ATTEMPTING TO CLEAN IT o Do not clean the appliance by pouring water onto it or spraying water over it o The refrigerator and freezer compartment should be cleaned periodically usi...

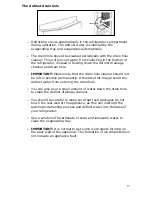
Page 17: ...t be left in position permanently Otherwise this may prevent the defrost water from entering the drain hole o You can also pour a small amount of water down the drain hole to clean the defrost drainag...

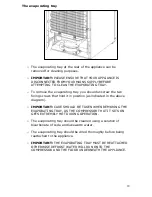
Page 18: ...it in position as indicated in the above diagram o IMPORTANT CARE SHOULD BE TAKEN WHEN REMOVING THE EVAPORATING TRAY AS THE COMPRESSOR THAT IT SITS ON GETS EXTREMELY HOT DURING OPERATION o The evapor...

Page 19: ...FREEZER COMPARTMENT THAT HAS STARTED TO THAW o After ensuring that your hands are dry disconnect your fridge freezer from your mains supply o Remove the drawers from the freezer section and leave the...

Page 20: ...ystem Replacing the light bulb 20 WARNING PLEASE ENSURE THAT YOUR APPLIANCE IS DISCONNECTED FROM YOUR MAINS SUPPLY BEFORE ATTEMPTING TO REPLACE THE LIGHT BULB o There is an interior light in the roof...

Page 21: ...I C and who will comply with the I E E and local regulations o Your refrigerator comes supplied with a 13 amp plug fitted If in future you need to change the fuse in this plug then a 13 amp ASTA appr...

Page 22: ...e g next to a radiator or boiler If this is not possible then you should install an insulation plate between the appliance and the adjacent heat source o You should check whether there is an electrica...

Page 23: ...in this area THE APPLIANCE MUST BE DISCONNECTED FROM THE POWER SUPPLY BEFORE COMMENCING THE DOOR REVERSAL PROCESS CERTAIN SECTIONS OF THIS PROCESS WILL REQUIRE TWO PEOPLE TO COMPLETE IT Any parts that...

Page 24: ...he underneath of the appliance left hand side there is an adjustable foot and a bottom hinge fixing o Carefully lay the appliance down on its left hand side o Unscrew the bottom hinge fixing and remov...

Page 25: ...into the top left hinge B 7 Remove the top screw hole plug from the left hand side of the refrigerator door o Transfer the bush from the top right hand corner of the refrigerator door into the hole o...

Page 26: ...e on the top left hand corner of the freezer door o Swap the bush on the bottom right hand side of the freezer door to the opposite side 9 Turn the middle hinge 180 from its original position and then...

Page 27: ...dhering to the cabinet properly then you should either 1 Use a warm damp cloth and manipulate the seal until it does adhere to the cabinet properly all the way around the door or 2 Use a hair dryer on...

Page 28: ...your appliance My fridge freezer appears to be performing poorly o Check that the appliance isn t overloaded and that food hasn t been packed too tightly into it o The thermostat setting is too low yo...

Page 29: ...NOT ATTEMPT TO REPAIR THE APPLIANCE YOURSELF Please note that if an engineer is asked to attend whilst the product is under guarantee and finds that the problem is not the result of an appliance fault...

Page 30: ...co uk Republic of Ireland 01 6266 798 Czech Republic Baumatic CR spol s r o Amperova 495 46215 Librec Czech Republic 420 800 185 263 www baumatic cz Slovak Republic Baumatic Slovakia s r o Skultetyho...

Page 31: ...31...

Page 32: ...32...

Reviews: