background image


22

My fridge appears to be performing poorly. 


o


Check that the appliance isn’t overloaded and that food hasn’t 
been packed too tightly into it. 

o


The thermostat setting is too low; you should turn the 
thermostat up higher. 

o


Ensure that the door is closing properly and that the door has 
not been opened for a prolonged period in error. 

o


Ensure that there is adequate ventilation for your appliance. 


My fridge is noisy. 


o


The refrigerant gas that circulates the pipe work of the appliance 
may make a slight noise, even if the compressor is not running. 

o


If the noise worsens or the appliance gets louder than normal; 
check that it is levelled off correctly, that nothing is touching the 
rear of the fridge and that nothing placed inside the appliance is 
rattling. 


A thick ice sheet has formed on the inner back wall of 
my fridge. 


o


Check that food has not been pushed too far back inside the 
appliance, so that it is in contact with the inner back wall. 


o


The formation of ice droplets on the inner back wall does not 
indicate a product fault.


There is water in the base of the fridge or leaking out 
of my fridge. 
 

o


Follow “The defrost drain hole” section.


Summary of Contents for BL500W

Page 1: ...BL500W Undercounter larder fridge...

Page 2: ...contains important information including safety installation points which will enable you to get the most out of your appliance Please keep it in a safe place so that it is easily available for futur...

Page 3: ...0 12 Before switching on 10 During first use 10 Switching on the appliance and setting the thermostat 11 12 Arranging and storing food in the fridge section 12 13 Normal operating noises 13 Cleaning a...

Page 4: ...off directly behind the appliance to prevent misuse This should be undertaken by a competent person Disable the door lock to make sure that children cannot get stuck inside the appliance o The packag...

Page 5: ...ept no liability for any damage that is caused o Altering the specification of the appliance must not be attempted for reasons of safety Before using your appliance o Check the appliance for any signs...

Page 6: ...efore cleaning the appliance or performing maintenance work ensure that the appliance has been disconnected from your mains supply o Never allow the back coils of the appliance to come into contact wi...

Page 7: ...Adjustable feet Dimensions of appliance Height 845 mm Width 495 mm Depth 540 mm Energy efficiency class Energy class A Please refer to the installation instructions for more specific information on th...

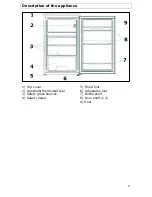
Page 8: ...Description of the appliance 1 Top cover 2 Lightbulb thermostat dial 3 Safety glass shelves 4 Salad crisper 5 Fixed foot 6 Adjustable foot 7 Bottle shelf 8 Door shelf x 2 9 Door 8...

Page 9: ...rtant that this channel never becomes clogged see Defrosting the refrigerator compartment for a detailed explanation of how to keep the channel clear 3 Crisper drawer and cover o The crisper drawer is...

Page 10: ...accessories should be thoroughly dried after the cleaning process has been completed 10 o There can be an odour when you first switch on the appliance It will lessen as the appliance starts to cool Du...

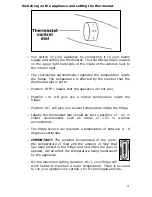
Page 11: ...temperature inside the fridge o Position 6 will give you a lower temperature inside the fridge o Ideally the thermostat dial should be set to position 3 4 in colder environments such as winter or 5 i...

Page 12: ...nce o No food items should be allowed to come into contact with the back wall of the refrigerator o Make sure that you arrange food in such a way that the door can close completely Particular attentio...

Page 13: ...ing noises Ice cracking noise o Can be heard during the automatic defrosting process Short cracking noise o Can be heard when the thermostat turns the compressor on and off Compressor noise o There wi...

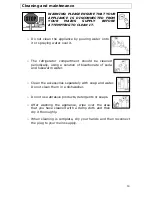
Page 14: ...nt should be cleaned periodically using a solution of bicarbonate of soda and lukewarm water o Clean the accessories separately with soap and water Do not clean them in a dishwasher o Do not use abras...

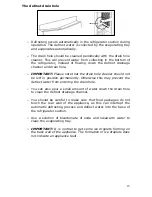
Page 15: ...left in position permanently Otherwise this may prevent the defrost water from entering the drain hole o You can also pour a small amount of water down the drain hole to clean the defrost drainage cha...

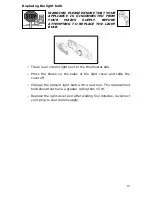
Page 16: ...T BULB o There is an interior light next to the thermostat dial o Press the hooks on the sides of the light cover and slide the cover off o Change the present light bulb with a new one The replacement...

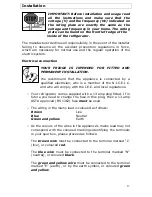
Page 17: ...nected by a qualified electrician who is a member of the N I C E I C and who will comply with the I E E and local regulations o Your refrigerator comes supplied with a 13 amp plug fitted If in future...

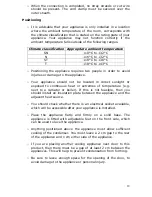
Page 18: ...inuous heat or extremes of temperature e g next to a radiator or boiler If this is not feasible then you should install an insulation plate between the appliance and the adjacent heat source o You sho...

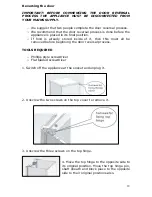
Page 19: ...ood is already stored inside of it then this must all be removed before beginning the door reversal process TOOLS REQUIRED o Phillips style screwdriver o Flat bladed screwdriver 1 Switch off the appli...

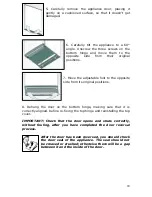
Page 20: ...opposite side from its original positions 8 Rehang the door on the bottom hinge making sure that it is correctly aligned before re fixing the top hinge and reinstalling the top cover IMPORTANT Check t...

Page 21: ...AL WHICH WOULD NOT BE RECTIFIED UNDER THE GUARANTEE FREE OF CHARGE IMPORTANT WHEN YOU HAVE REVERSED THE DOOR OF THE APPLIANCE AS YOU HAVE TILTED THE APPLIANCE BACKWARDS YOU MUST WAIT FOR 8 HOURS BEFOR...

Page 22: ...the appliance may make a slight noise even if the compressor is not running o If the noise worsens or the appliance gets louder than normal check that it is levelled off correctly that nothing is touc...

Page 23: ...r to perform any necessary repair If your appliance is installed in such a way that an engineer is concerned that damage will be caused to the appliance or your kitchen then he will not complete a rep...

Page 24: ...www baumatic co uk Republic of Ireland Service Telephone 1 890 812 724 Spares Telephone 091 756 771 Czech Republic Baumatic CR spol s r o Pr myslov z na Sever 696 460 11 Liberec 11 Czech Republic 420...

Page 25: ...25...

Page 26: ...26...

Page 27: ...27...

Page 28: ...28 28...

Reviews: