background image


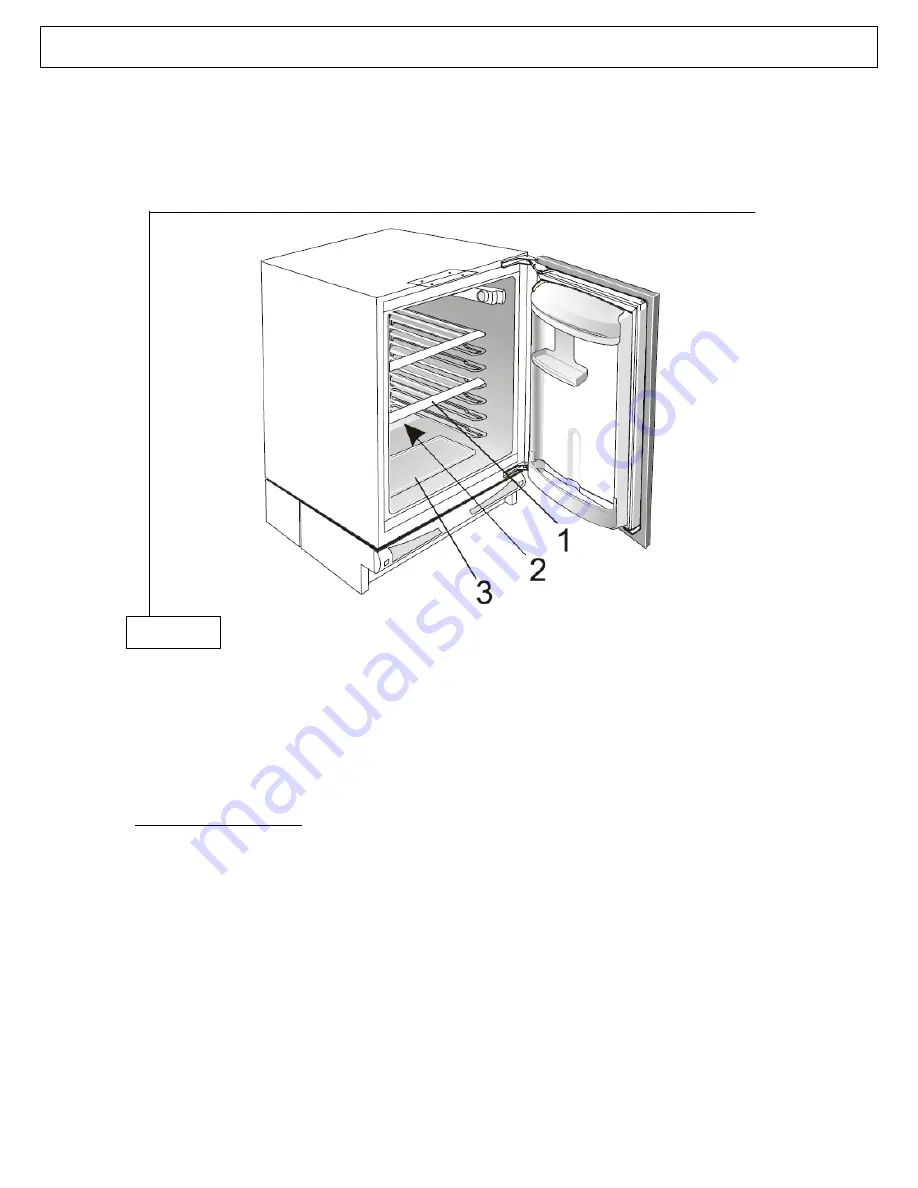
Your BR15A Built-under 

Larder-Fridge: 


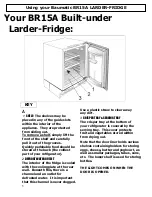
  KEY 


 1


SHELF

: The shelves may be 

placed in any of the guide slots 
within the interior of the 
appliance.  They are protected 
from sliding out. 
To remove a shelf, simply lift the 
front of the shelf and carefully 
pull it out of the grooves. 
Quickly perishable food should be 
stored at the back (the coldest 
part of your refrigerator). 


2


DEFROST WATER OUTLET


The interior of the fridge is cooled 
with the cooling plate at the rear 
wall.  Beneath this, there is a 
channel and an outlet for 
defrosted water.  It is important 
that this channel is never clogged.  

Use a plastic straw to clear away 
any dirt. 


3


CRISPER TRAY & SERVING TRAY 

The crisper tray at the bottom of 
your refrigerator is covered by the 
serving tray.  This cover protects 
fruit and vegetables stored within 
from drying out. 


Note that the door liner holds various 
shelves containing holders for storing 
eggs, cheese, butter and yoghourt, as 
well as smaller packages, tubes, cans, 
etc.  The lower shelf is used for storing 
bottles. 
 
THE LIGHT COMES ON WHEN THE 
DOOR IS OPENED. 


Using your Baumatic BR15A LARDER-FRIDGE 

Summary of Contents for BR15A

Page 1: ...BR15A Built under Larder Fridge...

Page 2: ...IDGE NOTE This User Instruction Manual contains important information including safety installation points which will enable you to get the most out of your appliance Please keep it in a safe place so...

Page 3: ...SING YOUR FRIDGE 6 USING YOUR FRIDGE 7 10 CLEANING AND MAINTENANCE 11 12 DEFROSTING 13 TIPS FOR SAVING ENERGY 13 INSTALLING YOUR FRIDGE 14 FITTING THE D COR DOOR 16 LEVELLING YOUR FRIDGE TO YOUR FLOOR...

Page 4: ...ttle rack o 1 Dairy compartment o 1 Half length utility rack Dimensions mm H x W x D 818 898 x 596 x 545 To fully enjoy using your appliance long into the future please firstly familiarise yourself wi...

Page 5: ...to come into contact with the elements Do not pull out or insert the plug with wet hands Before any cleaning or maintenance work ensure that the appliance has been disconnected from the power supply...

Page 6: ...ate at the rear wall Beneath this there is a channel and an outlet for defrosted water It is important that this channel is never clogged Use a plastic straw to clear away any dirt 3 CRISPER TRAY SERV...

Page 7: ...uid can settle SITUATING YOUR FRIDGE CAUTION DO NOT PLACE THE APPLIANCE NEAR HEAT SOURCES AND FOLLOW THE INSTALLATION ADVICE SHOWN ON PAGE 14 FOR FULL INSTALLATION ADVICE PLEASE SEE PAGE 14 MAKE A NOT...

Page 8: ...e the interior temperature may dip below 0 C you should not leave your fridge on this setting for long periods Settings 3 5 Use these mid settings for longer storage of food in the fridge mid coldness...

Page 9: ...ch your fridge OFF by turning the thermostat knob to position 0 NOTE When you first switch on the appliance allow 24 hours for it to cool down to the desired temperature During this time DO NOT open t...

Page 10: ...W anything to touch the refrigerator s back wall as it will cause frost Also packaging especially paper can stick to it and spoil Crispy delicate foods should be stored in the coldest parts of the fri...

Page 11: ...following in mind o Ambient temperature o How often the doors are opened and closed o Quantity of food stored in the compartments o Moisture content of what you place in your fridge o The location of...

Page 12: ...dge using a solution of soda bicarbonate in warm water 1 tablespoon Bicarbonate to 2 litres of water 9 Clean the condenser back of unit with a broom once a year NEVER USE SOLVENTS TO CLEAN THE INSIDE...

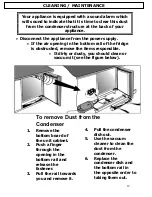
Page 13: ...e items responsible It dirty or dusty you should clean or vacuum it see the figure below To remove Dust from the Condenser 1 Remove the bottom board of the unit cabinet 2 Push a finger through the ope...

Page 14: ...tat settings only if essential and not for constant long term use 9 Before loading the appliance with packages of fresh foods ensure they are cooled to an ambient temperature except in the case of sou...

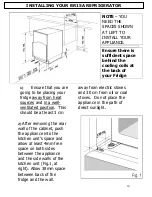
Page 15: ...2 After removing the rear wall of the cabinet push the appliance into the kitchen unit s space and allow at least 4mm free space on both sides between the appliance and the side walls of the kitchen u...

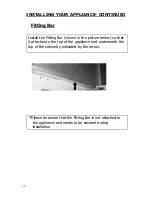
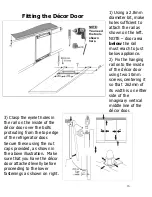
Page 16: ...Fitting Bar shown in the picture below so that it attaches to the top of the appliance and underneath the top of the cabinetry indicated by the arrow Please be aware that the Fitting Bar is not attach...

Page 17: ...of the d cor door over the bolts protruding from the top edge of the refrigerator door Secure these using the nut caps provided as shown in the above illustration Make sure that you have the d cor doo...

Page 18: ...You can adjust the height from 82 to 90 cm The height MUST be adjusted before the appliance is built into the unit space designated for it DO NOT MOVE THE FRIDGE WHEN THE FEET ARE EXTENDED HIGH Drill...

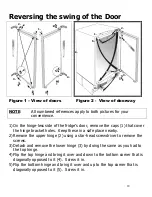
Page 19: ...les Keep these in a safe place nearby 2 Remove the upper hinge 2 using a star head screwdriver to remove the screws 3 Detach and remove the lower hinge 3 by doing the same as you had to the top hinge...

Page 20: ...O THE APPLIANCE YOU HAVE OVERLOADED THE APPLIANCE OR FOOD HAS BEEN PACKED TOO TIGHTLY TAKE OUT AND CONSUME FOOD LOOK FOR OUT OF DATE FOOD THAT CAN BE DISPOSED OF THE THERMOSTAT SETTING IS SET TOO LOW...

Page 21: ...HEAT UP THIS IS NORMAL IT WILL DO THIS IN SUMMER WITH A HIGH AMBIENT TEMPERATURE OR IF THE DOOR HAS BEEN OPENED AND CLOSED FREQUENTLY IT IS THE RESULT OF HEAT S DISSIPATING FROM INSIDE THE CABINET AND...

Page 22: ...sued at the time of purchase This guarantee is transferable only with the written consent of Baumatic Ltd If the appliance fails and is considered either not repairable or uneconomical to repair betwe...

Page 23: ...Kingdom Sales Telephone 44 118 933 6900 Sales Fax 44 118 931 0035 Service Telephone 44 118 933 6911 Service Fax 44 118 986 9124 Spares Telephone 44 118 933 6922 Technical Advice Telephone 44 118 933 6...

Page 24: ...2 2...
Reviews: