background image


17

Summary of Contents for RETRO1

Page 1: ...RETRO1 FRIDGE FREEZER ...

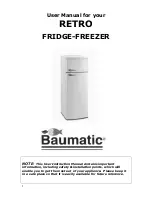
Page 2: ... NOTE This User Instruction Manual contains important information including safety installation points which will enable you to get the most out of your appliance Please keep it in a safe place so that it is easily available for future reference ...

Page 3: ...GE FREEZER 5 18 YOUR RETRO FRIDGE FREEZER 5 BEFORE USING YOUR FRIDGE FREEZER 6 USING YOUR FRIDGE FREEZER 7 8 ARRANGING FOOD 9 15 DEFROSTING 16 17 CLEANING AND MAINTENANCE 18 INSTALLING YOUR FRIDGE FREEZER 19 TROUBLESHOOTING 20 CONDITIONS OF GUARANTEE 21 CONTACT DETAILS 22 HT MOD 02 03 06 CONTENTS ...

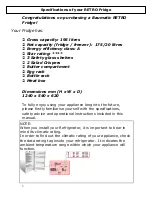
Page 4: ...x 540 x 620 To fully enjoy using your appliance long into the future please firstly familiarise yourself with the specifications safety advice and operational instructions included in this manual NOTE When you install your Refrigerator it is important to bear in mind its climatic rating In order to find out the climatic rating of your appliance check the data rating tag inside your refrigerator It...

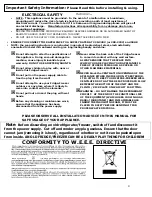
Page 5: ...y to come into contact with the elements Do not pull out or insert the plug with wet hands Before any cleaning or maintenance work ensure that the appliance has been disconnected from the power supply Never allow the back coils of the Fridge freezer to come into contact with any wall surface ALWAYS ENSURE THAT THE SPACE INTO WHICH YOU ARE PLACING YOUR APPLIANCE IS FREE OF STORED ITEMS SUCH AS PAPE...

Page 6: ...ring dairy products such as butter and cheese 2 Small Pocket For storing small packaged foods 3 Small Bottle Rack For storing smaller bottles containers 4 Bottle Rack For storing ors 5 Crisper Drawers 6 Fridge Shelves 7 Control Panel and Light 8 Freezer Compartment 9 Appliance 1 2 3 5 6 7 8 4 ...

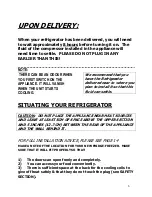
Page 7: ...plan to install it so that this fluid can settle SITUATING YOUR REFRIGERATOR CAUTION DO NOT PLACE THE APPLIANCE NEAR HEAT SOURCES AND LEAVE AT LEAST 5CM OF SPACE ABOVE THE UPPER SECTION AND 5 INCHES 12 7 CM BETWEEN THE REAR OF THE APPLIANCE AND THE WALL BEHIND IT FOR FULL INSTALLATION ADVICE PLEASE SEE PAGE 14 MAKE A NOTE OF THE LOCATION FOR YOUR NEW FRIDGE FREEZER MAKE SURE THAT IT WILL FIT PROPE...

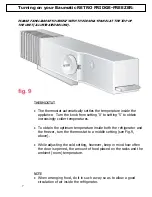
Page 8: ...peratures To obtain the optimum temperature inside both the refrigerator and the freezer turn the thermostat to a middle setting see Fig 9 above While adjusting the cold setting however keep in mind how often the door is opened the amount of food placed on the racks and the ambient room temperature NOTE When arranging food do it in such a way so as to allow a good circulation of air inside the ref...

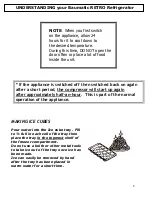
Page 9: ... start up again after approximately half an hour This is part of the normal operation of the appliance MAKING ICE CUBES Pour water into the Ice cube tray Fill to full in each cell of the tray then place the tray in the topmost shelf of the freezer compartment Do not use a knife or other metal tools to take ice out of the tray once ice has been made Ice can easily be removed by hand after the tray ...

Page 10: ...e OFF by turning the thermostat knob to position 0 NOTE When you first switch on the appliance allow 24 hours for it to cool down to the desired temperature During this time DO NOT open the door often or place a lot of food inside the unit WARNING If the appliance is switched off then switched back on again after a short period the compressor will start up again after approximately half an hour Th...

Page 11: ...d then be arranged to ensure adequate air circulation in the refrigerator compartment DO NOT ALLOW anything to touch the refrigerator s back wall as it will cause frost Also packaging especially paper can stick to it and spoil DO NOT open the refrigerator door too often or leave it open for long spells of time ARRANGE meat and cleaned fish wrapped in packages or sheets of plastic which you will th...

Page 12: ... BOX DO NOT USE DEFROTSING SPRAYS THEY MAY BE TOXIC TIPS FOR ENERGY SAVINGS 9 Try not to open the door too often especially when the weather is wet and hot Once you open the door be sure to close it as soon as possible 9 Use higher thermostat settings only if essential and not for constant long term use 9 Before loading the appliance with packages of fresh foods ensure they are cooled to an ambien...

Page 13: ... solution of soda bicarbonate in warm water 1 tablespoon Bicarbonate to 2 litres of water 9 Clean the condenser back of unit with a broom once a year NEVER USE SOLVENTS TO CLEAN THE INSIDE OF YOUR FRIDGE FREEZER 1 Carefully remove the light cover 2 Replace the spent bulb with a new one max 15W 3 Remount the light cover 4 Plug your fridge freezer back in MAINTENANCE THE ONLY MAINTENANCE YOUR FRIDGE...

Page 14: ...tioning your fridge freezer 4 Keep a space of 15cm above your fridge freezer 5 You need 5 inches 12 7 cm clearance between the rear of your appliance and the wall behind it If supplied fit the plastic wall spacers to the condenser at the back of the refrigerator This will maintain good performance 6 If placing beside another refrigerator or freezer keep at least 2cm between the units to prevent co...

Page 15: ...17 ...

Page 16: ... climate classification for which the appliance is designed The climate classification can be found on the data rating tag which is located at the left on the inside of the appliance Cooling Temperature Ranges Climate Classification Recommended Ambient Temp SN 10 to 32 C N 16 to 32 C ST 18 to 38 C T 18 to 43 C If the appliance is installed next to another refrigerator or freezer a clearance of 5 c...

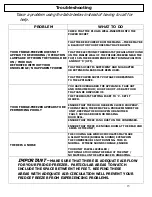
Page 17: ...OF DATE FOOD THAT CAN BE DISPOSED OF THE THERMOSTAT SETTING IS SET TO 1 SET IT HIGHER ENSURE THAT THE DOOR HAS BEEN CLOSED PROPERLY FOR INSTANCE THERE MAY BE A PROBLEM INSIDE THE UNIT KEEPING THE DOOR OPEN OR ANOTHER FAULT SUCH AS BROKEN OR MISSING DOOR SEAL ENSURE THAT THERE IS NO DUST ON THE CONDENSER YOUR FRIDGE FREEZER APPEARS TO BE PERFORMING POORLY ENSURE THAT THERE IS ENOUGH ROOM AT THE REA...

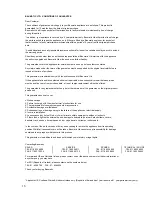
Page 18: ...ill not be offered The guarantee for any replacement will only be for the remainder of the guarantee on the original product purchased This guarantee does not cover x Sinks and taps X Failure to comply with the manufacturer s instructions for use X The replacement of cosmetic components or accessories X Accidental damage or wilful abuse X Subsequent loss or damage owing to the failure of the appli...

Page 19: ... United Kingdom Sales Telephone 44 118 933 6900 Sales Fax 44 118 931 0035 Service Telephone 44 118 933 6911 Service Fax 44 118 986 9124 Spares Telephone 44 118 933 6922 Technical Advice Telephone 44 118 933 6933 E mail sales baumatic co uk technical baumatic co uk Http Internet site www baumatic com Baumatic UK cod 1230000666 ...

Page 20: ...18 ...

Reviews: