NOTE: Take care of small parts that are removed during assembly
or when making adjustments. Keep them secure to avoid loss.
2. Handle bars
1. Remove the mounting sets
(12)
from the handle support
(21)
and keep them
handy.
2. Ensure that the locking knobs
(10a)
are loose and unfold the upper
(5)
and
lower handle bar
(9)
.
3. Make sure the wires
(6, 7, 8)
run on the upper side of the handle bars
(5, 9)
.
4. Lay the upper
(5)
and lower handle bar
(9)
on a stable, even surface. Tighten
the locking knobs
(10a)
.
5. Align the lower handle bar
(9)
with the support
(21)
. Make sure the holes in
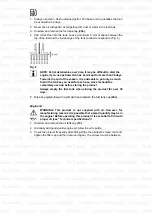
the lower handle bar are aligned with those in the support (Fig. 1).
Fig. 1b
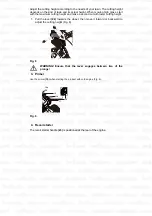
6. For handle height adjustment there are three holes in the support. Secure the
lower handle bar with the mounting sets
(12)
according to your handle bar
12b
21
9
12a
IMPORTANT
Blades
If your mower features the Cross Cut (four blade design) pull them
to the right to the outward position (the left side of the blade is very sharp).
(Fig. 1a)

