background image

Self-Propelled Lawnmower 


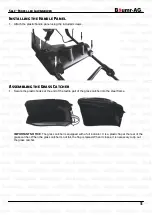
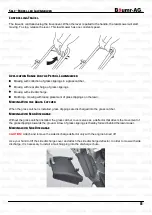
Installing the Handle Panel 

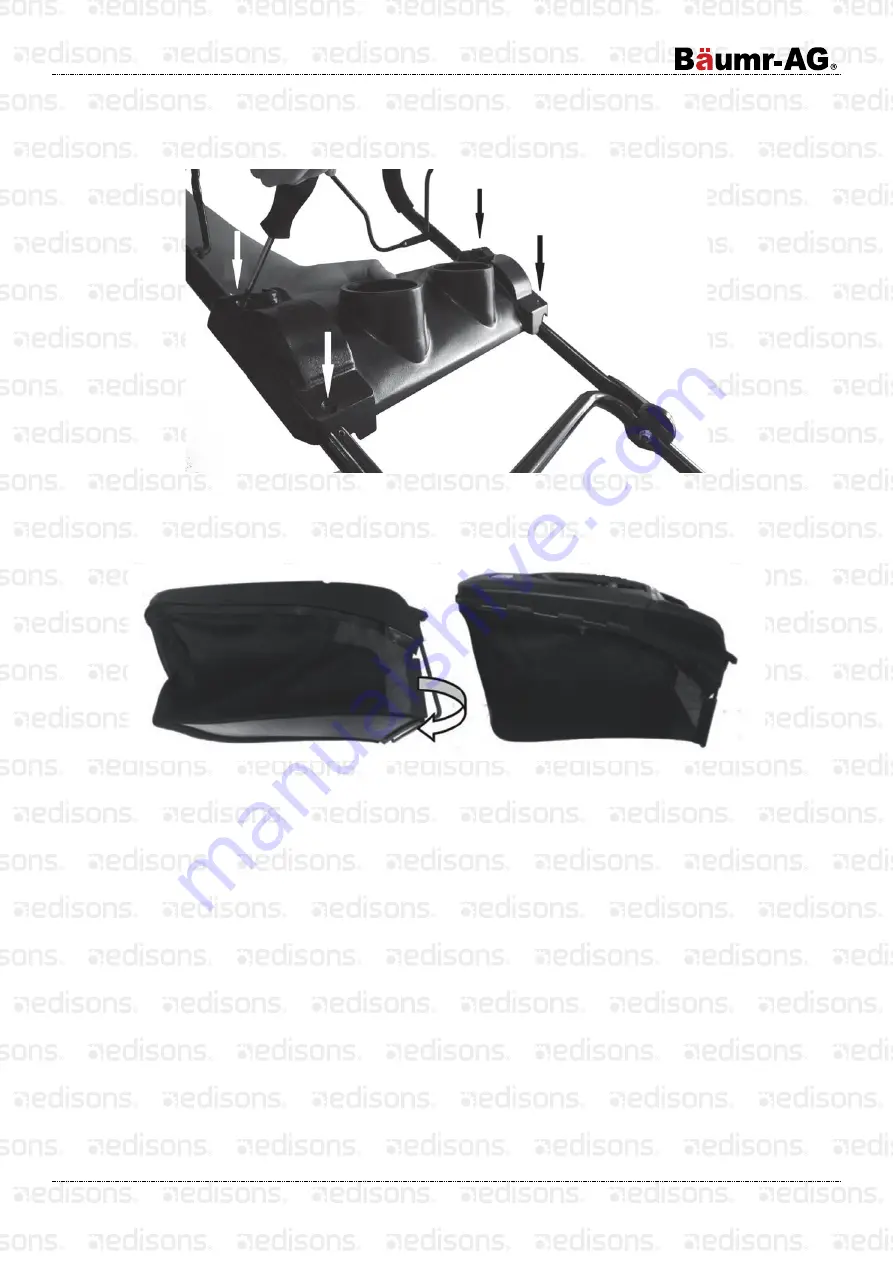
1.  Attach the plastic handle panel using the included screws. 


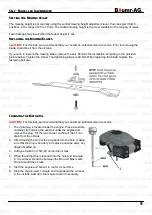
Assembling the Grass Catcher 

1.  Secure the plastic hooks at the end of the textile part of the grass catcher into the steel frame. 


IMPORTANT NOTICE

: The grass catcher is equipped with a full indicator. It is a plastic flap at the rear of the 

grass catcher. When the grass catcher is not full, the flap is raised. When it closes, it is necessary to tip out 
the grass catcher. 

Summary of Contents for 750SX

Page 1: ...Self Propelled Lawnmower User Manual RETAIN THIS MANUAL FOR FUTURE REFERENCE PLEASE READ THIS MANUAL CAREFULLY BEFORE USE ...

Page 2: ...rting the Lawnmower 6 Adding Oil 6 Adding Fuel 6 Controlling and Operating the Lawnmower 7 Starting the Lawnmower 7 Controlling Travel 8 Application Range for the Petrol Lawnmower 8 Mowing With the Grass Catcher 8 Mowing with Rear Discharge 8 Mowing with Side Discharge 8 Setting the Mowing Height 9 Replacing the Mowing Blades 9 Changing the Motor Oil 9 Maintenance 10 Lawn Care 10 Lawnmower Mainten...

Page 3: ...tains operating maintenance and repair instructions The manufacturer takes no responsibility for accidents or damages resulting from not following the instructions in this manual This product is used exclusively for mowing grass Do not use it for any other purposes than those intended Otherwise there is a risk of damaging it or an injury The person operating the lawnmower is responsible for the sa...

Page 4: ...inspect to ensure that there is no damage In the event of damage take the lawnmower to a specialised service centre for repairs ATTENTION The mowing blade continues to rotate for several seconds after the engine is turned off If the lawnmower is vibrating abnormally immediately identify and remedy the cause of the vibration For the purpose of ensuring safe operation regularly check that the pins b...

Page 5: ...scharge deflector 2 Engine speed control lever 9 Cap with oil dipstick 3 Top part of the handle 10 Central mowing height adjustment lever 4 Screws with wing nuts 11 Grass catcher cover 5 Bottom part of the handle 12 Handle panel 6 Fuel tank cap 13 Start brake switch 7 Air filter cover ...

Page 6: ...rts are left in the packaging Assembling the Handle IMPORTANT INFORMATION Carefully unfold the lawnmower handle being careful not to pinch or damage the lawnmower s control cables 1 Insert the bottom part of the handle point 1 into the respective hole on the lawnmower see arrow and secure in place with 4 screws two screws on each side of the handle 2 Attach the top part of the handle point 2 to th...

Page 7: ...cher 1 Secure the plastic hooks at the end of the textile part of the grass catcher into the steel frame IMPORTANT NOTICE The grass catcher is equipped with a full indicator It is a plastic flap at the rear of the grass catcher When the grass catcher is not full the flap is raised When it closes it is necessary to tip out the grass catcher ...

Page 8: ... for this engine is NATURAL 95 After unscrewing the fuel tank cap add the fuel pouring it in all the way up to the collar of the fuel tank but do not overfill it Always add fresh clean and approved lead free petrol with an octane rating of at least 95 CAUTION In the event that you spill any oil or fuel on the lawnmower when refilling wipe it away immediately Do not store or add fuel or handle it i...

Page 9: ...e remaining cable in 1 continuous and firm motion Repeat 3 4 times in succession or until engines starts 3 When engine starts move throttle to the RUN position Keeping the throttle in the COLD START position may cause engine to stop or run poorly CAUTION A small amount of smoke may be emitted when the engine is started up for the first time as the protective layers in the engine are burnt off This...

Page 10: ...lawn Mowing With the Grass Catcher When the grass catcher is installed grass clippings are discharged into the grass catcher Mowing with Rear Discharge Without the grass catcher installed the grass catcher cover serves as a deflector that directs the movement of the grass clippings towards the ground A row of grass clippings is thereby formed behind the lawnmower Mowing with Side Discharge CAUTION...

Page 11: ...cing the blade replace the fastening bolt also Changing the Motor Oil CAUTION For this task we recommend that you contact an authorised service centre 1 The drain plug is located under the engine Place a suitable container for catching the used oil under the engine and remove the plug Tilt the lawnmower so that all the oil can drain from the oil tank 2 After draining the oil put the plug back into...

Page 12: ...he basic prerequisite for ensuring safety of the user maintain the lawnmower s operating condition and high performance Never store a machine with petrol in the fuel tank inside a building where the fumes could come within range of an open fire sparks or sources of high temperature Before storing in any enclosed area allow the engine to cool down To reduce the risk of a fire ensure that the lawnmo...

Page 13: ... after purchasing the product you find any kind of defect contact the manufacturer When using the product follow the instructions contained in the included user s manual A complaint will not be accepted if you modified the product or if you did not follow the instructions in this user s manual Storage If you will not be using the machine for an extended period of time store it according to the fol...

Page 14: ...en access to the product The product has been supplied by a general merchandise retailer that may not be familiar with your specific applic ation or your description of the application Be sure to attain third party approval for your application from a qualified specialist before use regardless of prior assurances by the retailer or its representatives This product is not intended for use where fai...

Reviews: