Disposal
Warranty
Please recycle where facilities exist. Check with your local authority for recycling advice.
Retain your purchase receipt or statement as proof of purchase and date.
The warranty applies only if the product is assembled and used solely in the manner indicated in this guide, and all other instructions have
been followed accurately. Any abuse of the product, incorrect assembly or the manner in which it is used will void any warranty.
No rights are given under this warranty to a person acquiring the product second-hand or when used for commercial use.
Assembly
1.
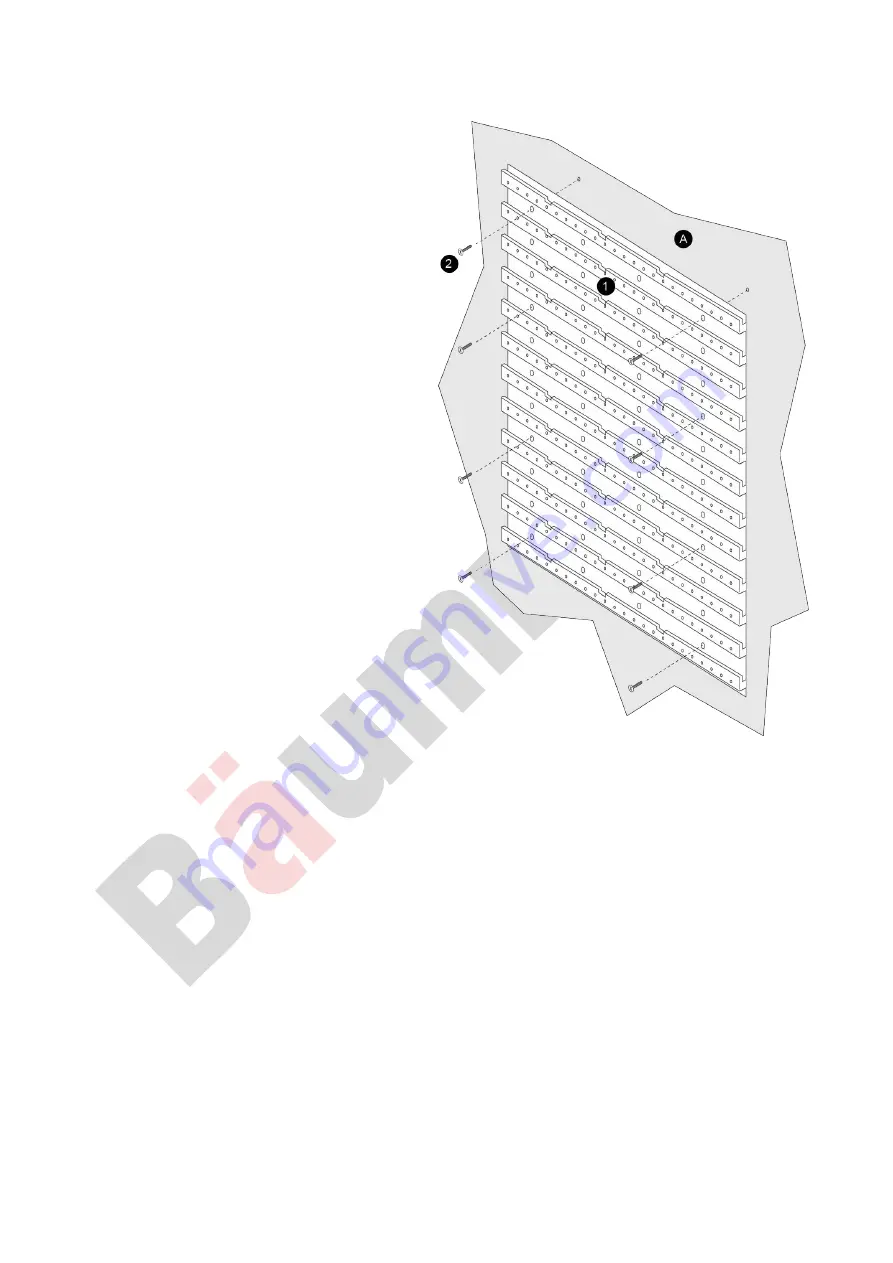
Hold a peg board (
1
) in position on the wall/mounting
surface
(
A
)
. Ensure that the
peg
board is level.
2.
Using a pencil or other device, mark out the mounting
holes on the wall / mounting surface. Alternatively,
measure the peg board
mounting
hole centres and mark
out
accordingly. It is recommended to use 8 mounting
points
per peg board.
3.
Create the necessary holes in the wall/mounting
surface. If the surface is masonry or brick, drill suitable
holes and use the supplied wall plugs or other suitable
anchors. For wood, drill pilot holes, or screw directly into
the wood. If mounting to plasterboard or drywall
surfaces, use appropriate fasteners.
4.
Fasten the peg board to the wall/mounting surface
using the supplied screws (
2
) or other suitable fasteners.
5.
Arrange the tool holders, hooks and storage bins as
required (larger bins and heavier items on the lower
rails). Hook each
item
to the
mounting rails and holes on
the peg board
and ensure it is secure before using it.


