Installation and Operating Manual
DVS Series
15
TITLES SUB-MENU
The
Titles
sub-menu is used to edit the title for each camera input that is connected to the
switcher. The screen position of each title can also be adjusted:
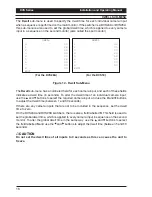
1 RECEPTION
2 STOREROOM
3 CAR PARK
4 CAMERA 4
5 CAMERA 5
6 CAMERA 6
7 CAMERA 7
8 CAMERA 8
EXIT
TITLES
Figure 11 - Titles Sub-Menu
(For the DVS18 and DVS28A)
The
Titles
sub-menu has a numbered field for each camera input, and each of these fields
indicates the current title for that camera input
To alter a camera title:
1. Use the and buttons to highlight the required camera. The first character of the title
will be selected.
2. Using the and buttons, highlight the character in the camera title that is to be
changed.
3. Press the
OK
button. The
Letter Selection
screen is displayed.
4. Using the , ,
and buttons, navigate through the 256 characters available and
highlight the required character.
5. Press the
OK
button to select it.
6. Repeat steps 2-5 until the required title has been entered. The maximum title length is
12 characters.
7. When the required title has been entered, use the button to move the cursor to the far
left of the title. Press the button again to open the
Title Position
screen.
8. Using the , ,
and buttons move the camera title to the required position.
9. Press the
OK
button to confirm the title position.
10. If required, use the and buttons to select another title to edit. To leave the menu,
move the cursor to
EXIT
and press the
OK
button.


