HBZMXSIB/10/16SD-PR-1
Page 17
VCR
This consists of video connection and the Vext input (via a 25-way D-type connector,
the synchronising pulse train from the VCR, connection.
For an S-VHS VCR, use 4-pin mini-din S-VHS connectors and leads. For a standard
VCR use 75 ohm coaxial cable and BNC connectors.
If you are using S-VHS, then to get the full benefit, you must also select it in the VCR
Setup menu.
Although the Vext connection is optional, by using it, you can automatically
synchronise your VCR with the multiplexer. This simplifies the operation of your
multiplexer. For connection to the Vext input, the Switch Input option must be used in
the VCR Setup in the menu system.
Note
Some time-lapse VCRs do not transmit a Vext signal in 3 hour mode. In this case,
if you are using the Vext input then select 3 hour mode in both the Alarm Record
Speed and Normal Record Speed menu via the Record option in the main menu.
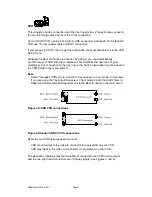
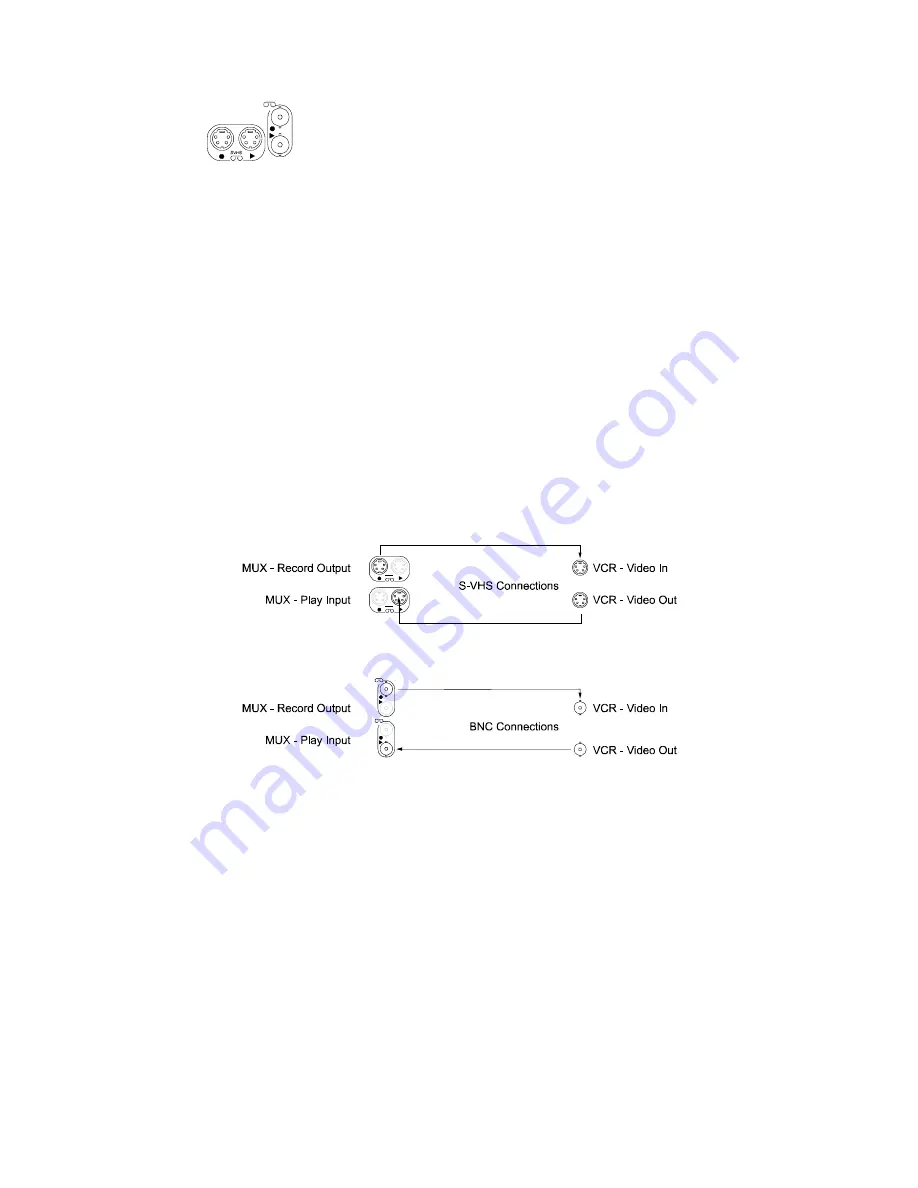
Figure 3 S-VHS VCR connections
Figure 4 Standard (BNC) VCR connections
Refer to your VCR instructions and connect:
VCR record output to the video in connector (or equivalent) on your VCR.
VCR play input to the video out connector (or equivalent) on your VCR.
The illustration indicates that the two leftmost connectors are VCR record outputs
and the two right hand connectors are VCR play inputs (see Figures 3 and 4).
Summary of Contents for ZMX/BD/10
Page 1: ...HBZMXSIB 10 16SD OP 1 Page 1 Operating Instructions ZMX BD 10 ZMX BS 10 ZMX CS 10 Multiplexers...
Page 3: ...HBZMXSIB 10 16SD PR 1 Page 2 This page is intentionally blank...
Page 5: ...HBZMXSIB 10 16SD PR 1 Page 4 This page is intentionally left blank...
Page 7: ...HBZMXSIB 10 16SD PR 1 Page 6 This page is intentionally left blank...
Page 78: ...HBZMXSIB 10 16SD OP 1 Page 2 This page is intentionally blank...
Page 80: ...HBZMXSIB 10 16SD OP 1 Page 4 This page is intentionally blank...


