HBZMXSIB/10/16SD-PR-1
Page 54
movement of trees in the wind, vehicles in an adjacent street, allowable pedestrian
areas, or areas with glass and other highly reflective surfaces which can be sources
of apparent motion via reflections.
To enable or disable zones, select Setup Active Zones from the Motion Detection
sub-menu. A new menu will prompt you to select a camera. The camera number can
be selected using either the arrow keys
, or the camera keys. The title will also be
displayed for information purposes only - it cannot be edited in this particular menu.
After selecting the camera which is to be set up, the system will switch Monitor-A to
the camera chosen and will then draw a 16 x 16 grid over the camera view. Each
block in the grid is one of the 256 zones.
Cursor
The top left zone will have a flashing square indicator
p
, known as the cursor. The
zone which has the flashing cursor can be enabled or disabled. When the cursor
reaches the end of a line in the zone grid, it will automatically wrap around to the
beginning of the next line.
Use the ALARM key
to select either the enable or disable mode, and then use the
ARROW keys
to ‘paint’ the adjacent zones with the mode selected.
The ALARM key
toggles between three possible zone set up modes, and the
cursor will change colour as shown below:
Mode
Cursor colour
No Action
grey/white
Enable Zones
black/white
Disable Zones
clear/white
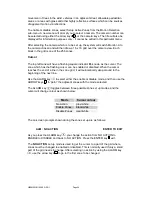
The on-screen prompts shown during the zone set up are as follows:
ALM: NO ACTION
ENTER TO EXIT
As you press the ALARM key
, you change the action from NO ACTION to
ENABLE to DISABLE and back to NO ACTION. Press the ENTER key exit.
The NO ACTION set up mode is used to get the cursor to a part of the grid where
zones must be changed to enabled or disabled. This is normally used if only a small
part of the grid needs to change. After selecting no action by using the ALARM key
, use the arrow keys
to go to the first zone to be changed.
Summary of Contents for ZMX/BD/10
Page 1: ...HBZMXSIB 10 16SD OP 1 Page 1 Operating Instructions ZMX BD 10 ZMX BS 10 ZMX CS 10 Multiplexers...
Page 3: ...HBZMXSIB 10 16SD PR 1 Page 2 This page is intentionally blank...
Page 5: ...HBZMXSIB 10 16SD PR 1 Page 4 This page is intentionally left blank...
Page 7: ...HBZMXSIB 10 16SD PR 1 Page 6 This page is intentionally left blank...
Page 78: ...HBZMXSIB 10 16SD OP 1 Page 2 This page is intentionally blank...
Page 80: ...HBZMXSIB 10 16SD OP 1 Page 4 This page is intentionally blank...

