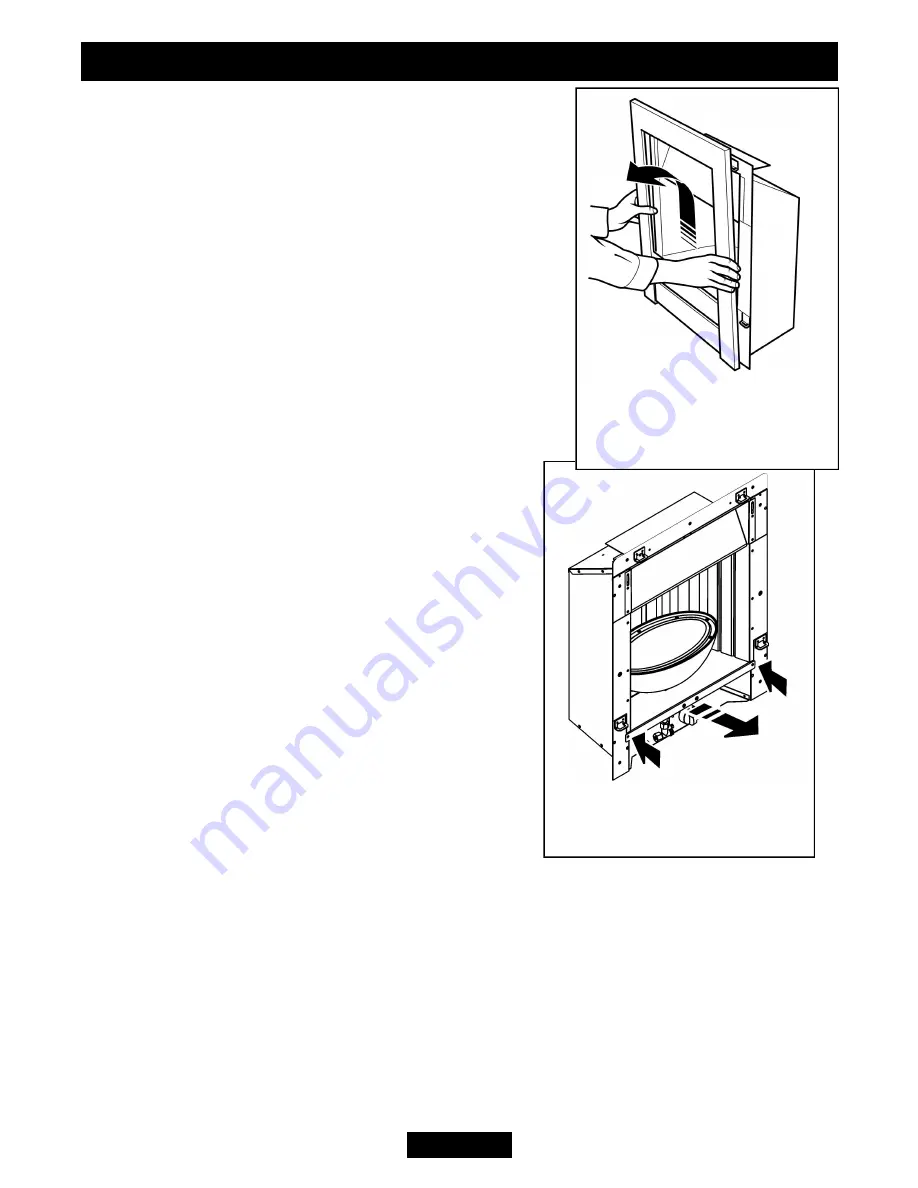
15.1 To remove the fascia.
1.
There is a heat baffle that is screwed to the fascia and
spillage plate (See section 12.2 and figure 25). Unscrew
and remove this heat baffle.
2.
The fascia is held in place by four hooked brackets at
the back of the fascia. These slot into four retaining
brackets on the hotbox. To remove the fascia, hold the
sides of the fascia and lift upward and forward. The
fascia should lift clear of the hotbox (See figure 27)
3.
Replace in the reverse order.
15.2 To remove the burner unit.
1.
Isolate the gas supply at the inlet isolating ‘T’
connector
2.
Support the inlet ‘T’ connector to avoid straining the
pipework and disconnect the appliance from the inlet
‘T’ connector.
3.
Lift and remove the eliptical burner cover from
the burner surface.
4.
Remove the two screws to the side of the burner
assembly (See figure 28)
5.
Detach the burner assembly from the hotbox by
holding the ‘bowl’ and gently sliding forward. The
burner assembly is heavy and if not supported
sufficiently will drop when clear of its support
brackets. When sliding the burner assembly be be
careful not to lift it as this may scratch the top
surface.
6.
Replace in the reverse order.
Page 26
INSTALLER GUIDE
Figure 28. Removal of burner
assembly.
Figure 27. Fascia removal
(The fascia may differ from
that shown)


