13. FITTING THE FASCIA
There is a self adhesive control position label and control slider assembly supplied
with this fire. These should be fitted to the fascia as shown in the fascia fitting guide.
The fitting guide for the fascia is supplied with the fascia and the fascia should be
fitted in accordance with it.
14. FULL OPERATING CHECKS
14.1 Check the control settings.
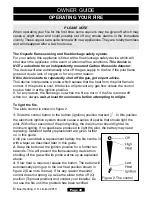
The control position markings on the fascia are shown in figure 27.
Please note:
When first turned on from cold, the flames will appear
predominantly blue.
When operating the fire for the first time, some vapours
may be given off which could set off smoke alarms in the
vicinity. These vapours are quite normal with new
appliances. They are totally harmless and will disappear after
a few hours use
.
1.
Make sure the slider button is at the off position (At
topmost position marked “
O
” on the fascia).
2.
Open the isolating valve on the inlet ‘T’ connector.
3.
Slide the button to the bottom (ignition) position marked
. Retain in this position to ignite the pilot. The burner
should ignite at its lowest setting within 4 seconds of the pilot igniting. Keep at this
position for a further 10 seconds to allow the pilot flame to stabilise.
4.
Release the button. The button should automatically spring up to the low heat
position. If for any reason the slider control does not spring up, raise the slider to the
topmost (Off) position and investigate why the slider is not operating correctly. If the
flames go out at this stage or when checking the rest of the setting positions, try the
full lighting sequence again. If the flames fail after two attempts, investigate the pilot
unit.
5.
Gradually slide the button up to increase the burner setting. The burner should be
at its maximum setting at the high heat position shown in figure 27. You should feel a
check to the button movement at this position.
6.
Slide the control button up past the high heat position to the off (“
O
”) position at the
top of the slide slot. Both pilot and main burner should go out. While cooling the
ceramic fuel effect may make some crackling noises. This is quite normal.
Page 28
©
Baxi Heating U.K. Limited 2010.
Figure 27. Control
markings
INSTALLER GUIDE


