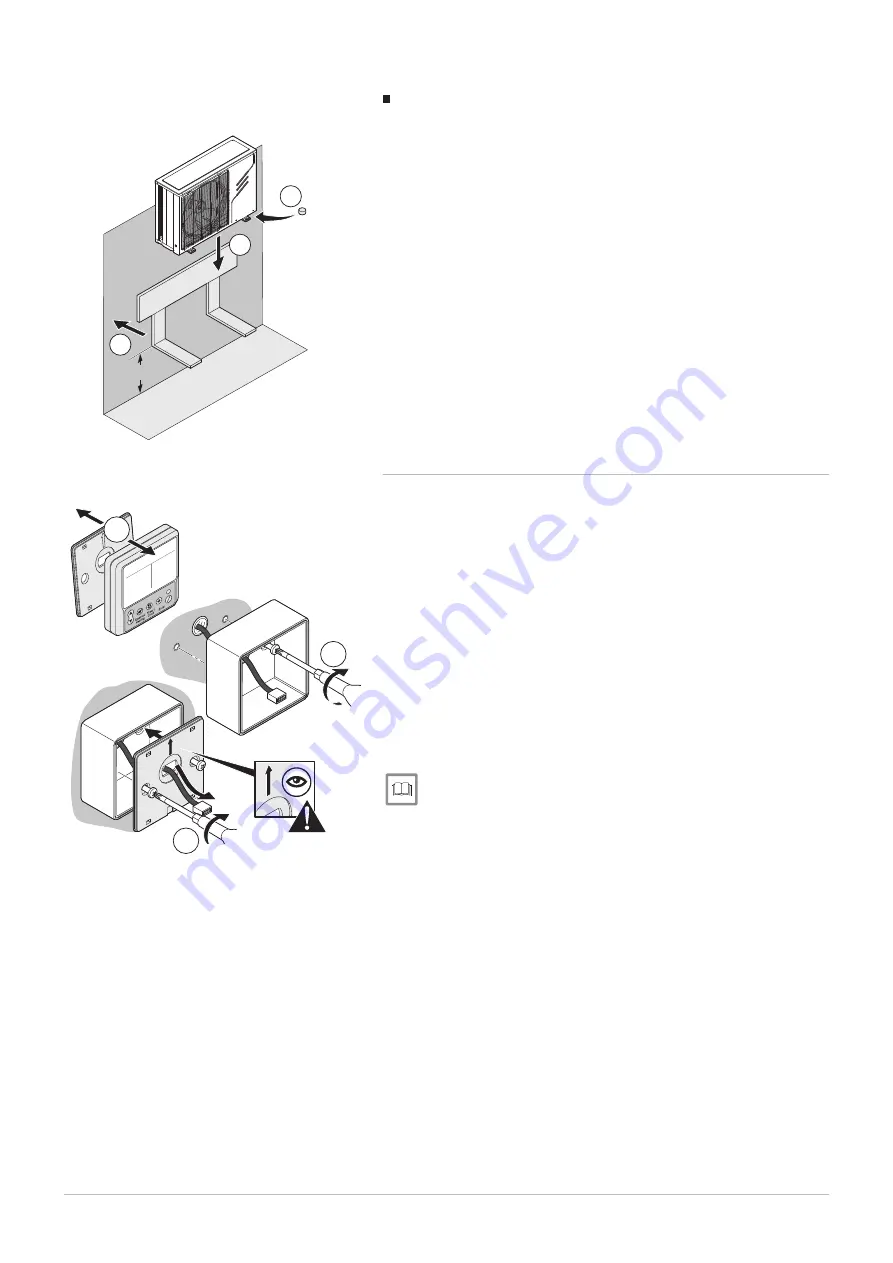
Installing the outdoor unit on its wall bracket
For wall mounting, fit the wall support kit and the anti-vibration studs
available separately: package EH95.
The data plate must be accessible at all times.
1. Mount the wall bracket with the horizontal plane at least 200 mm
above the ground.
2. Fit anti-vibration studs under the outdoor unit.
3. Mount the outdoor unit on its wall bracket.
The mounting screws are provided in the package EH95.
7.2.4
Installing the control panel support
The control panel is supplied with the outdoor unit.
The control panel must be positioned at eye level in a room free from
moisture and oil vapour (such as a kitchen or bathroom). Keep away from
powerful electrical appliances to avoid any interference.
Fit cable sleeves for the power supply to the control panel as well as the
connection between the control panel and the outdoor unit.
1. Open the control panel by unclipping the cover on the wall bracket.
2. Mount the support box, routing the cable through the hole provided for
this purpose.
Do not over-tighten the screws, to prevent deforming the back panel
and breaking the display.
The support box as well as the mounting screw are supplied in the
accessories box of the outdoor unit.
3. Fit the wall support cover, routing the cable through the hole provided
for this purpose.
For more information, see
Connecting the control panel display, page 41
Fig.36
MW-4000128-3
2
3
1
20
0
Fig.37
1
2
3
MW-2000628-1
7 Installation
7689749 - v03 - 25112019
35


