background image

1

Chapter 1

Checking the Components

Before you begin cabling and configuring the Bay Networks Extranet
Switch, examine the product packaging to be sure that you have all the
necessary components.

Front View

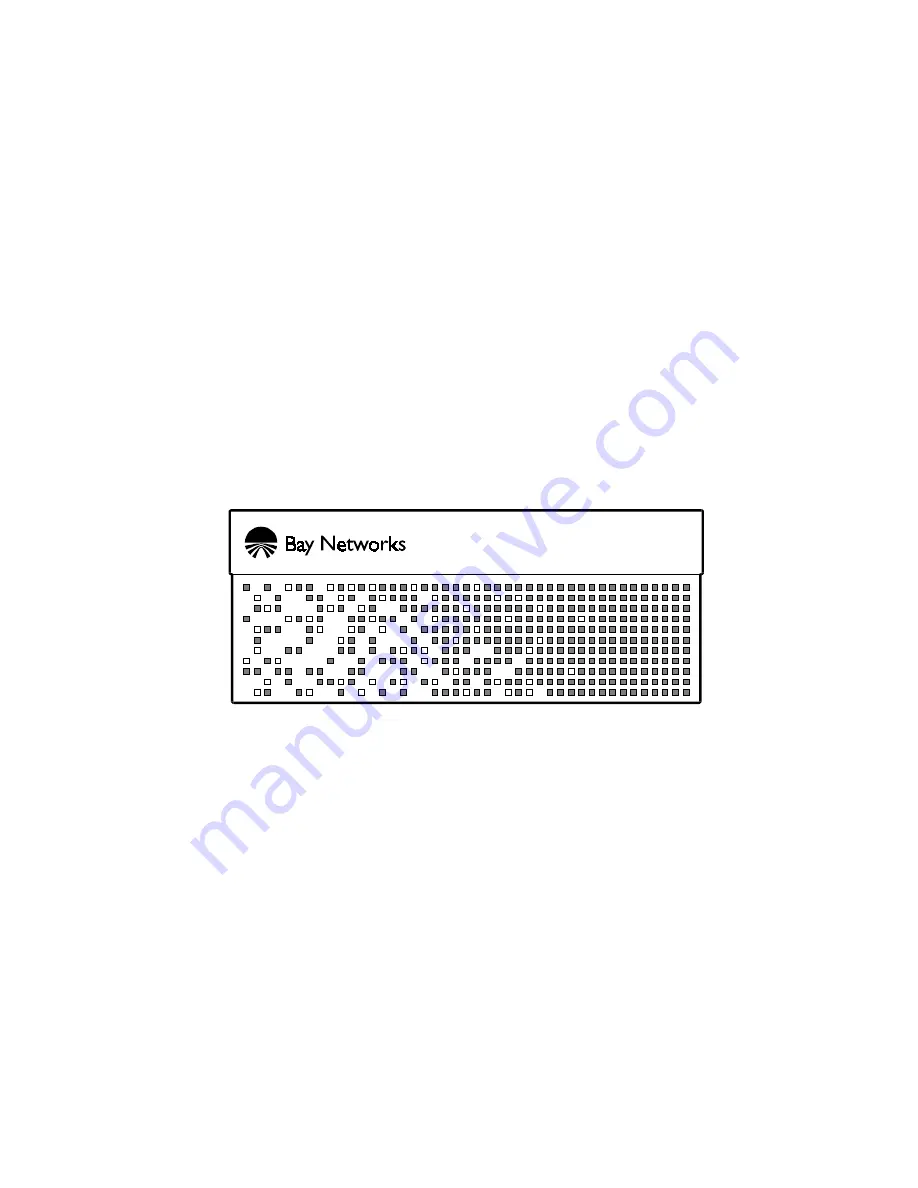
Following is a front view of the Switch.

Figure 1 

 The Bay Networks Extranet Switch, Front View

Summary of Contents for Bay Networks 2000

Page 1: ...Bay Networks Extranet Switch 2000 Getting Started Guide ...

Page 2: ...ense agreement and may only be used in accordance with the terms of that license A summary of the Software License is in Appendix B Trademarks Bay Networks is a registered trademark and Bay Networks 1000 Extranet Ready the Extranet Ready logo Personal Extranets Infrastructure for Extranets and the Bay Networks logo are trademarks of Bay Networks Inc Microsoft Windows 95 and Windows NT are register...

Page 3: ...N Interface 4 Serial Cable 5 Connecting the Cables 5 Understanding the Lights and LEDs 6 Assigning a System Identity 9 Startup Configuration Requirements 10 Management IP Address 10 Subnet Mask 10 Default Gateway 10 Private and Public Interfaces 11 Private 11 Public 11 IP Address Configuration Utility 12 Requirements 12 Running the IP Configuration Utility 12 Serial Interface Configuration 14 Prer...

Page 4: ...erfaces 27 PPTP Users 28 Administrator 29 Date and Time 29 Automatic Backup 30 Extranet Access Client Installation 31 Windows 95 31 Windows NT 4 0 33 Rack Mounting 35 Mounting Brackets 36 Sliding Rails Optional 38 Changing Hardware Configurations 41 Removing the Top Cover 41 System Board 43 Installing Option Cards 44 Installing Additional DIMMs 45 Memory Options 46 Replacing a Power Supply 47 Remo...

Page 5: ... Changing Hardware Configurations Complete details for configuring and monitoring the Switch are in the Bay Networks Extranet Switch Administrator s Guide After attaching the Switch s cables you can run the Bay Networks IP Configuration utility on your PC to provide the Switch with IP configuration information Then you can begin to manage the Switch and view active sessions Instructions are also p...

Page 6: ...would typically follow Gets you up and running fast with a PPTP connection Provides details to configure monitor manage and troubleshoot your Switch Provides latest information including known problems workarounds and special considerations Bay Networks Extranet Switch Release Notes Bay Networks Extranet Switch 1000 2000 4000 Getting Started Guides Bay Networks Extranet Switch Administrator s Guid...

Page 7: ...tant references contain concepts or information that has bearing on other fields or situations i e what you do here affects other fields or options elsewhere CAUTION Be careful In this situation you might do something that could result in damage to the equipment or loss of data WARNING Danger You are in a situation that could cause bodily injury Before working on equipment beware of the hazards in...

Page 8: ...echnical Solutions Center Telephone Number Fax Number United States and Canada 800 2LANWAN 800 252 6926 enter Express Routing Code ERC 176 978 916 3514 Valbonne France 33 4 92 96 69 66 33 4 92 96 69 96 Sydney Australia 61 2 9927 8800 61 2 9927 8899 Tokyo Japan 81 3 5402 0180 81 3 5402 0173 Latin America 561 988 7661 561 988 7550 ...

Page 9: ...egin cabling and configuring the Bay Networks Extranet Switch examine the product packaging to be sure that you have all the necessary components Front View Following is a front view of the Switch Figure 1 The Bay Networks Extranet Switch Front View ...

Page 10: ...es Envelope with Product Literature Mounting Brackets Screws 8 32 x 3 8 long 100 degree flathead Phillips black 1Tinnerman rack mounting nuts 10 32 2Screws 10 32 x 1 2 Truss PPH steel zinc Notes 1 Used only if the rack is not threaded 2 Used only with racks using 10 32 threading some racks use 10 24 Optional Sliding Rail Bracket Set Description Quantity Slides Slide Locking Brackets Extender Brack...

Page 11: ...e Switch connect to the desired LAN and power the unit back up LAN Interface 100BASE TX connections require Category 5 twisted pair wire The 100BASE TX specification supports 100Mbps transmission over two pairs of Category 5 twisted pair Ethernet wiring one pair each for transmit and receive operations 100 meters is the maximum recommended cable segment length between a 100BASE TX repeater and a w...

Page 12: ... a PCI card that is installed in the switch Two DB26S connectors provide the signals needed to interface to V 35 equipment Included in the accessory box are two cables that map the DB26S signals to a standard V 35 connector The cable pin outs are shown below DB26 Pin Signal V 35 Pin 1 GND A 2 TDA P 3 RDA R 4 RTS C 5 CTS D 6 DSR E 7 GND B 8 DCD F 9 RCB X 11 ETB W 12 TCB AA 14 TDB S 15 TCA Y 16 RDB ...

Page 13: ...E TX LAN RJ 45 connector to the Switch 2 Connect the power cord to the back of the Switch and to the electrical outlet 3 Additionally if you have LAN or WAN cards in Slots 1 through 3 connect those cables refer to Installing Optional Cards on page 44 NOTE Slot 4 is not supported Figure 4 Extranet Switch Back View Bay Networks ships a serial cable with the Switch You can provide the Switch with a M...

Page 14: ... examining the two LEDs located adjacent to the RJ 45 connector of the LAN port or the LEDs located on the card panel Figure 5 shows the LAN Port LEDs and Figure 6 shows the PCI card 10 100BASE TX LAN LEDs Look at the condition of the LEDs then examine the corresponding LED tables to better understand the indications Figure 5 LAN Port LEDs LAN Port LED Indicators LED Indicator Description On The c...

Page 15: ...hich this interface is attached are good LNK Off The cable connections between the card and the device to which this interface is attached are faulty On or Flashing The card is sending or receiving network data The frequency of the flashes increases with increased traffic ACT Off The card is not sending or receiving data On Operating at 100 Mbps 100 TX Off Operating at 10 Mbps ...

Page 16: ...ur Extranet Switch The Management IP Address is the address that is used for all system services such as HTTP FTP and SNMP The Management IP Address will enable you to manage the Switch from a Web browser Figure 7 shows the choices you have when first configuring your Management IP Address subnet mask and default gateway The IP Address Configuration Utility is on a diskette that comes with your Sw...

Page 17: ...private physical interface then the Management IP Address must reside in the 10 2 network Carefully record the Management IP Address Later during the Quick Start or the Guided Configuration you will be asked to supply IP addresses for the physical interfaces Subnet Mask The Subnet Mask defines how many bits of the IP Address represent the network the device is on and how many bits represent the ho...

Page 18: ...ity The LAN port is configured to be Private by default Bay Networks recommends that you connect this interface to your corporate LAN Additional interfaces that are inserted into the expansion slots are set to Public by default Private Indicates that this interface is attached to the internal corporate LAN and accepts regular networking protocols such as TCP IP FTP HTTP etc The Private interface a...

Page 19: ...u must use the serial interface configuration To test the function of your TCP IP stack send a PING command to any host Running the IP Configuration Utility The program BayNetIP exe is on a diskette labeled IP Address Configuration Utility that accompanies the Switch You can copy the utility to your hard disk and execute it from there or you can load it from the diskette drive The BayNetIP exe pro...

Page 20: ...e of discovered Switches Figure 9 IP Address Configuration Utility Display 3 Assign a Management IP Address and Subnet Mask to the Switch the Default Gateway address is optional and can be added later refer to Startup Configuration Requirements on page 10 for descriptions of the required fields If you have more than one Switch click Search to automatically add the additional Switch serial numbers ...

Page 21: ...al Interface Configuration procedure to access your Switch because it will not be accessible from a Web browser with an invalid address Serial Interface Configuration NOTE Bay Networks recommends that you use the IP Address Configuration Utility refer to page 12 to provide the Switch with its initial IP configuration information Alternatively you can use this procedure to access the Switch via the...

Page 22: ...ss Management IP Subnet Mask Gateway IP Address optional Allow HTTP Management default Controlled Crash 3 Follow the screen prompts Descriptions of the fields required to complete this procedure are in the section Startup Configuration Requirements on page 10 Allow HTTP Management enables you to manage the Switch via a Web browser A Controlled Crash forces the Switch into a hard crash state which ...

Page 23: ...2 Management IP Subnet Mask 3 Gateway IP Address 4 Allow HTTP Management C Controlled Crash E Exit Please select a menu choice 1 4 C E Figure 10 Sample Serial Interface Display 4 Once you complete the configuration type E to Exit You can then manage the Switch from a Web browser IMPORTANT This Administrator s Password is also the Primary Administrator s Password This password guarantees access to ...

Page 24: ...or later 4 70 1215 or later NOTE The Help About box of Internet Explorer Version 3 01 actually displays Version 3 00 4 70 1215 Not using a recent version of Internet Explorer causes the upper left and top left corners of the management displays to remain gray rather than displaying the navigational menu and the current menu selection respectively Netscape Communicator Version 4 0 or later and Nets...

Page 25: ...istration Notebook Before entering the configuration options you should first register to activate licenses warranties and services Figure 11 shows the alternatives you have when first configuring your Switch Bay Networks recommends that you begin with the Quick Start or the Guided Configuration Once you are familiar with the Switch s navigation menu and capabilities then you will want to select M...

Page 26: ...llow A detailed checklist describes things you will need to properly configure your Switch Then full details of the different procedures are described Complete details for configuring and monitoring the Switch are in the Bay Networks Extranet Switch Administrator s Guide Figure 12 Bay Networks Extranet Switch Welcome Display ...

Page 27: ... database then make sure you have either the external LDAP or the RADIUS server s IP Address and password or shared secret An external accounting server such as RADIUS with its IP Address and shared secret password Client dial in Prepare the clients for the type of tunneling protocol they will be using The PPTP client application is available on the Bay Networks CD for Windows 95 and it comes with...

Page 28: ...u have the information required to set up the Switch the Guided Configuration can to take two to three hours to complete depending on how extensive your configuration will be Manage Extranet Switch Click to begin a standard configuration and management session This option allows access to all configuration management facilities Bay Networks recommends that you follow the Quick Start or Guided Conf...

Page 29: ...n and Password in lowercase characters as follows Login admin Password setup IMPORTANT If you change your password and later need to access the Serial Interface Configuration you must then enter the modified password The factory default password is no longer valid in this case Also make sure you change the default Administrator s Login and Password as soon as possible refer to the Admin Administra...

Page 30: ...sites This display acts as a checklist for you to prepare for the Quick Start Configuration Assembling the information beforehand and verifying that you can establish a PPTP Client session makes the Quick Start easy Figure 13 Quick Start Prerequisites Display ...

Page 31: ...r on the private LAN segment dynamically assigns IP addresses on behalf of remote users The DHCP server is automatically discovered via broadcasting on the private interface that is associated with the Management IP Address With an Internal Client Address Pool you will need a range of IP addresses Local Lightweight Directory Access Protocol LDAP database authentication LDAP is a standard protocol ...

Page 32: ...gement IP Address for the Switch Subnet Mask for the local subnet User IDs and Passwords PPTP Users up to 3 Administrator Post Configuration Testing A PPTP remote user dialing in from an external system Refer to the Bay Networks Extranet Switch Administrator s Guide the Switch s online help and the Microsoft PPTP documentation for additional information ...

Page 33: ...ddress and Subnet Mask establish the tunnel as Private your private LAN or Public public data networks and configure up to three PPTP Users and an Administrator with User IDs and Passwords Additionally you can set the system s Date and Time Figure 14 Quick Start Configuration Display ...

Page 34: ...igured through the initial IP Address configuration Subnet Mask The Subnet Mask defines how many bits of the IP Address represent the network the device is on and how many bits represent the host s ID on the network The device uses the Subnet Mask to determine which IP Addresses are directly reachable on the network and which must be routed through a gateway A sample IP Address is 10 2 3 3 with a ...

Page 35: ...tes that this interface is attached to the Private network and it can accept nontunneled networking protocols such as TCP IP FTP HTTP etc The Private interface also accepts tunneled protocols e g IPsec PPTP L2TP and L2F that can be used for secure management access to the Switch PPTP Users User ID Enter a User ID The User ID works along with the password as the authentication mechanism when attemp...

Page 36: ...s This UID is also used to access the serial port and the recovery disk Note that there can be only one Primary Administrator User ID Enter an appropriate User ID for the Primary Administrator This UID has the privileges to modify and view all controls in the Switch Password Enter a user Password for the Primary Administrator NOTE Do not use a password of 16 pound signs Confirm Password Reenter th...

Page 37: ...onfigure regular intervals when your system files are saved to designated host backup file servers IMPORTANT You should configure Automatic Backups immediately so that you will not lose system or configuration information in case of problems You configure the Automatic Backup servers from the Admin Automatic Backup display ...

Page 38: ...ow have the Microsoft PPTP tunneling client installed 3 Complete the IPsec installation by running the Eac_10d exe Bay Networks Extranet Access Client The installation is self explanatory You might need your Windows 95 CD ROM in case the CD was not copied onto your drive As prompted at the end of the installation reboot your system 4 If you do not care about operating within the Network Neighborho...

Page 39: ... s internal workgroup For example baynetworks D Next under the Identity tab verify that the Computer Name is different from your PC at work Otherwise you would be attempting to log a second unit with the same name onto the network E If you have made any changes in the Network Control Panel click OK then reboot the system 5 Double click on the Extranet Connection Manager icon A Enter a new Connecti...

Page 40: ...twork Control Panel Select the Services tab and click on Add Scroll down to select Remote Access Service and click OK 3 Under the Protocols tab verify that NetBEUI is not installed If NetBEUI is listed click on it then click on the Remove button This will force the Network Neighborhood to use NetBIOS over TCP IP which is compatible with the Switch Click the OK button and reboot your system 4 Doubl...

Page 41: ...dditionally make sure the internal temperature of the rack does not exceed 40 degrees Do not block the power supply vents or otherwise restrict airflow when installing the Switch into a rack Make sure that your rack is properly stabilized so that it will not tip over under the weight of the Switch and other devices Make sure that the electrical branch circuits are capable of handling the Switch an...

Page 42: ...f a two post rack mount installation Position the brackets with the rack mount bracket facing outward as shown below Optionally you can mount the brackets in the rear of a rack Figure 15 Bracket Installation for a Two Post Chassis Rack Mount Front Mounting Bracket Rack Mounting Screws Mounting Rail Optional Rear Mounting Bracket ...

Page 43: ...ng the rack mount brackets 1 Position the bracket onto the Switch as shown on the previous page then screw in the four rack mounting screws Repeat this step on the other side of the chassis 2 With one person holding the Switch in place insert the two front screws on each side to secure the Switch and brackets into the rack ...

Page 44: ... sliding rail mount assembly and the rack must be at least 20 inches deep Optional extender brackets and hardware are provided in case your rack is deeper than 20 inches Attach the extender brackets to the sliding rails Bay Networks recommends that you have two people available when installing the sliding rail assembly The job is easier when one person holds the rail brackets to the rack sides whi...

Page 45: ...Rack Mounting 39 Figure 16 Sliding Rail Installation for a Four Post Chassis Rack Mount Rack Mounting Bracket s Rack Mounting Screws Mounting Rail ...

Page 46: ...crews until the chassis has been installed 3 Mount the sliding rails to the chassis Note that the closed end bracket must be mounted at the front 4 Mount the slide locking bracket to the top front left and right sides of the chassis 5 Pull out the bracket inner rails so that the ball retainers are fully forward Install the chassis by positioning the slides into the slide rail brackets and pushing ...

Page 47: ...NING Turn off the Switch and unplug it before installing LAN or WAN cards system memory or installing a new power supply To install LAN and WAN cards you must first remove the Switch s top cover To replace a power supply or to use the Recovery Diskette you must remove the front bezel of the Switch Removing the Top Cover The following illustration shows you how to remove the top cover from the Swit...

Page 48: ...op Cover 1 Turn off the Switch s power and unplug it 2 Remove the three screws at the top rear of the chassis 3 Slide the top cover back and move it away from the chassis Remove the three screws from top of cover 1 Lift rear of cover up and pull away from unit 2 ...

Page 49: ...tion Cards Slots Cooling Fans and Replaceable Battery are noted Figure 18 Switch s System Board WARNING Beware of danger if the battery is incorrectly replaced Replace with the same or an equivalent battery only as recommended by the manufacturer Also dispose of used batteries according the manufacturer s instructions ...

Page 50: ...Slots 1 to 3 for any mix of LAN and WAN cards Note that Slot 4 is not supported Figure 19 Installing LAN or WAN Cards 1 Power off the Switch 2 Remove the filler panel screw and pull out the filler panel 3 Slide the option card into the intended slot Make sure the card seats firmly and evenly into the card slot If the card is not seated properly it will not work ...

Page 51: ...e if the DIMM 1 slot is populated then add the next DIMM to the DIMM 2 slot Figure 20 Installing Additional Memory 1 Power off the Switch 2 Press down the locking levers on both sides of the DIMM 3 Pull the DIMM up to remove it from the slot 4 Place a new DIMM in the slot making sure to properly position the DIMM s alignment keys 5 Pull up the locking levers on both sides of the DIMM and snap in t...

Page 52: ...Kingston Technology Corp KTM2x72V82 60EG PNY 722086EDM2G11TC 4M x 72 32Mb Buffered ECC 60ns Micron Technology MT18LD472G 60X Samsung KMM372F400BK 6U Kingston Technology Corp KTM4x72V44 60EG Southland Micro Systems SM572044A92E5G6 PNY 724056EDM4G20TC 8M x 72 64Mb Buffered ECC 60ns Advantage Memory Corp AD872 4x4 60VE IBM IBM11M8735CBD 60 Kingston Technology Corp Micron Technology KTM8x72V84 60EG MT...

Page 53: ...wer supply involves the following steps 1 Remove the top cover three screws 2 Remove the four exterior screws that secure the Power Supply to the rear of the Switch 3 Detach the connectors from the following devices Processor board Hard disk drive s Recovery diskette drive 4 Swap out the faulty power supply 5 Reattach all cables and screws ...

Page 54: ... you how to remove the front bezel from the Switch You must remove the bezel to insert the Recovery Diskette Figure 21 Front Bezel Removal F ro n t B e z e l S lid e fin ge rs b e h in d fro n t be z e l a nd firm ly p u ll fo rw a rd in th e d ire ctio n o f a rro w s 3 5 in c h D is k D riv e ...

Page 55: ...are new After a few times removal is easier Sliding the top cover back is optional it allows you to get a better grip on the front bezel for removal Remove the Switch front bezel as follows 1 Optionally remove the three screws at the top rear of the chassis then slide the top cover back 2 Slide your fingers between the front bezel and the Switch 3 Pull forward firmly ...

Page 56: ...Changing Hardware Configurations 50 Removing the Hard Disk Drive The following illustration describes how to remove a Hard Disk Drive from the Switch Figure 22 Removing the Hard Disk Drive ...

Page 57: ... the chassis 4 Tighten the two standoff screws 5 Attach the DC power cable at the bottom to the hard drive 6 Attach the hard drive ribbon cable Make sure the hard drive cable is correctly positioned to the right NOTE When standing in front of the unit the red line on the ribbon cable that signifies Pin 1 is on the left i e facing the center of the unit 7 Reattach the small ribbon cable to the disk...

Page 58: ...cifications Physical Depth 17 in 43 18 cm Width 16 75 in 42 55 cm Height 7 00 in 17 78 cm Weight 25 0 lbs 11 34 kg Electrical 110 120 220 240V 6 0 3 0A 50 60Hz Operating Environment Temperature 32 F 122 F 0 C 50 C Relative Humidity 10 90 non condensing ...

Page 59: ...ARRANTIES OF MERCHANTABILITY AND FITNESS FOR A PARTICULAR PURPOSE In addition the program and information contained herein are licensed only pursuant to a license agreement that contains restrictions on use and disclosure that may incorporate by reference certain limitations and notices imposed by third parties Federal Communications Commission FCC Compliance Notice Radio Frequency Notice Note Thi...

Page 60: ...a domestic environment radio disturbance may arise When such trouble occurs the user may be required to take corrective actions Canadian Department of Communications Radio Interference Regulations This digital apparatus does not exceed the Class A limits for radio noise emissions from digital apparatus as set out in the Radio Interference Regulations of the Canadian Department of Communications Rè...

Page 61: ...ay Networks software products are licensed for use under the terms of the applicable Bay Networks Inc Software License Agreement that accompanies such software and upon payment by the end user of the applicable license fees for such software 2 Restrictions on use reservation of rights The Software and user manuals are protected under copyright laws Bay Networks and or its licensors retain all titl...

Page 62: ...construct lost or altered files data or programs 4 Limitation of liability IN NO EVENT WILL BAY NETWORKS OR ITS LICENSORS BE LIABLE FOR ANY COST OF SUBSTITUTE PROCUREMENT SPECIAL INDIRECT INCIDENTAL OR CONSEQUENTIAL DAMAGES OR ANY DAMAGES RESULTING FROM INACCURATE OR LOST DATA OR LOSS OF USE OR PROFITS ARISING OUT OF OR IN CONNECTION WITH THE PERFORMANCE OF THE SOFTWARE EVEN IF BAY NETWORKS HAS BE...

Page 63: ...ata or information to any military end user or for any military end use including the design development or production of any chemical nuclear or biological weapons 9 General If any provision of this Agreement is held to be invalid or unenforceable by a court of competent jurisdiction the remainder of the provisions of this Agreement shall remain in full force and effect This Agreement will be gov...

Page 64: ...rit Network Inc 1992 1993 1994 1995 1996 All Rights Reserved Permission to use copy modify and distribute this software and its documentation for any purpose and without fee is hereby granted provided that the above copyright notice and this permission notice appear in all copies of the software and derivative works or modified versions thereof and that both the copyright notice and this permissio...

Page 65: ...nnecting cables 5 conventions vii D date 29 DB26S to V 35 connector 4 pinouts 4 DB9 or DB25 connectors 5 default gateway 10 27 DHCP 24 dimensions of Switch 51 DIMMs 43 installing 45 diskette IP Address Configuration Utility 12 documentation map vi DSU CSU required 5 E electrical 51 F front bezel removing 48 49 G gateway IP address serial interface 15 Guided Configuration 18 21 H height 51 I initia...

Page 66: ...drive 48 registration 18 21 relative humidity 51 RJ 45 pinouts 4 S safety 41 power off 44 45 serial cable connectors 5 serial interface configuration requirements 14 connector 5 serial number search 13 sliding rail installation procedure 40 sliding rails 38 software latest registration 21 speed selection 3 subnet mask 25 Support contacting Customer viii system board illustration 43 system board LA...

Page 67: ...29 top cover removing 41 42 U user ID 28 user interface vii W WAN cards 27 installing 41 44 WAN connection DSU CSU 5 warning vii Web browser 14 Web browsers recommended 17 weight 51 Welcome display 18 width 51 ...

Reviews: