background image

O

PERATION

3-1

3.1

Creating a Managed Object

Managed Objects are placed onto sub-maps.  To add an object for a Marlin Router
to a map. open up the relevant sub-map and select EDIT-NEW OBJECT-NAUTICA
MARLIN ROUTER.

Nautica MicroManager has special code for managing Nautica Objects.  This means
that the configuration that would normally need to be done for a Nautica Router or
Bridge can be done through MicroManager itself.

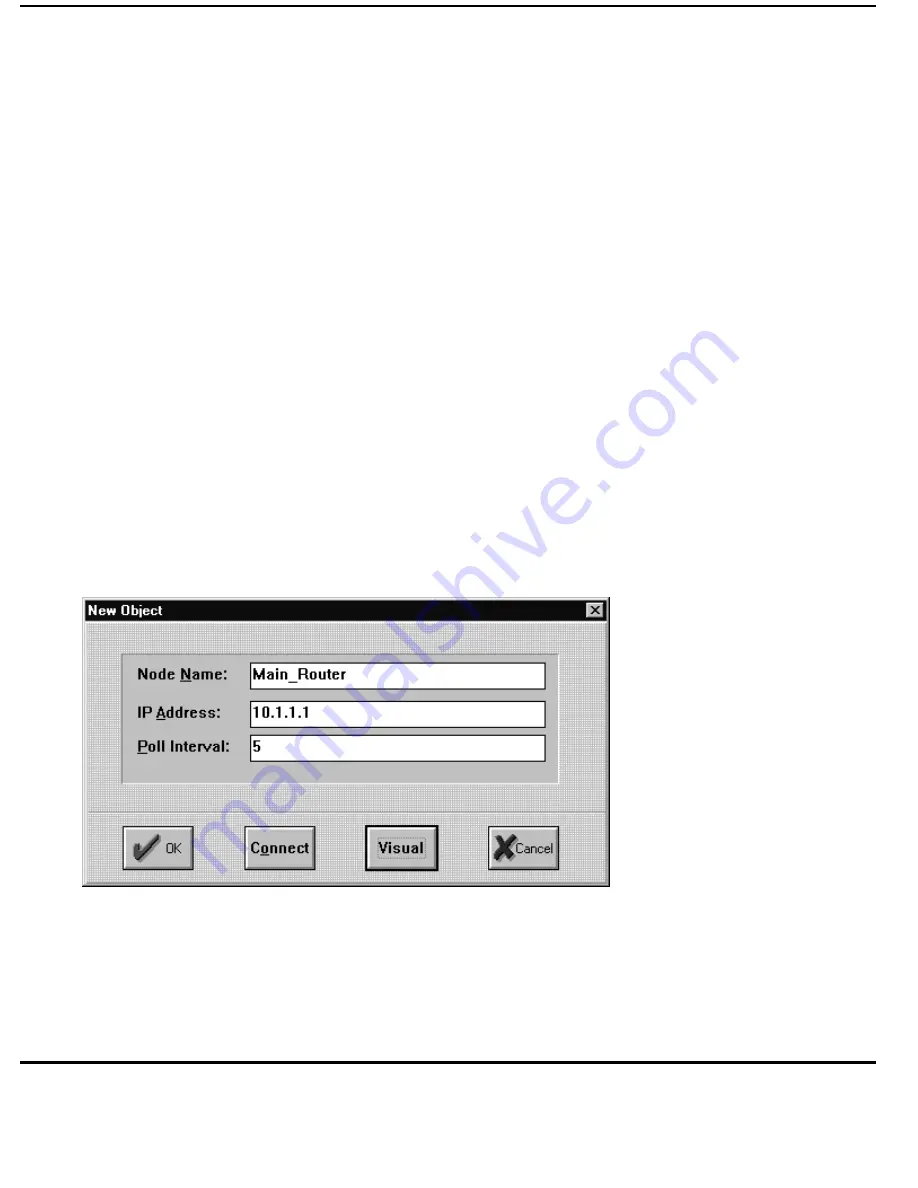
Once you have selected the Marlin option from the New Object menu, the New
Object dialogue box will appear on the screen.

Type in the name of the object into this screen.  As with Map Objects, the entry here
can be Alpha-Numeric, but you cannot use spaces.

Next enter the IP number of the router.  In our example it is 126.209.0.1 and then
enter a Polling Interval of, for example, 5 seconds.  The dialogue box should look
something like this:

Figure 10: Managed Object setup

If you want to attach a different icon to the object (the default is a representation of
a marlin Router), click on Visual and enter the name of the bitmap file (do not enter
the .BMP extension).  Remember, this file must be in the Maps directory in the
MicroManager directory.

Summary of Contents for MicroManager

Page 1: ...machine readable form without the prior written permission of Bay Networks Inc The information contained in this manual is believed to be accurate However no responsibility whatsoever is assumed by Bay Networks Inc for its use nor for any infringements of patents or other rights of third parties resulting from its use All trade marks are acknowledged 1996 Scorpion Logic Ltd A Bay Networks Company ...

Page 2: ...ns Maps can be layered one onto another and these sub maps are entered by double clicking on them Any alerts and alarms affecting sub maps are also passed through to the top level map This gives instant notification of status warnings and changes on the entire network seen from the top level map SYSTEM REQUIREMENTS Before installing Nautica MicroManager on your system verify that you have the foll...

Page 3: ... setup If you are using Windows 95 select Run from the Start Menu and type floppy drive setup Click on the OK button and the setup will begin Once the program has initialised you will be taken into the Setup routines Follow the prompts on the screen and the software will be installed Insert Disks 2 and 3 when prompted At the end of the installation a group called Map will be created and the MicroM...

Page 4: ... the countries for there are sub maps included with the software Above the Map is the Menu bar Menus are activated by clicking on them with the mouse and selecting the option you require or by holding down the ALT key on the keyboard and then pressing the underlined letter in the menu name ALT F for example will take you into the File menu Once a menu is open just press the underlined letter in th...

Page 5: ...Figure 3 Europe Map Object Each of the areas highlighted in blue on the Root Map can be accessed in this way Each Map Object like Europe has its own Menu bar These Map Objects open into smaller windows that can be re sized as you see fit 2 2 Creating Sub Maps The first two level maps give you general geographic information but more often than not you will want to create further map levels that ref...

Page 6: ... and then the New Object command When the flyout menu appears select the Map Object option A dialogue box as shown over will appear on the screen Figure 4 New Map Object Every object you create on a map needs a name Names can contain Alpha and numeric characters but cannot have any spaces If you require a space use the underscore _ key The dialogue box also asks for the IP address of the object If...

Page 7: ...n has to correspond to a bitmap BMP file in the Nautica MicroManager directory When you are entering the file name do not enter the BMP extension Bitmaps are installed by default into the C RBNM MAP directory or your own directory if you changed the directory path at the time the software was installed Several bitmaps come with MicroManager these are as follows Aus_Icon bmp Austra 1 bmp Eng_icon b...

Page 8: ...st shown above or create your own The icon forms a picture on the higher level map to represent the sub map If you are going to include an icon in the description of your object do not include the BMP extension in its name Icons need not all be active objects and can be used to represent things like rooms and desks It is possible to create your own icons but as with backgrounds you must follow the...

Page 9: ...r your sub map click on OK and you will be returned to the setup dialogue box Click on OK again and the object will be placed onto the higher level map The icon may be in the wrong place and you will not be able to move it If you hold your mouse down on the icon a sub menu will appear ...

Page 10: ...n object does nothing and holding the mouse still over an object will cause the editing menu to appear To turn Locking on or off you will need to select the Lock option from the Map menu If there is a tick next to the Lock command then locking is turned on With Lock turned off it is possible to move but not edit map objects Drag the icon into position and turn Lock on once more Double click on the...

Page 11: ... left or right of an object This is set in the Visual section of the setup procedure In the following example the name for the Head_Office icon was positioned to the left to make it fit the screen better Figure 9 Sub Map with further Sub Maps To edit an object and make this change make sure Lock is on hold the mouse down over the icon to be changed and select Map Object Edit In the dialogue box se...

Page 12: ...he mouse down over the relevant object and select the delete command in the sub menu 2 3 Using Map Objects To use a sub map open the main geographic map and then double click the icon If this does not work make sure the map is locked Map Lock When the sub map opens double click any other objects you have placed here and you will move into another level of maps Eventually you will come to a blank s...

Page 13: ... menu the New Object dialogue box will appear on the screen Type in the name of the object into this screen As with Map Objects the entry here can be Alpha Numeric but you cannot use spaces Next enter the IP number of the router In our example it is 126 209 0 1 and then enter a Polling Interval of for example 5 seconds The dialogue box should look something like this Figure 10 Managed Object setup...

Page 14: ... The icon should start to flash yellow at this point This is to remind you that the configuration changes you have made have not yet been saved If you close the Map down you will notice that the icon for the sub map is also flashing yellow This colour reminder will even flash over the specific area of the Root map to remind you that configuration changes have been made but not saved To save the ch...

Page 15: ...3 3 Figure 12 Paths Dialogue Box This dialogue gives you information on the Paths used by the Router These Paths can be edited and deleted as required Click on OK and the box will disappear ...

Reviews: