Manual breast pump
EN
6
■
Before you start assembling the feeding bottle, clean and sterilise the individual parts according to the
instructions contained in the chapter "Cleaning and sterilisation" and thoroughly wash your hands .
■
Assemble the feeding bottle by placing the nipple A
5
into the bottle screw ring A
6
and then screw the
bottle opening cap A
6
together with the nipple A
5
on to the feeding bottle A
qd
. If you wish to use a
narrow-neck feeding bottle, connect the adapter A
7
to the bottle opening cap A
6
and nipple A
5
from
underneath and then screw this assembly on to the narrow-neck bottle . If you do not use the feeding bottle
immediately after assembling it, we recommend that you place the protective nipple cap A
4
on to the bottle
opening cap A
6
and nipple A
5
, which will protect the nipple A
5
against dust .
■
If you wish to store the milk in the bottle, close it according to the following instructions: Turn the bottle screw
ring A
6
so that the opening with the thread for screwing on the feeding bottle A
qd
points downwards . Place
the bottle closing cap A
qf
with the convex side pointing downwards in the centre of the bottle screw ring
A
6
and push it down thoroughly along its perimeter until an audible click is heard .
■
Turn the bottle bottle cover A
qf
so that the bottle screw ring A
6
is pointing upwards and screw it on to the
neck of the feeding bottle A
qd
. Now the feeding bottle A
qd
is closed .
■
You can check for leaks by turning the feeding bottle A
qd
with the bottle bottle cover A
qf
upside down .
Note
Store and heat the milk according to the instructions contained in chapter Storing and heating up breast
milk .
■
For disassembly of the feeding bottle, proceed in the reverse sequence .
Using the breast pump
■
Prior to expressing breast milk, thoroughly wash your hands and wipe the breast with a wash cloth (ideally
a disposable type) dipped in clean warm water .
■
Seat yourself comfortably in a chair or armchair and rest your back against a backrest . It is not appropriate
to express breast milk when bending over . Take the breast pump out of the bottle stand A
qg
.
■
Check the position of the handle A
qa
on the piston A
0
and check that it is in the correct expression phase
position that you wish to use .
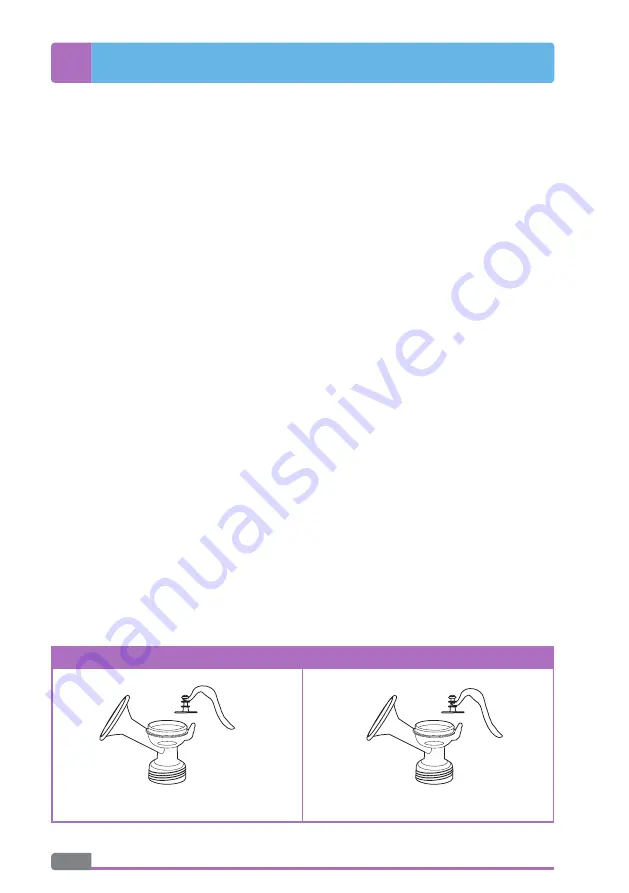
Setting the expression phase and intensity:
■
For gentle stimulation expression, place the handle A
qa
in the first position on the piston A
0
.
■
For strong expression, which emulates the deeper and slower sucking action of the baby, place the handle
A
qa
on to the second position on the piston A
0
. Figure C
1
and
2
.
C
1
First stimulation phase with gentle expression
2
Second expression phase with strong expression


