background image

5

Getting Started

4

Getting Started

4

5

4

5

Y

our Meter F

eatures

Information F

or Safety

Information For Safety


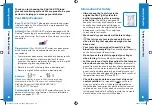
Always keep the test strips in the 
original bottle. Tightly close the 
bottle immediately after removing 
a test strip. 

The bottle is designed to 

keep the test strips dry. Exposure to room 
humidity from leaving the bottle open or 
not storing them in the original bottle can 
damage your test strips. This could lead 
to inaccurate test results.


Wash and dry your hands well before testing.


Test strips are for single use only.


Do not 

use a test strip that appears damaged or has 
been used.


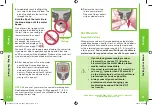
Your test strip is designed to easily “sip” the 
blood into the sample tip.

 Do not drop blood directly 

on the flat surface of the test strip.


Do not press the test strip against your finger 
when testing.

 This may block the sample tip.


Let the meter and test strips adjust to the temper-
ature where you are testing. 

Whenever the meter is 

moved from one location to another, allow approximately 
20 minutes for the meter to adjust to the temperature of 
a new location before performing a blood glucose test. 
The meter has been designed to give accurate results at 
temperatures between 5°C and 45°C. 


Check the expiry dates on your test strips and 
control solution. 

It is important to not use the test 

strips or control solution if the expiry date printed on 
the bottle label and carton has passed. For the control 
solution do not use if it has been six months since you 
first opened the bottle. It will help to write the six month 
discard date on the control solution label.

Your Meter Features

Easy:

 The C

ONTOUR

 XT blood glucose monitoring system 

is about simplicity. You will notice its simple approach the 
first time you see it.

Automatic:

 Your C

ONTOUR

 XT meter is designed with No 

Coding

TM

 technology, to automatically code itself every time 

you insert a test strip. It will even tell you when a test strip is 
underfilled.

Programmed:

 Your C

ONTOUR

 XT meter has been preset 

at the factory with the standard date and time for your 
convenience.

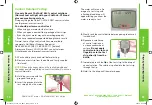
   Your meter has been preset and locked to display results 

in mmol/L (millimoles of glucose per liter). In some 
countries, the meters are preset to display units in mg/dL 
(milligrams of glucose per deciliter);

   Results in mmol/L will always have a decimal point;

   Results in mg/dL will never have a decimal point.

Example: 


or


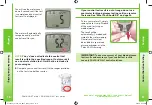
Check your display to ensure that results are being 
displayed in mmol/L. If they are not, contact Bayer 
Diabetes Support at 0845 600 6030 (UK) /
1 890 920 111 (Ireland).

Customizable:

 The C

ONTOUR

 XT meter allows you to set 

personal choices for some features. For more information, 
please see pages 21 – 27.

Thank you for choosing the C

ONTOUR

®

XT blood 

glucose monitoring system! We are proud to be your 
partner in helping you manage your diabetes.

81534497_CntrXT_UG_ENuk_FpBp_v0.indd   4-5

81534497_CntrXT_UG_ENuk_FpBp_v0.indd   4-5

1/25/13   8:13 AM

1/25/13   8:13 AM

Summary of Contents for CONTOUR XT

Page 1: ...57539 6 0 H x 4 5 W 10000008206 REV 1 FONTS Helvetica Zapf Dingbats Berthold Akzidenz Grotesk Frutiger Gotham COLORS Cyan Magenta Yellow Black NOTE THIS COLOR PROOF INDICATES COLOR BREAK ONLY AND MAY NOT ACCURATELY REFLECT ACTUAL PRODUCTION COLOR Regional Master Template No M_GDE_USR_0051 R0002 Clinical Trial Global Master Template No XXXX FC 20 8mm BC 10 4mm 1 3rd of the Cross clear space has bee...

Page 2: ...se monitoring system is not intended for diagno sis of or screening for diabetes mellitus and is not for use in neonatal care Information For Safety Read your CONTOUR XT user guide the MICROLET 2 lancing device insert and all instructional materials provided in your meter kit before testing Please follow all instructions for use and care exactly as described to help avoid inaccurate results Wash a...

Page 3: ...t is very impor tant to verify that is fully displayed If there are missing segments see Error Codes and Symbols pages 32 34 This may affect the way you see your results or will appear if the meter is in 12 hour setup Center area on the display that shows either your test result or any error codes Top area on the display presenting date and time Day month format Results are displayed as mmol L or ...

Page 4: ...the bottle label and carton has passed For the control solution do not use if it has been six months since you first opened the bottle It will help to write the six month discard date on the control solution label Your Meter Features Easy The CONTOUR XT blood glucose monitoring system is about simplicity You will notice its simple approach the first time you see it Automatic Your CONTOUR XT meter ...

Page 5: ...nfection Use a new MICROLET lancet each time you test because it is no longer sterile after use Do not perform a blood glucose test when the CONTOUR XT meter is connected to an external device e g computer Use only approved equipment from the manufacturer or certified body such as UL or TUV Preparing the Test Strip 1 Wash and dry your hands well before testing 2 Remove a CONTOUR NEXT test strip fr...

Page 6: ...This will re set the device You can also pull and release the re setting handle 6 The puncture depth depends on the endcap setting and the amount of pressure applied to the puncture site You will determine which combination works best for you Getting the Blood Drop and Testing 1 Press the endcap firmly against the puncture site and press the blue release button with your thumb 2 Stroke your hand a...

Page 7: ...down as this may result in an error NOTE You can set your meter to use meal marker options See Advanced Mode settings L 2 on pages 21 22 If you want to mark your result you will need to do it before removing the test strip 6 Remove the test strip to turn your meter off Dispose of the used test strip as medical waste If your blood glucose reading is under 2 8 mmol L or you see less than 0 6 mmol L ...

Page 8: ...posed side of the cap 4 While pressing the release button a pull the re setting handle b and the lancet will drop into the container you have selected 5 Dispose of the used lancet as medical waste Do not reuse lancets Use a new MICROLET lancet each time you test The exterior of the CONTOUR XT meter can be cleaned using a moist not wet lint free tissue with a mild detergent or disinfectant solution...

Page 9: ... control solution Do not use expired materials 3 Hold the test strip with the grey end facing up 4 Insert the grey end into the test strip port on the meter The meter will turn on An image of a test strip with a flashing blood drop will appear letting you know the meter is ready to test 6 Squeeze a small drop of control solution on a clean nonabsorbent surface Do not apply control solution to your...

Page 10: ...If your control test result is out of range do not use your meter for blood glucose testing until you resolve the issue See What You Should Do on page 34 To turn your meter off simply remove the test strip Dispose of the used test strip as medical waste The result will be automatically marked and stored in the meter memory Control results will not be included in your blood glucose averages or in t...

Page 11: ...lect the 12H with AM and PM or 24H setting Press M to set The number in the hour position will now flash Press or until you reach the current hour Press M to set The minute will now flash Press or to select the current minute Press M to set If you selected a 12 hour time setting the AM or PM will now flash Press or to select AM or PM Press M to set d m will now flash on the display Press or to sel...

Page 12: ... flashing test strip 2 Press and hold or for 3 seconds 3 L 2 will flash 4 Press or to change to L 1 5 Press M to set To set your meter to Advanced Mode and take advantage of meal markers and other functions available to you 1 Press M to turn your meter on Wait to see the flashing test strip 2 Press and hold or for 3 seconds 3 L 1 will flash 4 Press or to change to L 2 5 Press M to set The flashing...

Page 13: ... on your display you can change your meter s personal low and high blood glucose settings By person alizing these settings your CONTOUR XT meter will help you track these HI and LO results Personalising LO HI and Reminder Settings Using the Markers You have now completed your CONTOUR XT meter set up for Advanced Mode The LO setting will flash de fault 4 0 mmol L To change this setting press or unt...

Page 14: ...ark a result with the post meal marker press or until the flashes Press M to set To mark a result with the diary press or until the flashes Press M to set When the reminder sounds the meter will automatically turn on The reminder will beep 20 times and the display will show the pre meal test result you marked when you set the reminder Pressing any button will silence the reminder You can now run a...

Page 15: ...ress or twice and the reminder icon will disappear Press M to cancel the reminder To Cancel a Reminder After performing a test Transferring Results to a Computer You can transfer test results from the CONTOUR XT meter to a computer where they can be summarized in a report with graphs and tables To make use of this feature you need Bayer s diabetes management software GLUCOFACTS Deluxe and a data c...

Page 16: ...nd the total number of results during that period Press twice to review previous results Results will be shown starting with the most recent Each result will show the date and time the test was taken You can press or to scroll forward or backward through the results Viewing Basic Mode Results When appears on the display you have viewed all of the results in the memory NOTES Averages include the sp...

Page 17: ...s M again to view the 14 day average including the number of results used to obtain the average Press to view the 7 day high and low summary At the top of the display you will see the number of HI and LO results In the center of the display is the total number of results Viewing Advanced Mode Results Press to view the 7 day average You will see the average in the center of the display and the numb...

Page 18: ...t Bayer Diabetes WHAT YOU SEE WHAT IT MEANS WHAT YOU SHOULD DO E5 E9 E6 E12 E8 E13 Potential software or hardware issue Remove the test strip and retest using a new test strip If you continue to have problems contact Bayer Diabetes Support at 0845 600 6030 UK 1 890 920 111 Ireland E7 Incorrect test strip Remove the test strip and retest using a new test strip Make certain that you are using a CONT...

Page 19: ... meter electronics failure Compare meter display with the illustration on page 3 If the display is not correct contact Bayer Diabetes Support at 0845 600 6030 UK 1 890 920 111 Ireland Results are not displayed in expected units of measure mmol L This may affect the way you see your results Contact Bayer Diabetes Support at 0845 600 6030 UK 1 890 920 111 Ireland If you do not resolve the problem co...

Page 20: ...e Wash and dry hands well before handling to keep the meter and test strips free of water oils and other contaminants Handle the meter carefully to avoid damaging the electronics or causing other malfunctions Avoid exposing meter and test strips to excessive humidity heat cold dust or dirt Clean your meter as recommended on page 13 Caring for Your Meter Information For Safety Keep batteries away f...

Page 21: ...x 57 mm W x 19 mm T Weight 47 5 grams 1 7 oz Sound A beep sounds when the meter is turned on a test strip is inserted when a test strip is filled with blood or when a test result appears on the display Two beeps sound when the meter turns off or to indicate an error You will hear twenty beeps when a programmed reminder sounds Electromagnetic Compatibility EMC The CONTOUR XT meter complies with the...

Page 22: ... Do not use during or soon after xylose absorption testing Xylose in the blood will cause an interference Contraindications Capillary blood glucose testing may not be clinically appropriate for persons with reduced peripheral blood flow Shock severe hypotension hyperosmolar hyperglycaemia and severe dehydration are examples of clinical conditions that may adversely affect the measurement of glucos...

Page 23: ...l L Difference range in values between YSI laboratory reference method and CONTOUR XT meter Within 0 3 mmol L Within 0 6 mmol L Within 0 8 mmol L Number and percent of samples within specified range 48 of 54 88 9 54 of 54 100 0 54 of 54 100 0 Table 2 System accuracy results for glucose concentration 4 2 mmol L Difference range in values between YSI laboratory reference method and CONTOUR XT meter W...

Page 24: ... obligation to incorporate such changes into previously manufactured instruments 4 Bayer HealthCare has no knowledge of the performance of the CONTOUR XT blood glucose meter when used with any test strips other than CONTOUR NEXT test strips and therefore makes no warranty of the performance of the CONTOUR XT meter when used with any test strips other than CONTOUR NEXT test strips or when the CONTO...

Page 25: ...ine 18th edition 2011 3003 3 American Diabetes Association www diabetes org 4 Tietz Fundamentals of Clinical Chemistry 5th Edition Edited by Burtis CA and Ashwood ER W B Saunders Co Philadelphia PA 2001 p 444 5 Atkin S et al Fingerstick Glucose Determination in Shock Ann Int Med 114 1020 24 1991 5 Bayer HealthCare makes no warranty of the performance of the CONTOUR XT meter or test results when us...

Page 26: ...81534497_CntrXT_UG_ENuk_FpBp_v0 indd 48 49 81534497_CntrXT_UG_ENuk_FpBp_v0 indd 48 49 1 25 13 8 13 AM 1 25 13 8 13 AM ...

Page 27: ...her trademarks are the property of their respective owners 2011 Bayer All rights reserved Rev 01 13 Bayer plc Diabetes Care Bayer House Strawberry Hill Newbury Berks RG14 1JA UK Bayer Diabetes Support Group 0845 600 6030 UK 1 890 920 111 Ireland www bayerdiabetes co uk 81534497 1534497_CntrXT_UG_ENuk_FpBp_v0 indd obc50 534497_CntrXT_UG_ENuk_FpBp_v0 indd obc50 1 25 13 8 13 AM 1 25 13 8 13 AM ...

Reviews: