background image


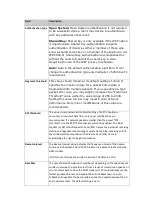
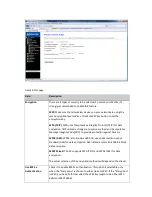
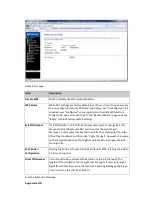
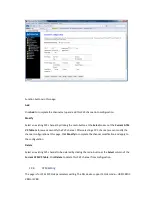
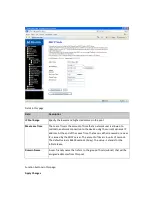
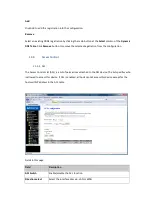
   G.lite : G.992.2 Annex A 

   G.dmt : G.992.1 Annex A 

   T1.413 : T1.413 issue #2 

   ADSL2 : G.992.3 Annex A 

   ADSL2+ : G.992.5 Annex A 

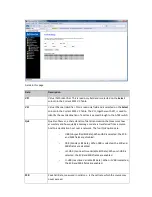
AnnexL Option 

Enable/Disable ADSL2/ADSL2+ Annex L capability. 

AnnexM Option 

Enable/Disable ADSL2/ADSL2+ Annex M capability. 

ADSL Capability 

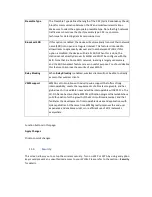
“Bit-swap Enable” : Enable/Disable bit-swap capability. 

“SRA Enable” : Enable/Disable SRA (seamless rate adaptation) capability. 

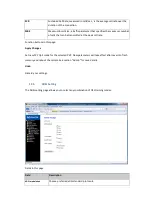
Function buttons in this page: 

Apply Changes 

Click to save the setting to the configuration and the modem will be retrained. 

13.


 Services  

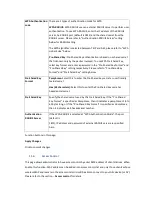
There are thirteen sub-menus for Services: [DHCP Config], [DNS], [Acess Control List], [NAT/NAPT], 

[Priority Queue], [QoS], [Traffic Shaping], [MAC Filtering], [DMZ], [URL Block], [DOS Setting], [IGMP 

Proxy] and [RIP]. 

13.1.


DHCP Config 

You can configure your network and DSL device to use the Dynamic Host Configuration Protocol 

(DHCP). This page provides DHCP instructions for implementing it on your network by selecting the 

role of DHCP protocol that this device wants to play. There are two different DHCP roles that this 

device can act as: DHCP Serve and DHCP Relay. When acting as DHCP server, you can setup the server 

parameters at the 

DHCP Server

 page; while acting as DHCP Relay, you can setup the relay at the 

DHCP 

Relay

 page. 

13.1.1.


DHCP Mode 

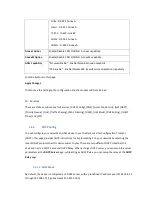
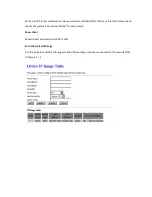
By default, the device is configured as a DHCP server, with a predefined IP address pool of 192.168.1.2 

through 192.168.1.254 (subnet mask 255.255.255.0).  

Summary of Contents for RTA04W

Page 1: ...RTA04W ADSL2 11b g HOME GATEWAY User Manual ...

Page 2: ...TY 18 11 4 ACCESS CONTROL 20 11 5 WPS 22 12 WAN CONFIGURATION 24 12 1 CHANNEL CONFIGURATION 24 12 2 ATM SETTING 25 12 3 ADSL SETTING 27 13 SERVICES 28 13 1 DHCP CONFIG 28 13 1 1 DHCP Mode 28 13 2 DNS 31 13 2 1 DNS Server 32 13 2 2 Dynamic DNS 33 13 3 ACCESS CONTROL 34 13 3 1 ACL 34 13 3 2 IP Port Filtering 36 13 4 NAT PAT 37 13 4 1 Virtual Server 38 13 4 2 NAT IP Pool 38 13 4 3 NAT Forwarding 39 1...

Page 3: ... ROUTING 50 14 4 UPNP CONFIGURATION 52 14 5 SNMP CONFIGURATION 53 14 6 SYSTEM TIME 54 14 7 OTHER ADVANCED CONFIGURATION 55 14 8 PORT MAPPING 56 15 DIAGNOSTIC 57 15 1 PING 57 15 2 TRACEROUTE 58 15 3 ATM LOOPBACK 58 16 ADMIN 59 16 1 COMMIT REBOOT 59 16 2 BACKUP RESTORE 60 16 3 PASSWORD SETUP 61 16 4 UPGRADE FIRMWARE 61 16 5 TR 069 CONFIG 62 17 STATISTICS 63 ...

Page 4: ...eless access point These local computers can communicate and share resources and files with each other when the RTA04W is connected to the Internet with DSL line Support up to 8 permanent virtual circuits PVCs Provide one RJ11 interface and four built in RJ45 interfaces IGMP Snooping and IGMP Proxy General IP NAT PAT DHCP server DHCP relay and DNS relay Routing Static routing RIP V1 and V2 Securit...

Page 5: ...utton 1 Dimensions W D H 170 120 33 mm Features Protocol Feature RFC 1483 Bridge IEEE 802 1D transparent bridging Bridge Filtering RFC 1483 Router RIP 1 2 supported DHCP RFC1541 Server Relay Network Address Translation NAT Network Address Port Translation NAPT DNS relay IGMP v1 and v2 ADSL Feature Support ANSI T1 413 Issue2 Support ITU G 992 1 G dmt Annex A Support ITU G 992 2 G lite Annex A Suppo...

Page 6: ...ting different types of versions from upgrading each other Support denial of service DoS which detects and protects against a number of attacks such as SYN FIN RST Flood Smurf WinNuke Echo Scan Xmas Tree Scan Management Support Web and TFTP modes for local and long distance version upgrade Support test estate of circuitry connect diagnostics Support settings in the Web interface Support Telnet CLI...

Page 7: ... 24 18 12 9 6 Mbps OFDM Wireless operating range Transmission Distance 300 meters outdoors 100 meters indoors coverage area varying depending on the actual environment Wireless security 64 128 bit WEP AES TKIP WPA WPA2 802 1x Antenna Single external antenna Power Input Output Input power 100 240 V DC 50 60Hz Output power 12 V DC 800mA min Environment Operating Temperature 0 50 Storage Temperature ...

Page 8: ...cords regularly If you find any damage replace it at once Proper space left for heat dissipation is necessary to avoid damage caused by overheating to the device The long and thin holes on the device are designed for heat dissipation to ensure that the device works normally Do not cover these heat dissipation holes Do not put this device close to a place where a heat source exists or high temperat...

Page 9: ...6 LEDs and Interfaces Front Panel The following table describes the LEDs of the device ...

Page 10: ...g to the power adapter Reset Reset to the factory defaults To reset to the factory defaults keep the device powered on and push a paper clip in to the hole for over 3 seconds Then release it the configuration is reset to the factory defaults WLAN WPS Button to enable and disable Wireless interface and establish WPS connection Power switch power on or power off the device 7 Hardware Installation Fo...

Page 11: ...you must add a micro filter before a telephone set Do not connect several telephones before the splitter or connect several telephones with the micro filter 8 Access the Router The following is the detailed description of accessing the router for the first time Step 1 Open the Internet Explorer IE browser and enter http 192 168 1 1 Step 2 In the Login page that is displayed enter the username and ...

Page 12: ...9 Status Status page shows the current status and some basic settings of the router such as uptime software version upstream speed downstream speed and other information ...

Page 13: ...10 LAN Configuration This page shows current LAN configuration You can configure IP address network mask and secondary IP address ...

Page 14: ...P Secondary IP or emergency and mask MAC Address Control Access control based in MAC address at LAN level If selected one MAC included in the list will have access Apply Changes Click here to keep settings temporarily Add Enter MAC addresses and click Add Note Secondary LAN IP and LAN IP must be in different network segments otherwise the page will report a configuration error message ...

Page 15: ...t to your Access Point Please refer to the section Basic settings for details Fields in this page Field Description Disable Wireless LAN Interface Check it to disable the wireless function for ADSL modem Band Select the appropriate band from the list provided to correspond with your network setting Mode Access Point The gateway communicates with both clients and bridges SSID Enter a name for your ...

Page 16: ...ed with the ADSL modem Apply Changes Change the settings New parameters will take effect after save into flash memory and reboot the system 11 2 Advanced Settings This page allows advanced users who have sufficient knowledge of wireless LAN These setting shall not be changed unless you know exactly what will happen for the changes you made on your DSL device Please refer to the section Advance set...

Page 17: ...twork performance Only minor modifications of this value are recommended RTS Threshold This value should remain at its default setting of 2347 Should you encounter inconsistent data flow only minor modifications are recommended If a network packet is smaller than the preset RTS threshold size the RTS CTS mechanism will not be enabled The ADSL modem or AP sends Request to Send RTS frames to a parti...

Page 18: ...d disable this feature to improve the security of your WLAN Relay Blocking When Relay Blocking is enabled wireless clients will not be able to directly access other wireless clients VMM support WMM is a QoS solution with industry wide support that offers strong interoperability meets the requirements of all market segments and has global reach It is available now and will be interoperable with 802...

Page 19: ...and incorporates Message Integrity Code MIC to provide protection against hackers WPA2 AES WPA2 also known as 802 11i uses Advanced Encryption Standard AES for data encryption AES utilized a symmetric 128 bit block data encryption WAP2 Mixed The AP supports WPA TKIP and WPA2 AES for data encryption The actual selection of the encryption methods will depend on the clients Use 802 1x Authentication ...

Page 20: ...Pre Shared Key secret as user friendly textual secret Hex 64 characters Select this to enter the Pre Shared Key secret as hexadecimal secret Pre Shared Key Specify the shared secret used by this Pre Shared Key If the Pre Shared Key Format is specified as Passphrase then it indicates a passphrase of 8 to 63 bytes long or if the Pre Shared Key Format is specified as Passphrase then it indicates a 64...

Page 21: ...rrent access control list will be able to connect to this device Deny Listed When this option is selected all wireless clients except those whose MAC addresses are in the current access control list will be able to connect to this device MAC Address Enter client MAC address and press Apply Changes button to add client MAC address into current access control list Function buttons in this page Apply...

Page 22: ...s have become more and more popular users still have trouble with the initial set up of network This obstacle forces users to use the open security and increases the risk of eavesdropping Therefore The Wi Fi Protected Setup WPS is designed to ease set up of security enabled Wi Fi networks and subsequently network management Wi Fi Protected Setup Specification 1 0h pdf p 8 The largest difference be...

Page 23: ...click Regenerate PIN and then click Apply Changes Moreover if users want to make their own PIN they could enter four digit PIN without checksum and then click Apply Changes However this would not be recommended since the registrar side needs to be supported with four digit PIN Push Button Configuration Clicking this button will invoke the PBC method of WPS It is only used when AP acts as a registr...

Page 24: ...ation There are three sub menus for WAN configuration Channel Comfit ATM Settings and ADSL Settings 12 1 Channel Configuration ADSL modem router comes with 8 ATM Permanent Virtual Channels PVCs at the most There are mainly three operations for each of the PVC channels add delete and modify And there are several channel modes to be selected for each PVC channel For each of the channel modes the set...

Page 25: ...After selecting a PVC channel we can modify the channel configuration at this page Click Modify to complete the channel modification and apply to the configuration Delete Select an existing PVC channel to be deleted by clicking the radio button at the Select column of the Current ATM VC Table Click Delete to delete this PVC channel from configuration 12 2 ATM Setting The page is for ATM PVC QoS pa...

Page 26: ...ic of data transmission that measures how accurately and how quickly a message or data is transferred from a source host to a destination host over a network The four QoS options are UBR Unspecified Bit Rate When UBR is selected the SCR and MBS fields are disabled CBR Constant Bit Rate When CBR is selected the SCR and MBS fields are disabled nrt VBR non real time Variable Bit Rate When nrt VBR is ...

Page 27: ...ll rate Function buttons in this page Apply Changes Set new PVC QoS mode for the selected PVC New parameters will take effect after save into flash memory and reboot the system See section Admin for save details Undo Discard your settings 12 3 ADSL Setting The ADSL setting page allows you to select any combination of DSL training modes Fields in this page Field Description ADSL modulation Choose p...

Page 28: ...NAT NAPT Priority Queue QoS Traffic Shaping MAC Filtering DMZ URL Block DOS Setting IGMP Proxy and RIP 13 1 DHCP Config You can configure your network and DSL device to use the Dynamic Host Configuration Protocol DHCP This page provides DHCP instructions for implementing it on your network by selecting the role of DHCP protocol that this device wants to play There are two different DHCP roles that...

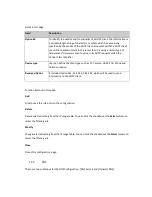
Page 29: ...evice using the current dynamic IP address At the end of the Lease Time the lease is either renewed or a new IP is issued by the DHCP server The amount of time is in units of seconds The default value is 86400 seconds 1 day The value 1 stands for the infinite lease Domain Name A user friendly name that refers to the group of hosts subnet that will be assigned addresses from this pool Function butt...

Page 30: ...ter save into flash memory and reboot the system See section Admin for save details Show Client Shows clients associated by DHCP to LAN Set Vendor ClassIP Range Use this page to set DHCP sub ranges to the different type of devices connected to the network STB IP Cameras ...

Page 31: ...n define the client type such as PC Camera HGW STB Phone and Unknown device Reserved Option It includes Option 241 242 243 244 245 which will be used to send information to the DHCP client Function buttons in this page Add Click to save the rule entry to the configuration Delete Delete selected setting from the IP range table You can click the checkbox at the Select column to select the filtering ...

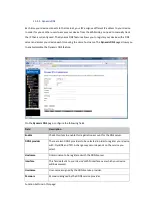
Page 32: ...on New parameters will take effect after save into flash memory and reboot the system See section Admin for save details Reset Selected Discard your changes Field Description Attain DNS Automatically Select this item if you want to use the DNS servers obtained by the WAN interface via the auto configuration mechanism Set DNS Manually Select this item to configure up to three DNS IP addresses ...

Page 33: ...e Dynamic DNS feature On the Dynamic DNS page configure the following fields Field Description Enable Check this item to enable this registration account for the DNS server DDNS provider There are two DDNS providers to be selected in order to register your device with DynDNS and TZO A charge may occur depends on the service you select Hostname Domain name to be registered with the DDNS server Inte...

Page 34: ...n from the configuration 13 3 Access Control 13 3 1 ACL The Access Control List ACL is a list of permissions attached to the DSL device The list specifies who is allowed to access this device If ACL is enabled all hosts cannot access this device except for the hosts with IP address in the ACL table Fields in this page Field Description ACL Switch Enable disable the ACL function Direction select Se...

Page 35: ...IP Address Enter the IP address that allows access to this device ...

Page 36: ...tion Outgoing Default Action Specify the default action on the LAN to WAN forwarding path Incoming Default Action Specify the default action on the WAN to LAN forwarding path Fields on the second setting block Field Description Rule Action Deny or allow traffic when matching this rule Direction Traffic forwarding direction Protocol There are 3 options available TCP UDP and ICMP ...

Page 37: ... the destination IP Dst Port Starting and ending destination port numbers Function buttons for this second setting block Apply Changes Click to save the rule entry to the configuration Function buttons for the Current Filter Table Delete Selected Delete selected filtering rules from the filter table You can click the checkbox at the Select column to select the filtering rule Delete All Delete all ...

Page 38: ...13 4 1 Virtual Server 13 4 2 NAT IP Pool ...

Page 39: ...13 4 3 NAT Forwarding 13 4 4 NAT ALG and pass through ...

Page 40: ... QoS preference list Follow instructions in the page to configure 13 6 QoS Classification In this page you can define and assign the preferences and priorities to the incoming packets and manage the Upstream packets queue according to the priorization set ...

Page 41: ...13 7 Traffic Shaping In this page you can apply Traffic Shaping for the IP traffic control It will only have effect if the IP QoS is disabled ...

Page 42: ...scription Outgoing Default Policy Specify the default action on the LAN to WAN bridging forwarding path Incoming Default Policy Specify the default action on the WAN to LAN bridging forwarding path Function button for this first setting block Apply Changes Click to save the setting of default actions to the configuration Fields on the second setting block Field Description Rule Action Deny or allo...

Page 43: ...ng block Add Click to save the rule entry to the configuration Function buttons for the Current Filter Table Delete Delete selected filtering rules from the filter table You can click the checkbox at the Select column to select the filtering rule Delete All Delete all filtering rules from the filter table 13 9 DMZ A DMZ Demilitarized Zone allows a single computer on your LAN to expose ALL of its p...

Page 44: ...ge you can configure the FQDN Fully Qualified Domain Name to which you want to block access For instance for the PC named serv1 and the domain bar com you can block access to URL serv1 bar com you can also block through key word ...

Page 45: ...over which of their hosts belong to multicast groups This device supports IGMP proxy that handles IGMP messages When enabled this device acts as a proxy for a LAN host making requests to join and leave multicast groups or a multicast router sending multicast packets to multicast group on the WAN side When a host wishes to join a multicast group it sends IGMP REPORT message to the device s IGMP dow...

Page 46: ...nterface that IGMP requests from hosts is sent to the multicast router Downstream The interface data from the multicast router are sent to hosts in the multicast group database Fields in this page Field Description IGMP Proxy Enable disable IGMP proxy feature Proxy Interface The upstream WAN interface is selected here Function buttons in this page Apply Changes Click to save the setting to the con...

Page 47: ...igure RIP if any of the following circumstances apply to your network Your home network setup includes an additional router or RIP enabled PC other than the ADSL Router The ADSL Router and the router will need to communicate via RIP to share their routing tables Your network connects via the ADSL line to a remote network such as a corporate network In order for your LAN to learn the routes used wi...

Page 48: ...ccepted into its routing table Send Mode Indicate the RIP version this interface will use when it sends its route information to other devices Function buttons for the second setting block in this page Add Add a RIP entry and the new RIP entry will be display in the table Delete Selected Entry Delete a selected RIP entry The RIP entry can be selected on the Select column of the RIP Config Table 14...

Page 49: ...address from Forwarding Database fdb 802 1d Spanning Tree Enable disable the spanning tree protocol Function buttons in this page Apply Changes Save this bridge configuration New configuration will take effect after saving into flash memory and rebooting the system See section Admin for details Show MACs List MAC address in forwarding table 14 2 Log Setting This page allows you to check the logs c...

Page 50: ...lt gateway either because you assigned it to them when you modified your TCP IP properties or because you configured them to receive the information dynamically from a server whenever they access the Internet On the DSL device itself a default gateway is defined to direct all outbound Internet traffic to a route at your ISP The default gateway is assigned either automatically by your ISP whenever ...

Page 51: ...his is the route that creates the default gateway Subnet Mask The network mask of the destination subnet The default gateway uses a mask of 0 0 0 0 Next Hop The IP address of the next hop through which traffic will flow towards the destination subnet Metric Defines the number of hops between network nodes that data packets travel The default value is 0 which means that the subnet is directly one h...

Page 52: ...the Static Route Table Show Routes Click this button to view the DSL device s routing table The IP Route Table displays as shown in Figure 14 4 UPnP Configuration Universal Plug and Play UPnP defines protocols and common procedures to guarantee the interoperability among PCs allowed in network applications and wireless devices ...

Page 53: ... Management Protocol SNMP is a troubleshooting and management protocol that uses the UDP protocol on port 161 to communicate between clients and servers The DSL device can be managed locally or remotely by SNMP protocol Fields in this page ...

Page 54: ...Address Destination IP address of the SNMP trap Community name read only Name of the read only community This read only community allows read operation to all objects in the MIB Community name write only Name of the write only community This write only community allows write operation to the objects defines as read writable in the MIB Function buttons in this page Apply Changes Save SNMP configura...

Page 55: ...ge allows configuring the modem in Half Bridge mode If it is enabled the modem will turn to be visible The DHCP will duplicate the WAN IP from its local ISP to your PC and only one PC of the local network will be allowed to connect to internet ...

Page 56: ...14 8 Port Mapping In this page you can select the different interfaces group to create the specific ports mapping ...

Page 57: ...ds a message to the host you specify If the host receives the message it sends messages in reply To use it you must know the IP address of the host you are trying to communicate with and enter the IP address in the Host Address field Click Ping To start the ping command the ping result will then be shown in this page Fields in this page Field Description Host Address The IP address you want to pin...

Page 58: ... VC ATM uses F4 and F5 cell flows as follows F4 used in VPs F5 used in VCs An ATM connection consists of a group of points This OAM implementation provides management for the following points Connection endpoint the end of a VP VC connection where the ATM cell are terminated Segment endpoint the end of a connection segment This page allows you to use ATM ping which generates F5 segment and end to ...

Page 59: ...you use the Web configuration to change system settings the changes are initially placed in temporary storage These changes will be lost if the device is reset or turn off To save your change for future use you can use the commit function ...

Page 60: ...16 2 Backup Restore This page allows you to backup and restore your configuration into and from file in your host ...

Page 61: ...ssword Enter the old password for this selected login New Password Enter the new password here Confirmed Password Enter the new password here again to confirm 16 4 Upgrade Firmware To upgrade the firmware for the DSL device Click the Browse button to select the firmware file Confirm your selection Click the Upload button to start upgrading IMPORTANT Do not turn off your DSL device or press the Res...

Page 62: ...6 5 TR 069 Config TR 069 is a protocol for communication between a CPE and Auto Configuration Server ACS The CPE TR 069 configuration should be well defined to be able to communicate with the remote ACS ...

Page 63: ...ce at the system startup Periodic Inform Interval Time interval in second to send Inform RPC Connection Request Field Description User Name The username the remote ACS should use when connecting to this device Password The password the remote ACS should use when connecting to this device Path The path of the device ConnectionRequestURL The device ConnectionRequestURL should be configured based on ...

Page 64: ......
Reviews: