background image

18m

3m

3m

3m

3m

3m

1. Mark out the site.

Mark out the position of the wall poles 

12m

18m

m

3

m

3

m

3

m

3

2. Square the layout. Check that diagonals

are approximately the same (+ or - 50mm).

When adjusting diagonals make sure the side

lengths remain correct.

3. Clearly mark each corner.

Peg Line

300mm

300mm

300mm

m

m

0

0

3

4. Set out the peg lines and position the 
corner pegs as shown. Use your feet as 

a guide.

5. Space remaining corner pegs evenly.

Peg Line

m

m

0

0

3

6. Set out the remaining side and end pegs
using the side pole as a guide.

Peg Line


Summary of Contents for ELECTRON 6m

Page 1: ...12mELECTRON Assembly Instructions New Zealand 52 Newton Street PO Box 4370 Mount Maunganui New Zealand tel 64 7 579 0190 fax 64 7 579 0194 www baytex co nz Australia tel 02 4340 4144 mob 0400 312 314...

Page 2: ...ame or 50mm When adjusting diagonals make sure the side lengths remain correct 3 Clearly mark each corner Peg Line 300mm 300mm 300mm m m 0 0 3 4 Set out the peg lines and position the corner pegs as s...

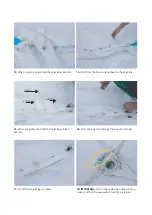
Page 3: ...rop sheet 9 Set out side poles base plates and ratchet straps 10 Spread out the fabric 11 Line up the centre pole grommets Make sure the eyelets are on top and the lacing on the bottom Pull the outer...

Page 4: ...n to the eave line LONG SHORT SHORT 15 When you get to the bottom the lacing will look like this 16 Pass the long lace through the two short lacings 17 Tie off the long lacing as shown 18 IMPORTANT Tu...

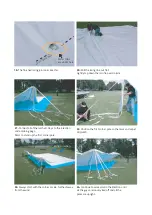
Page 5: ...21 Connect all of the ratchet straps to the Electron and adjoining pegs Start to stand up the first corner pole 22 Position the first corner pole on the mark and adjust till plumb 24 Continue to work...

Page 6: ...ide guys 26 Tension the side guys just enough so the eave line is curved out 27 Tie off the jump ropes 28 At this stage the Electron should look like this 29 Check that the eave lines are tight and st...

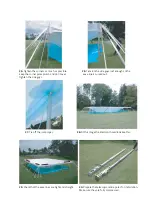
Page 7: ...ugh the eyes in the top of the pole Make sure the pole spike passes neatly between the two rain flaps 33 Raise the first pole Work from the middle of the Electron 34 Loosely tie off the jump ropes 35...

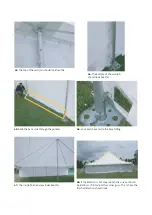
Page 8: ...39 Your Electron should now look like this 40 Your Electron should now look like this from inside 41 Hang each wall in turn Work from the inside with the wall outside the side poles Tension each wall...

Page 9: ...ook like this 45 Slide the base rails through the pockets 46 Lock each base rail to the base fitting 47 The inside finished view looks like this 48 If the Electron is set square both the curves should...

Reviews: