

Contact 1.800.762.1142 for assistance. Do not return to place of purchase.
page no.
3
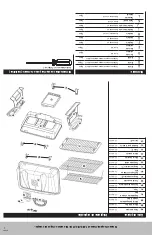
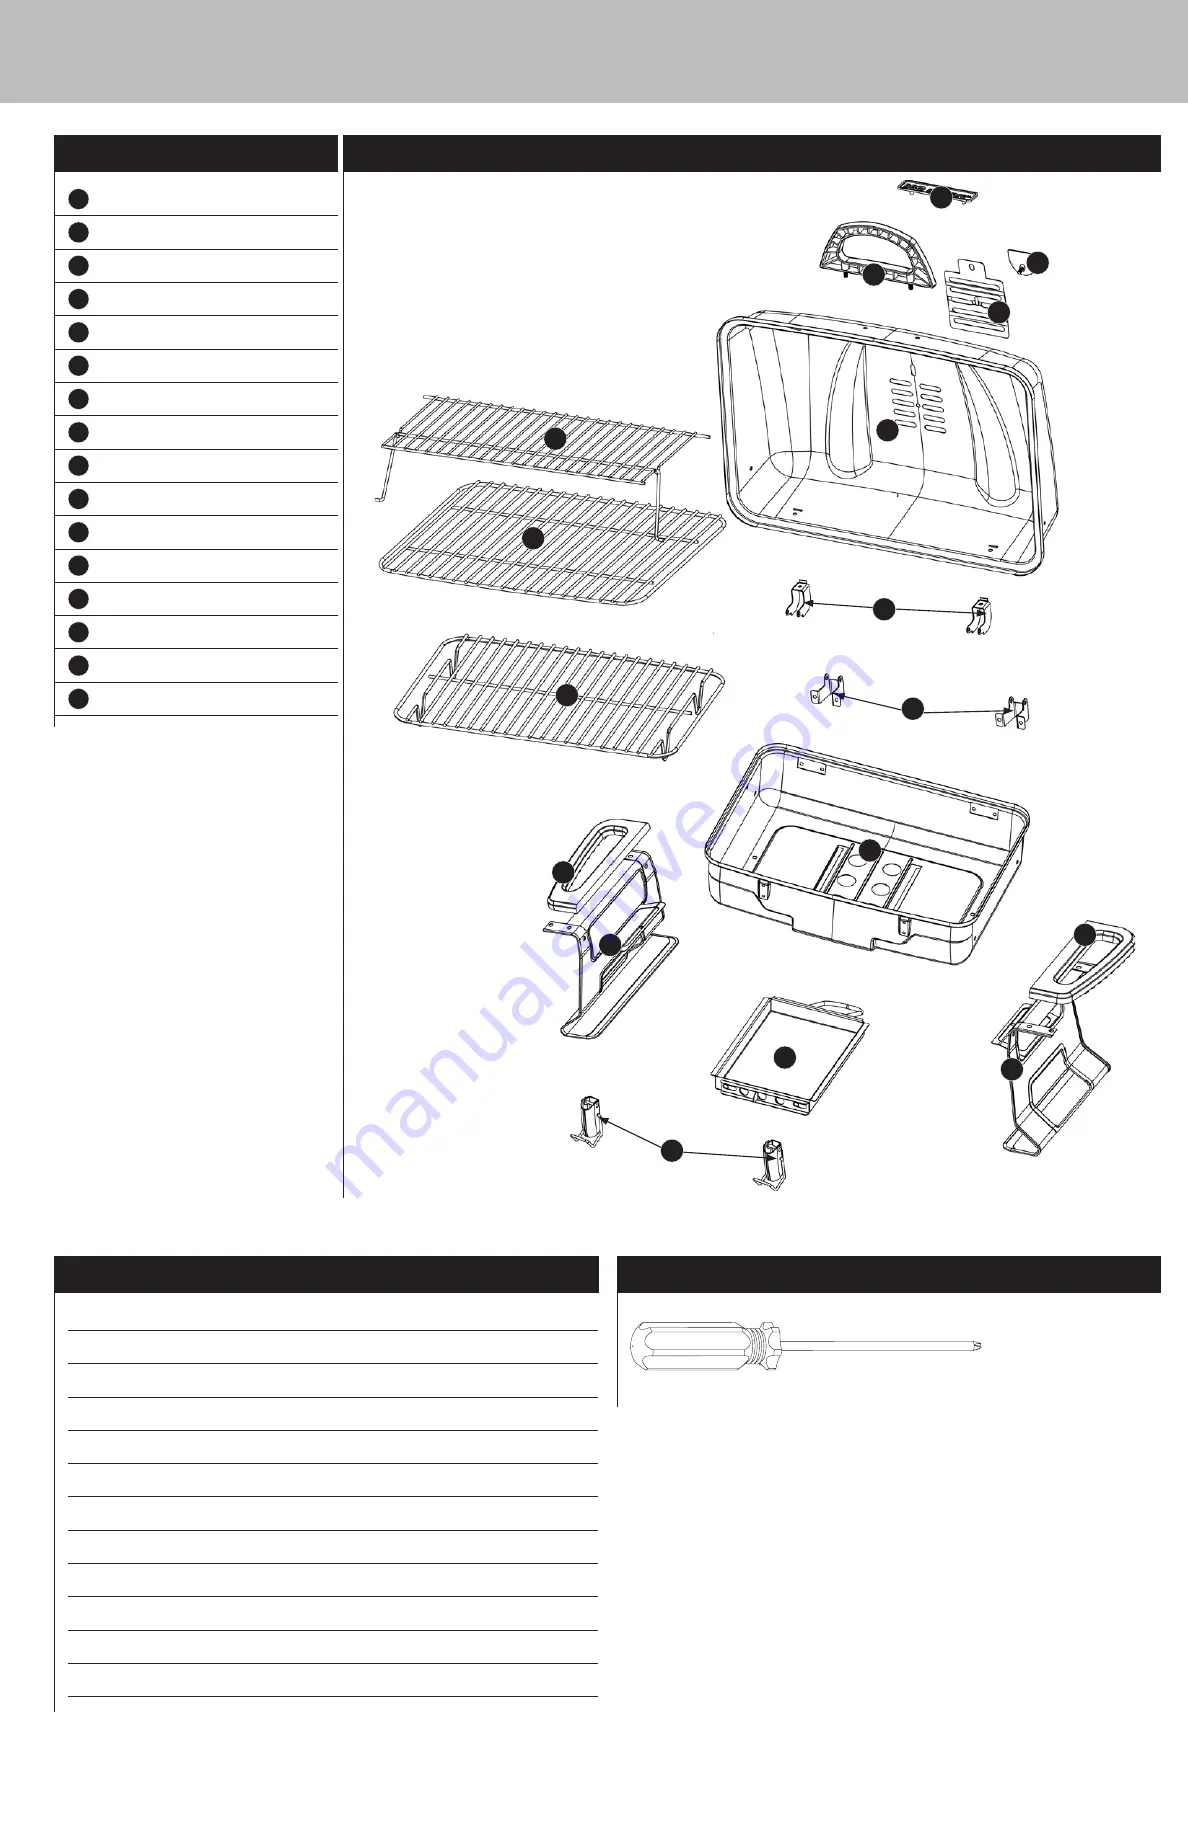
Hardware
A
Screw
M4x10 Zinc Plated Phillips Truss Head
4 pcs
B
Screw
M5x12 Zinc Plated Phillips Truss Head
13 pcs
C
Screw
M6x8 Zinc Plated Phillips Truss Head
8 pcs
D
Wing Nut
M4 Steel
4 pcs
E
Wing Nut
M5 Steel
18 pcs
F
Washer
ø4 Zinc Plated
4 pcs
G
Washer
ø5 Zinc Plated
8 pcs
H
Washer
ø6 Heat Resistant
2 pcs
I
Lock Washer
ø4 Zinc Plated
4 pcs
J
Lock Washer
ø5 Zinc Plated
8 pcs
K
Pin
ø5 x 30 Black Coated
2 pcs
L
Cotter Pin
ø1.4 x 30 Zinc Plated
2 pcs
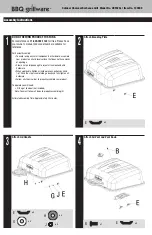
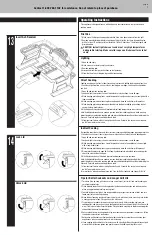
Tools Required for Assembly (Included)
#2 Phillips Head Screwdriver
4
1
3
5
7
9
14
13
11
15
2
12
Parts List
1
Branding Plate
55-08-248
2
Lid Handle
55-08-255
3
Lid Air Vent Handle
55-08-318
4
Lid Air Vent
55-08-319
5
Lid
55-08-320
6
Warming Rack
55-08-321
7
Cooking Grid
55-08-322
8
Top Hinges (2)
55-08-323
9
Charcoal Grid
55-08-324
10
Bottom Hinges (2)
55-08-325
11
Bottom Bowl
55-08-326
12
Left Side Handle
55-08-327
13
Right Side Handle
55-08-328
14
Legs (2)
55-08-329
15
Ash Tray
55-08-330
16
Locks (2)
55-08-331
Exploded View
6
14
8
10
16


