

Contact 1.800.762.1142 for assistance. Do not return to place of purchase.
page no.
7
This appliance is designed for use with only quality charcoal briquets, lump charcoal and
cooking wood.
First Use
1. Make sure all labels, packaging and protective films have been removed from the grill.
2. Remove manufacturing oils before cooking on this grill for the first time, by operating the
grill for at least 15 minutes with the lid closed. This will “heat clean” the internal parts and
dissipate odors.
CAUTION: Instant light charcoal can burn at very high temperatures
during initial startup. Make sure lid is open until charcoal turns to hot
coals.
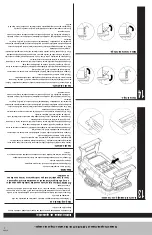
Lighting
1. Open lid and vents.
2. Make sure ash receiver is empty and secure.
3. Remove cooking grid.
4. Arrange and light fuel per instructions on fuel package.
5. Allow fuel time to ash into glowing coals before cooking.
Direct Cooking
Cooking directly over hot coals. Ideal for searing in juices and grilling food requiring less than
25 minutes of grilling time, such as steaks, hamburgers, hot dogs, chicken parts, vegetables
and fruit.
1. Open lid and remove cooking grid.
2. Load and light charcoal per charcoal manufacturer’s instructions. Leave lid open.
3. While wearing protective gloves, carefully spread hot coals evenly across charcoal grid with a
long-handled tool.
4. While wearing protective gloves replace cooking grid, close lid and allow grill to preheat.
5. While wearing protective gloves open lid and place food onto cooking grids above the hot
coals with long-handle tongs.
6. With lid open or closed, cook until desired internal food temperatures are achieved.
Note
: If additional briquettes are needed, remove food from cooking grid, and while wearing
protective gloves remove the cooking grid and place additional briquettes without disturbing the
hot coals. Carefully replace cooking grid and food.
7. Allow charcoal to burn out by closing lid and all vents. Except in the case of an emergency,
do NOT pour water on hot coals.
Indirect Cooking
Not cooking directly over hot coals. Ideal for slow cooking and grilling foods requiring more than
25 minutes such as most roasts, loins, chops, whole chickens, turkey, fish and baked goods.
1. Open lid and remove cooking grid.
2. Load and light charcoal per charcoal manufacturer’s instructions. Leave lid open.
3. While wearing protective gloves, carefully spread hot coals to the outsides of charcoal grid
with a long-handle tool.
4. While wearing protective gloves replace cooking grid, close lid and allow grill to preheat.
5. Wear protective gloves to open lid. Use long-handled tools to place food onto cooking grids
above the areas without hot coals.
6. With lid closed, cook until desired internal food temperatures are achieved.
Note
: If additional briquettes are needed, remove food from cooking grid and while wearing
protective gloves remove the cooking grid and place additional briquettes without disturbing the
hot coals. Carefully replace cooking grid and food.
7. Allow charcoal to burn out by closing lid and all vents. Except in the case of an emergency,
do NOT pour water on hot coals.
For more tips on indirect cooking please see “Tips for Better Cookouts and Longer Grill Life”
Tips for Better Cookouts and Longer Grill Life
1. To reduce flare-up keep grill clean, use lean cuts of meat (or trim fat) and avoid cooking on
very high temperatures.
2. Place delicate foods like fish and vegetables in aluminum foil pouches and indirect cook or
place on upper cooking levels (warming rack).
3. To avoid losing natural juices, use long-handled tongs or spatulas instead of forks and turn
foods over just once during cooking.
4. When indirect cooking roasts and larger cuts of meat, place meat onto a roasting rack inside
a heavy gauge metal pan. Place pan over the unlit coals.
5. Try water pans to reduce flare-ups and cook juicer meats. Before starting coals remove
cooking grids, and place a heavy duty shallow pan directly on charcoal grid. Fill half way with
water, fruit juices or other flavored liquids. Place hot coals around grid, replace cooking grids
and position food over the loaded pan.
6. Enhance food flavors by using wood chips in smoker boxes or aluminum foil pouches. Follow
the wood manufacturer’s instructions.
7. Rotisseries, grill baskets, vertical poultry holders and other accessories can enhance your
experiences, reduce cooking times and aid in clean-up.
8. Clean cooking grids and racks after every use with a quality grill bush designed for your grid
material. Wear protective gloves and gently remove the build-up while grids are hot.
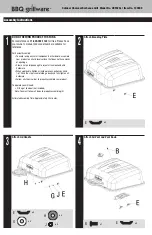
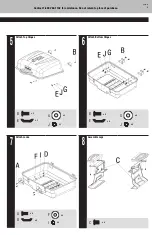
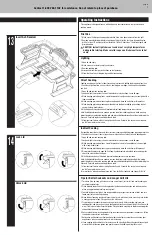
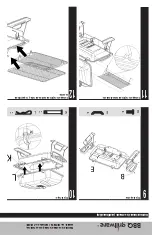
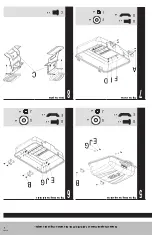
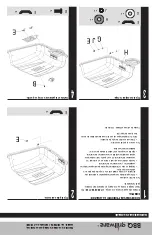
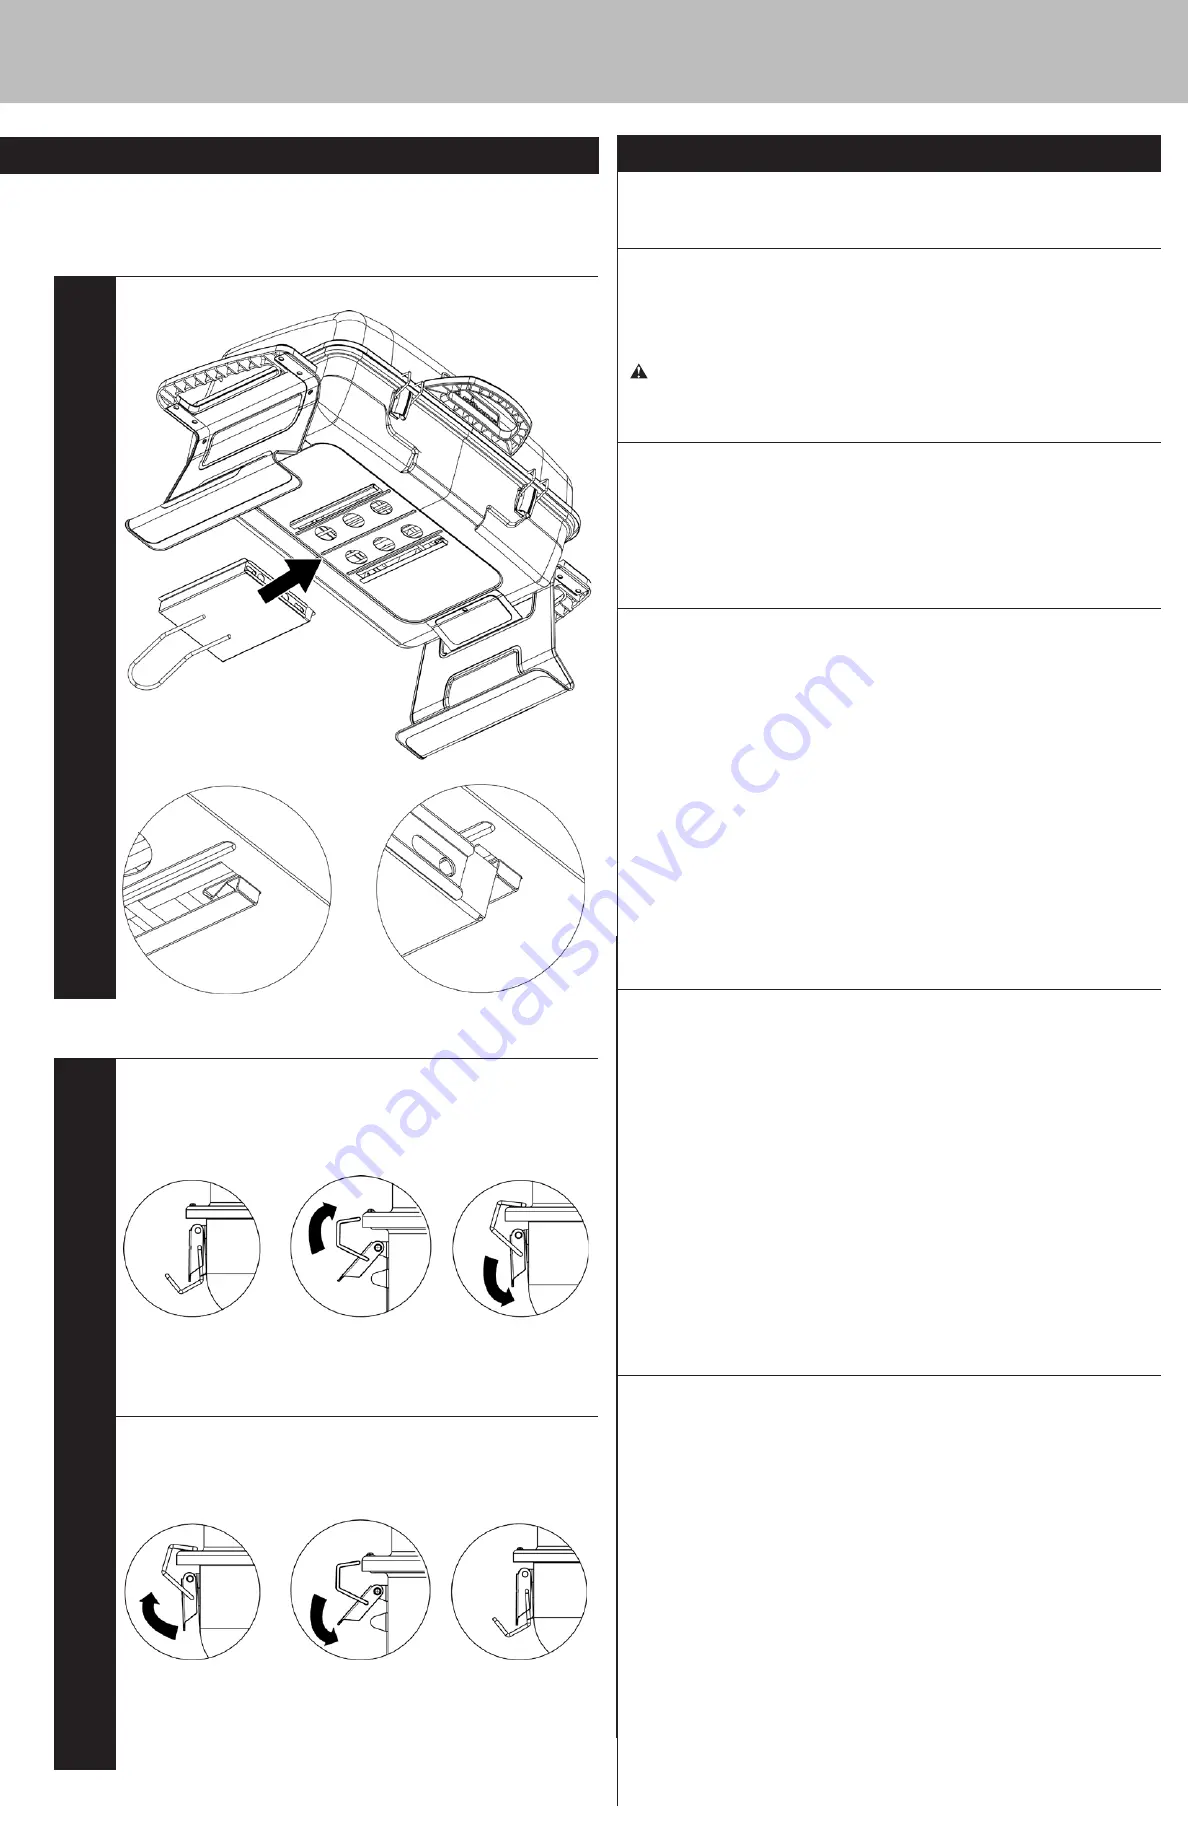
Assembly Instructions (continued)
Operating Instructions
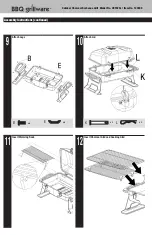
13
Insert Ash Receiver
14
Lock Lid
Unlock Lid


