21
20
RepRapBCN
User Manual
Netfabb interface
After installing Netfabb, it is advisable to become familiar with its interface. First of all, we will enable printing volumen visualiza-
tion for our BCN3DR. For this, click on View/Show Platform.
Then, we will redefine volume dimensions. Click on Settings/Settings/General/Default PlatformSize, introducing the
values corresponding to the BCN3DR: 252 x 200 x 200. Lastly, click on Save.
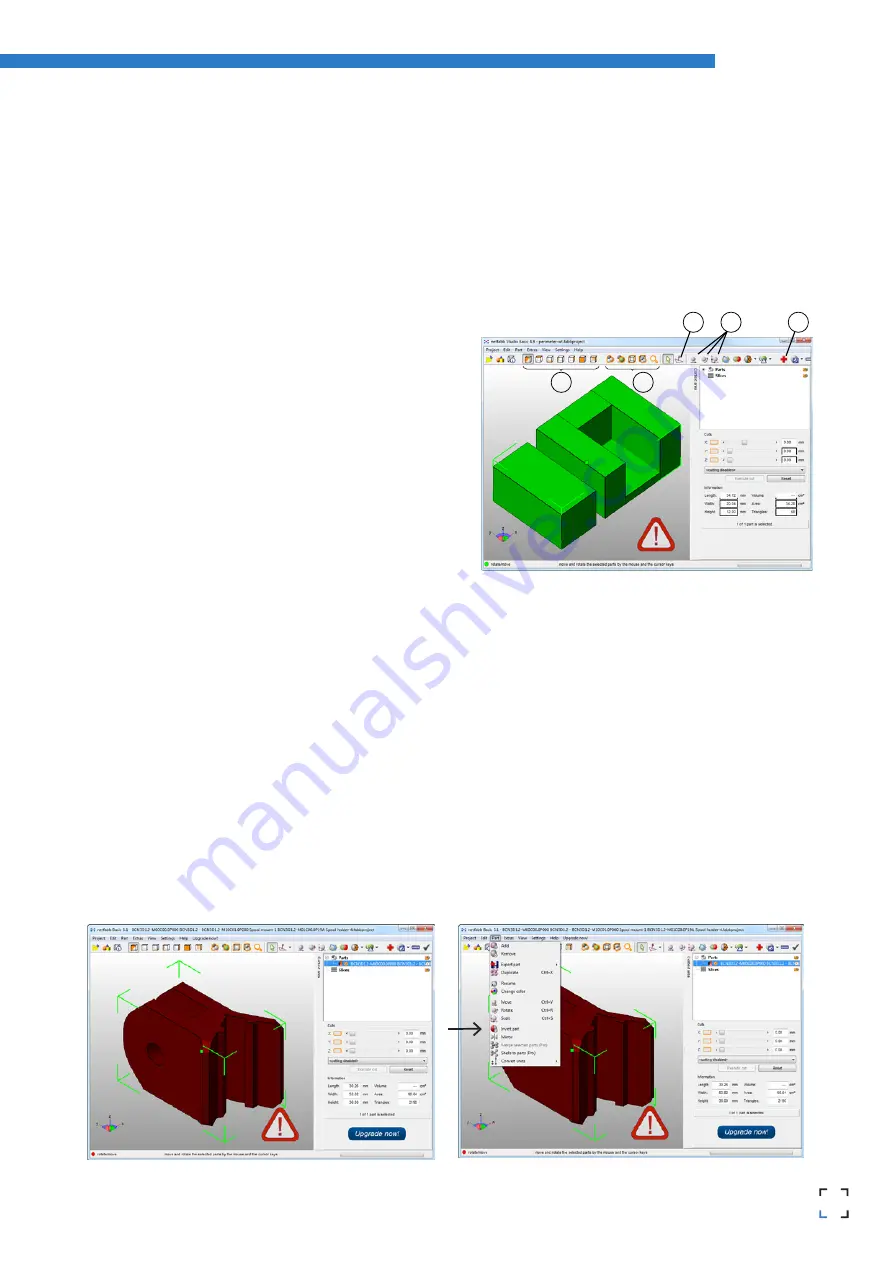
In the upper tool bar several icons are found, of which we
highlight the following ones:
1) 7 basic views
2) Zoom tools
3) Tool to orientate the face of the object to the printing
surface
4) Move, Rotate and Escale tools
5) Repairment tools
In the right part of the screen the model’s basic info and the cutting tool are available.
Repairment
In case the model needs to be repaired before printing, a warning sign will appear in the lower right corner. To repair it, select the
model and click on the tool
Repair
.
Next, in the right side window, click on Automatic Repair and select
Default Repair in the pop-up window. Click on Execute and then click on Apply Repair in the right side window to
finish the process.
In the new pop-up window, select Remove old part to erase the faulty original file. If the file is successfully repai-
red, the warning sign will be gone.
•
In case the model faces are inverted, the model will be shown in red. In this instance, the model can be repaired
clicking on Part/InvertPart.
1
2
3
5
4
Summary of Contents for BCN3DR
Page 1: ...R...


