6. Re-install the retainer and the outer sleeve.
7. Install a sample tube on the SIP to ensure that the outer sleeve has been properly installed.
If the sleeve hits the bottom of the tube, loosen the retainer slightly and push the sleeve up as far as it will
go. Tighten the retainer.
Cleaning or replacing the sheath gasket
Introduction
This topic describes how to clean or replace the gasket of the sheath tank lid.
When to change the sheath gasket
We recommend cleaning the sheath gasket when needed.
Procedure
To clean or replace the gasket:
1. Put the cytometer in standby mode.
2. Depressurize the sheath container by pulling up on the vent valve.
3. Remove the lid from the sheath tank.
4. Remove the black gasket from the lid.
5. Rinse it with water to clean the gasket.
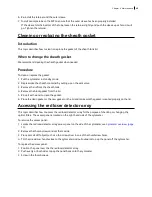
6. Place the clean gasket or the new gasket on the lid and make sure the gasket is seated properly on the lid.
Accessing the red laser detector array
This topic describes how to access the red laser detector array for the purpose of checking or changing the
optical filters. The access panel is located on the right-hand side of the cytometer.
To remove the access panel:
1. Locate the red laser detector array access panel on the side of the cytometer, see
2. Remove the thumb screws and set them aside.
3. Place a small stiff object such as a thin screwdriver in one of the thumbscrew holes.
4. Tilt the screwdriver handle close to the cytometer and pull outwards to pop the panel off the cytometer.
To replace the access panel:
1. Position the panel over the the red laser detector array.
2. Push evenly on both sides to pop the panel back onto the cytometer.
3. Screw in the thumbscrews.
Chapter 4 Maintenance
49
Summary of Contents for FACSymphony A1 Flow
Page 1: ...FACSymphony A1 Flow Cytometer User s Guide 23 23437 01 2022 07 For Research Use Only ...
Page 6: ......
Page 10: ...This page intentionally left blank ...
Page 24: ...This page intentionally left blank ...
Page 36: ...This page intentionally left blank ...
Page 50: ...This page intentionally left blank ...
Page 87: ...More information l Running a performance check page 55 Chapter 7 Technical overview 87 ...
Page 88: ...This page intentionally left blank ...
Page 96: ...This page intentionally left blank ...

