User’s Manual
29/73
Ver. [E.1.1]
To write the IP address of the PC to set the DMZ among the PCs that are connecting
to the LAN, select “Enable” and click “Submit”. To establish the DMZ that the
function operates as the same state, which does not utilize the firewall functionality of
the DosaLink – 540 by forwarding all the packets, connected to the official IP that is
assigned to the DosaLink – 540 from the outside of the network, to the specific PC
that is connecting to the DosaLink – 540. If, at the specific PC, some special services
such as a Web Server and FTP Server are able to be operated by utilizing various
firewall functions that the DosaLink – 540 has, then it is possible for the external to
access to the DosaLink – 540 and impossible to access to the specific Programs of
PC that connects to the DosaLink – 540. In case that it is necessary for the external
to forward to the specific program at the specific PC, the Port Forwarding is used for
this purpose.
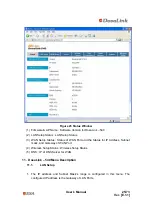
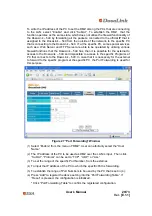
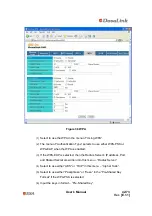
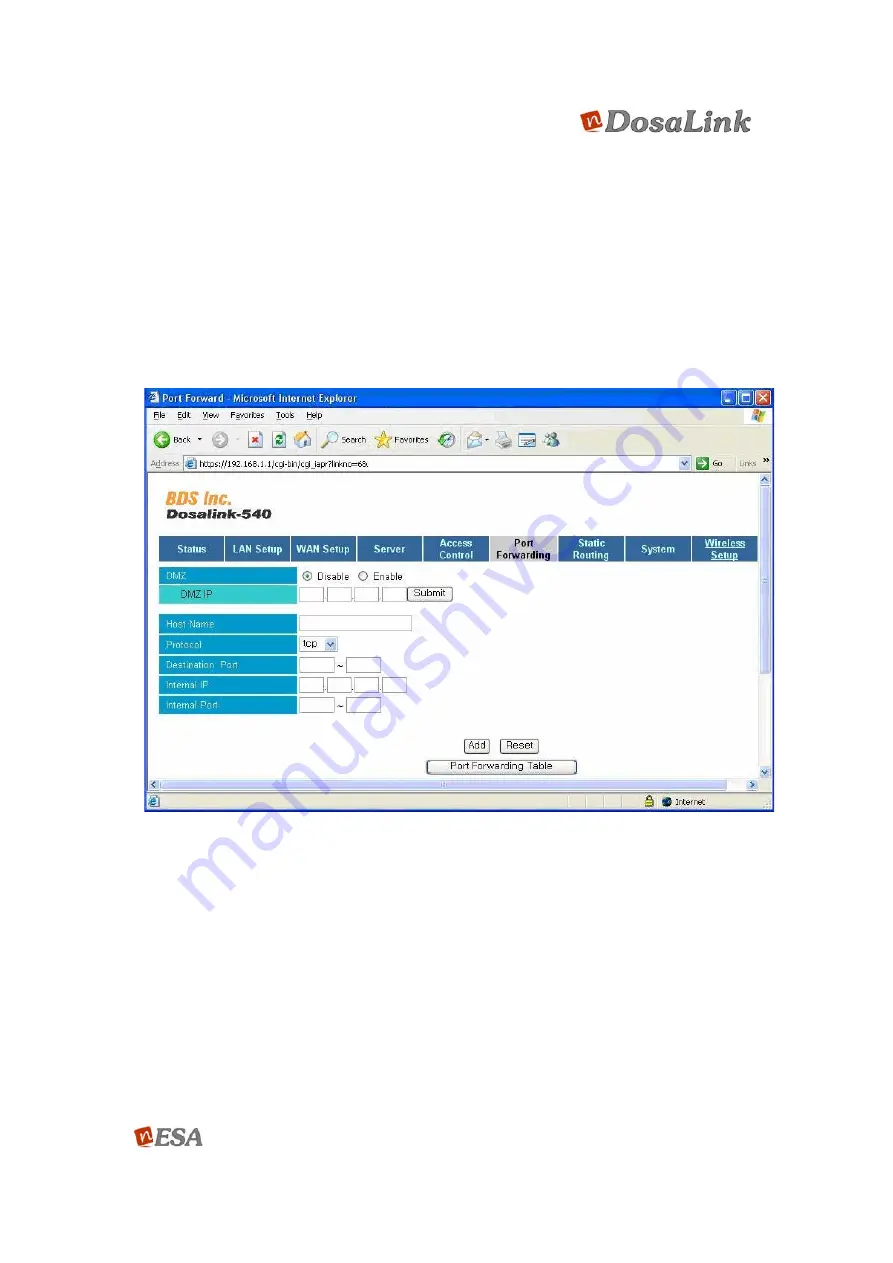
Figure 27 “Port Forwarding” Window
(1)
Select “Enable” from the menu of “DMZ”. User can arbitrarily select the “Host
Name”.
(2)
The IP address of the PC to be used as DMZ over the LAN is input. Then click
“Submit”. “Protocol” can be set to “TCP”, “UDP”, or “ALL”.
(3)
To set the range of the specific Port Number, from the external.
(4)
To input the IP address of the PC to which the specific Port is forwarding.
(5)
To establish the range of Port Numbers to be used by the PC that is set in (4).
(6)
Press “Add” to register the above setting into the “Port Forwarding Table”. If
“Reset” is pressed, the configuration is initialized.
* Click “Port Forwarding Table” to confirm the registered configuration.

