background image

13

EKF Series 300/500/600

GB

NOTE

Observe the following instructions:


Never attach the reversing plates (20, 

fig 6) to the material during standstill.


Maintain an even feed.


‹

Push the machine slowly and evenly 

in the opposite running direction of 

the tool. (feed direction = from left to 

right).

NOTE

Observe the following instructions:


Pay attention to the direction of rota-

tion marking on the supporting plate.


In the case of machines of the 

EKF Series 500/600, the supporting 

plate rotates to reduce friction during 

processing.


Make sure that the machine and the 

supporting plate rest on each other 

evenly.


‹

Before switching off, remove the ma

-

chine from the tool.


‹

Switch off the machine, see section 

“Switching off the machine”

.


‹

Pull the plug out of the mains socket.

Tool change

 WARNING

Risk of injury!


Do not use damaged, soiled or worn 

tools.


Change tools only when the machine 

is switched off and at a standstill. Pull 

the plug out of the mains socket.


After inserting, check that the tool is 

engaged securely.


Only use tools, adapter and accesso-

ries that match the machine.

Replacing the milling cutter

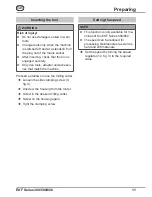
To replace the milling cutter, proceed as 

follows:


‹

Loosen the side clamping screw (3, 

fig. 4).


‹

Unscrew the housing from the motor.


‹

Loosen and remove the milling cutter 

with the tool supplied.


‹

Screw in the desired milling cutter.


‹

Screw on the housing again.


‹

Tight the clamping screw.

Tool change

Summary of Contents for EKF 300

Page 1: ...EKF Series 300 500 600 Translation of the Original Operating Instructions GB...

Page 2: ...1 2 3 4 5 6 7 8 9 10 Fig 1 Fig 3 11 5 3 2 1 12 7 11 6 9 8 13 Fig 2 10...

Page 3: ...ermitted with written consent of the manufacturer Liability disclaimer All technical information data and in structions contained in these operating instructions for startup operation and care corresp...

Page 4: ...al damage Follow the instructions in this warning to avoid material damage NOTE A note indicates additional information that simplifies the use of the machine Intended use The machine is only intended...

Page 5: ...onnecting cable may only be performed by a qualified elec trician Repairs to the machine may only be performed by an authorised specialist workshop or factory customer service Improper repairs can cau...

Page 6: ...1 5 mm Only use extension cables that are approved for the location of use Check the condition of the extension cable regularly and replace if dam aged Avoid bodily contact with grounded parts e g pi...

Page 7: ...r hand into the ma chine while it is in operation Remove swarf only when the machine is at a standstill Wear protective gloves when removing swarf Check that the tool is tightened securely before usin...

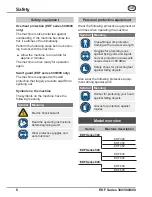
Page 8: ...shock hazard Read the operating instructions before beginning work Wear protective goggles and ear protection Personal protective equipment Wear the following protective equipment at all times when o...

Page 9: ...g scale 11 Side handle 1x short 1x long 12 Speed regulator fig 3 13 Swarf protection Scope of supply EKF Series 300 EKF Series 500 EKF Series 600 Machine EKF 300 EKF 450 EKF 452 EKF 530 EKF 545 EKF 63...

Page 10: ...e to fall This can lead to serious injuries Secure the workpiece by suitable means against falling down e g clamping equipment Use the protective equipment stipulat ed in the section Personal protec t...

Page 11: ...o ries that match the machine Proceed as follows to use the milling cutter Loosen the side clamping screw 3 fig 4 Unscrew the housing from the motor Screw in the desired milling cutter Screw on the ho...

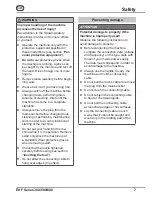
Page 12: ...e to property if the machine is improperly used Observe the following instructions to avoid damage to property Lay the connecting cable so that it cannot be caught by the running machine Set the chamf...

Page 13: ...ther evenly Before switching off remove the ma chine from the tool Switch off the machine see section Switching off the machine Pull the plug out of the mains socket Tool change WARNING Risk of injury...

Page 14: ...ope of supply turn the reversing plate an screw tightly Repeat the procedure for all reversing plates of the miller Screw on the housing again Tight the clamping screw Replacing the reversing plate Wh...

Page 15: ...nd cause damage to the machine Repairs to electrical appliances may only be carried out by the works cus tomer service or by specialists trained by the manufacturer Checking the milling cutter Check t...

Page 16: ...dy The motor does not start after pressing the ON OFF switch Plug not inserted into socket Insert plug Circuit breaker switched off Switch on circuit breaker The circuit breaker in the power distribut...

Page 17: ...eversing plates Dimensions L x W x H 310 x 295 x 138 375 x 350 x 300 400 x 350 x 300 mm Approx net weight 4 6 9 3 10 2 kg Operating voltage see type plate 220 240 V 50 60 Hz or 110 125 V 50 60 Hz 220...

Page 18: ...following harmonised standards were applied in whole or in part DIN EN ISO 12100 2011 03 DIN EN 62841 1 2016 07 DIN EN 60745 2 17 2011 6 Authorised person for compiling the technical documentation BDS...

Page 19: ...Fig 5 11 Fig 4 3 Fig 6 21 20 20 A B C F1 F2 F3 F4 F5 F6...

Page 20: ...nen GmbH Martinstra e 108 D 41063 M nchengladbach Fon 49 0 2161 3546 0 Fax 49 0 2161 3546 90 Internet www bds maschinen de E mail info bds maschinen de BA_EKF Series 300 500 600_1704_A1 2017 BDS Masch...

Reviews: